I Tried Wildlife Photography With The Sony ZV-E10 II
I recently decided to take this fun little Sony vlog camera on my local bird trails to see how it would handle some wildlife photography, and spoiler: it did really well!
The video focused mainly on the adventure, but there was still so much I wanted to talk about without getting into a full review, so today I’m sharing just that - my initial thoughts on this outing, along with some RAW file sample images.
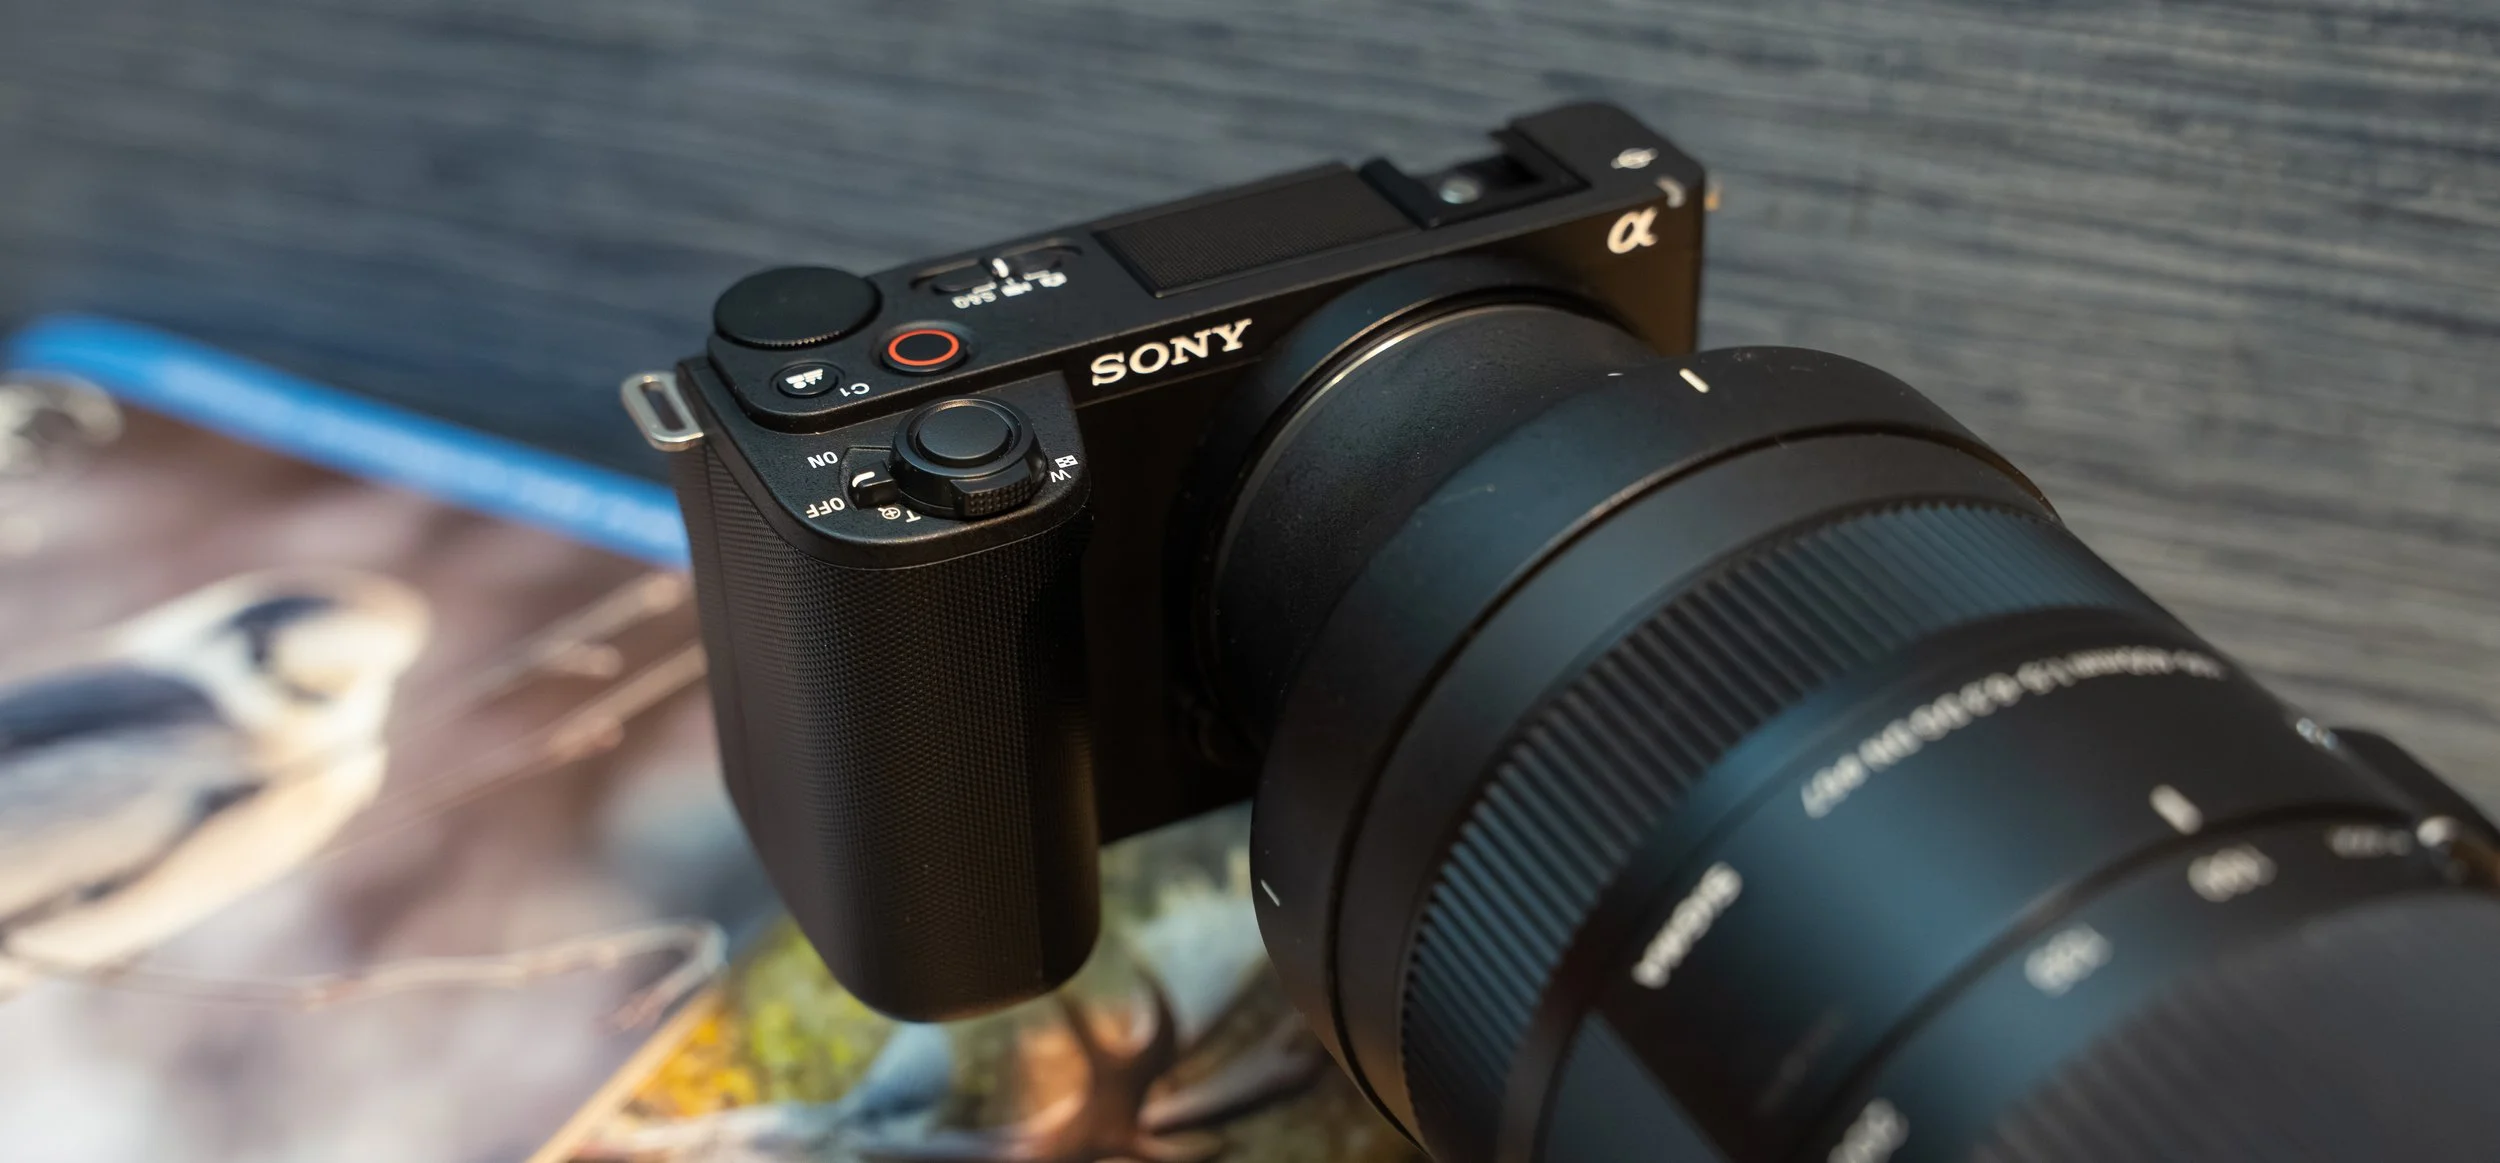
For this outing, I decided to pair the camera with the Sigma 100-400mm F5-6.3, which effectively gave me a 150-600mm equivalent field of view on the APS-C (1.5x crop compared to full frame) sensor. It also kept the overall setup fairly lightweight, which felt like a good match for this camera.
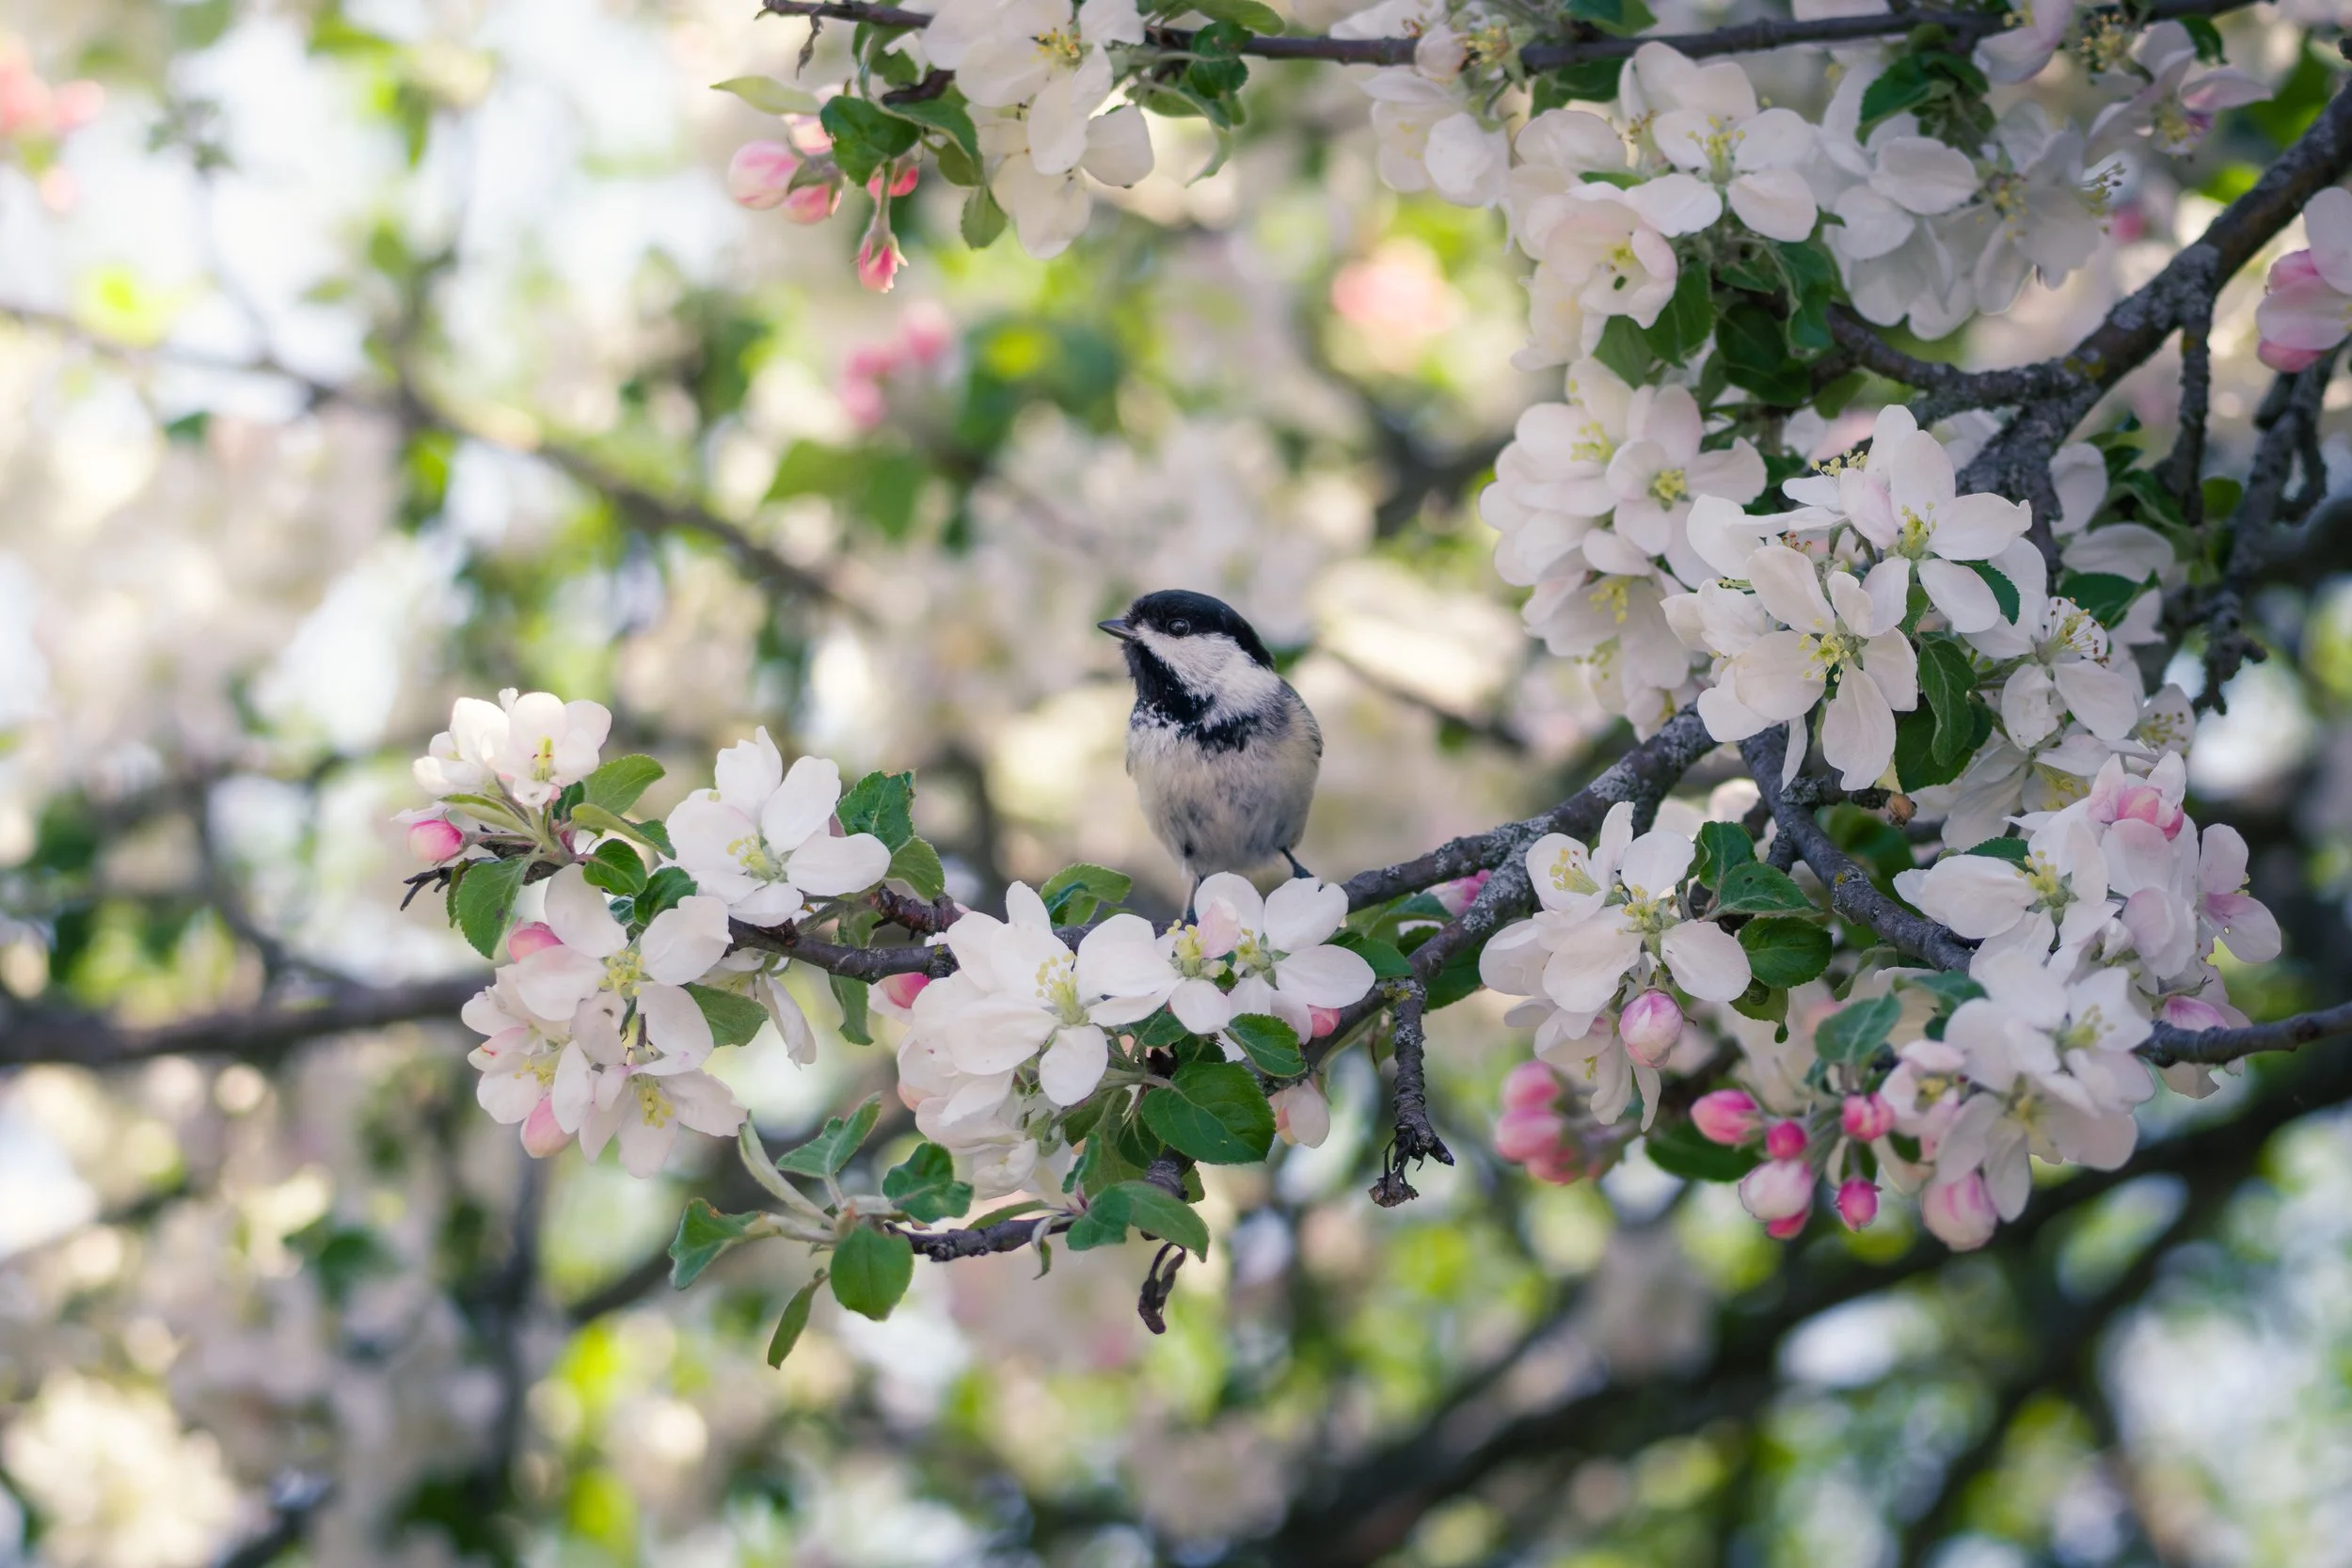
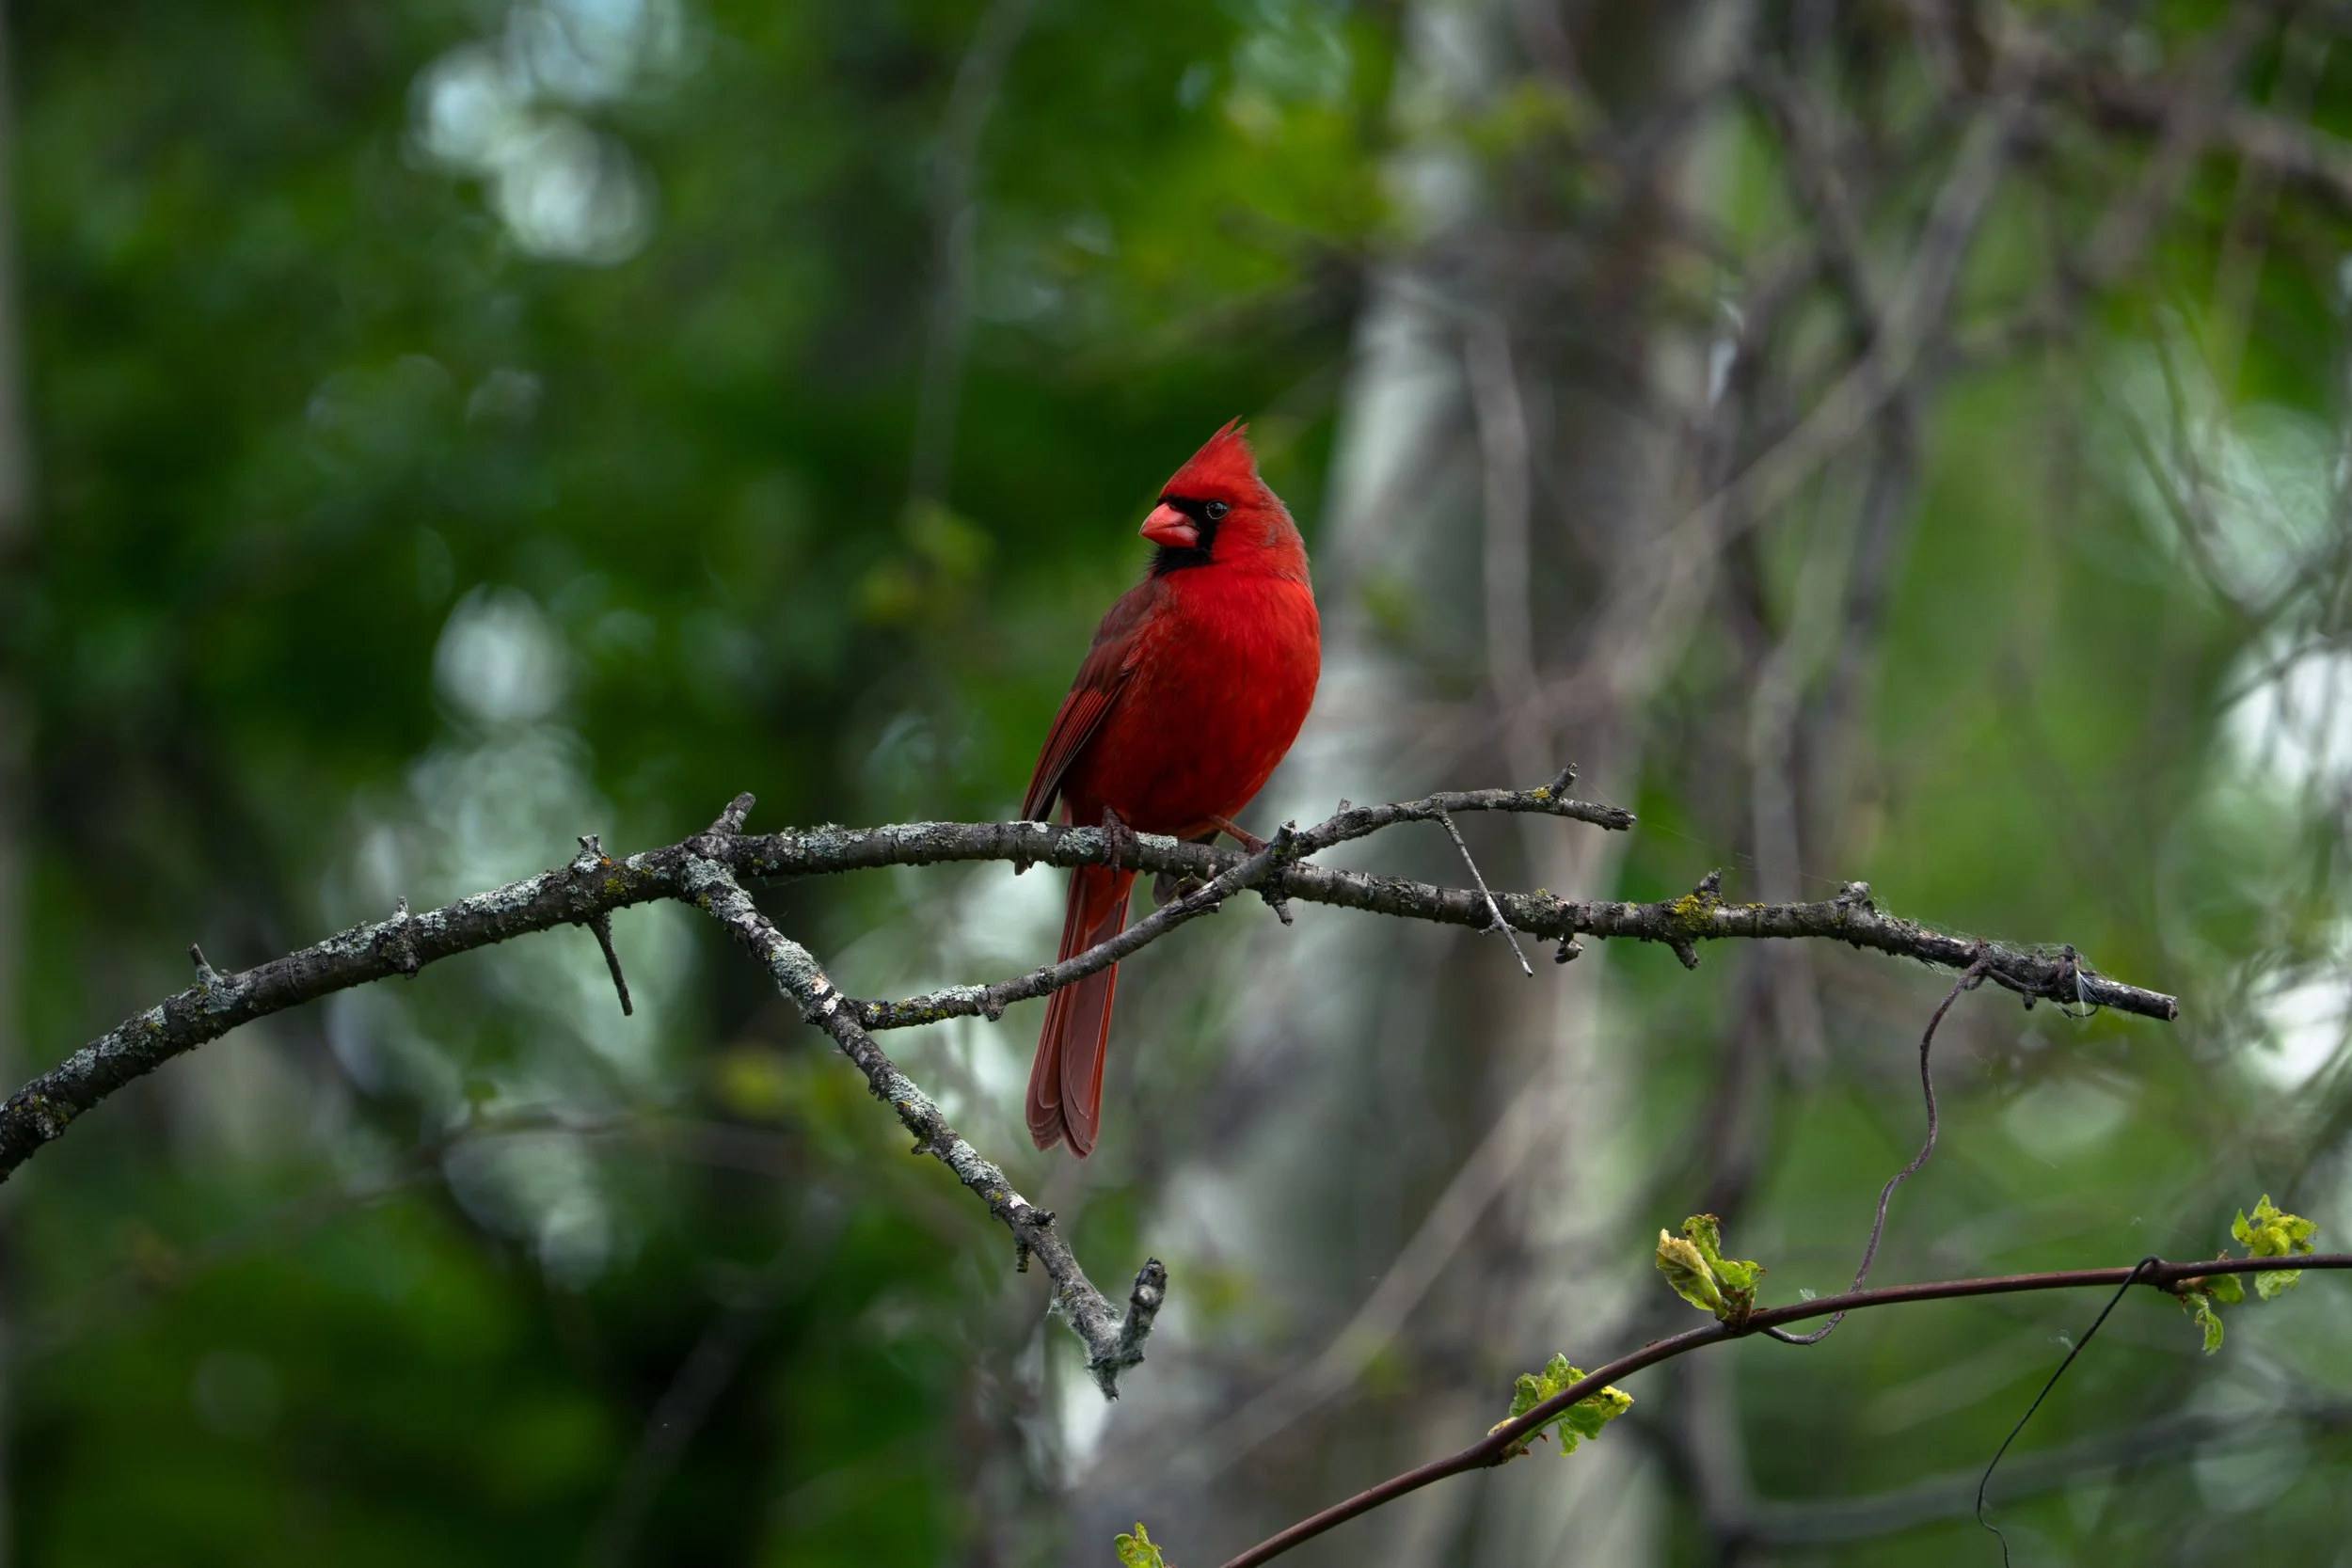
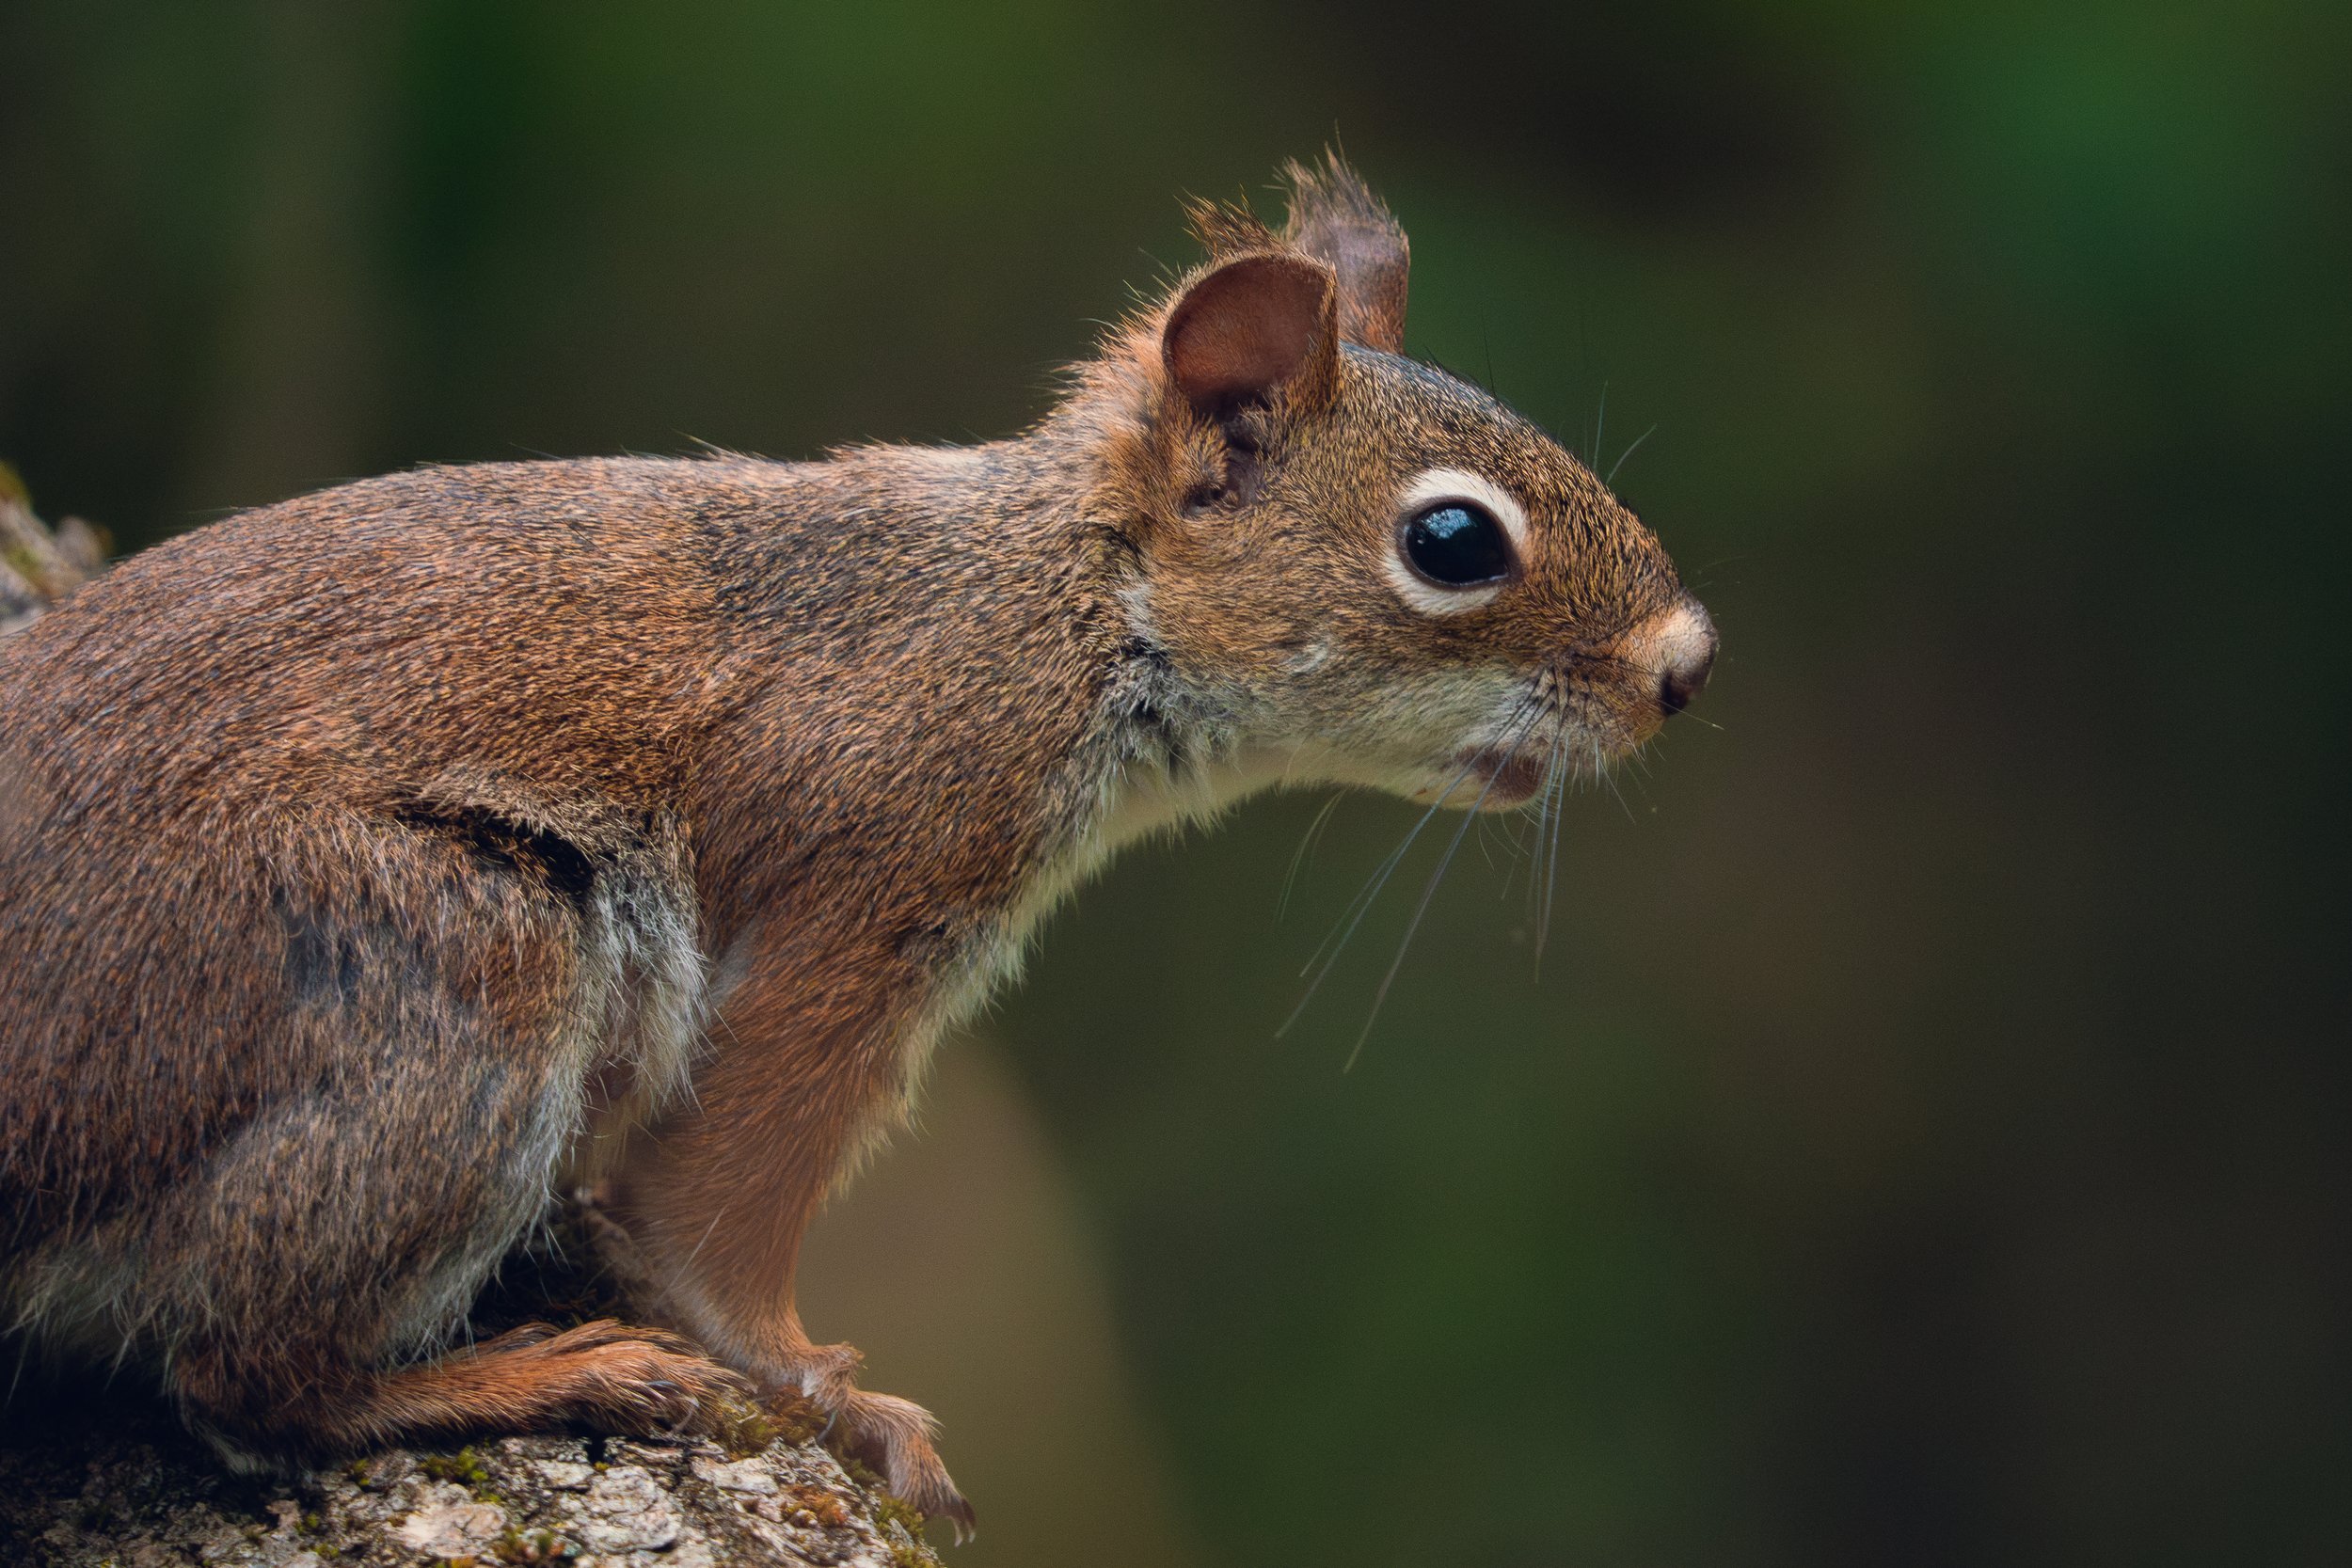
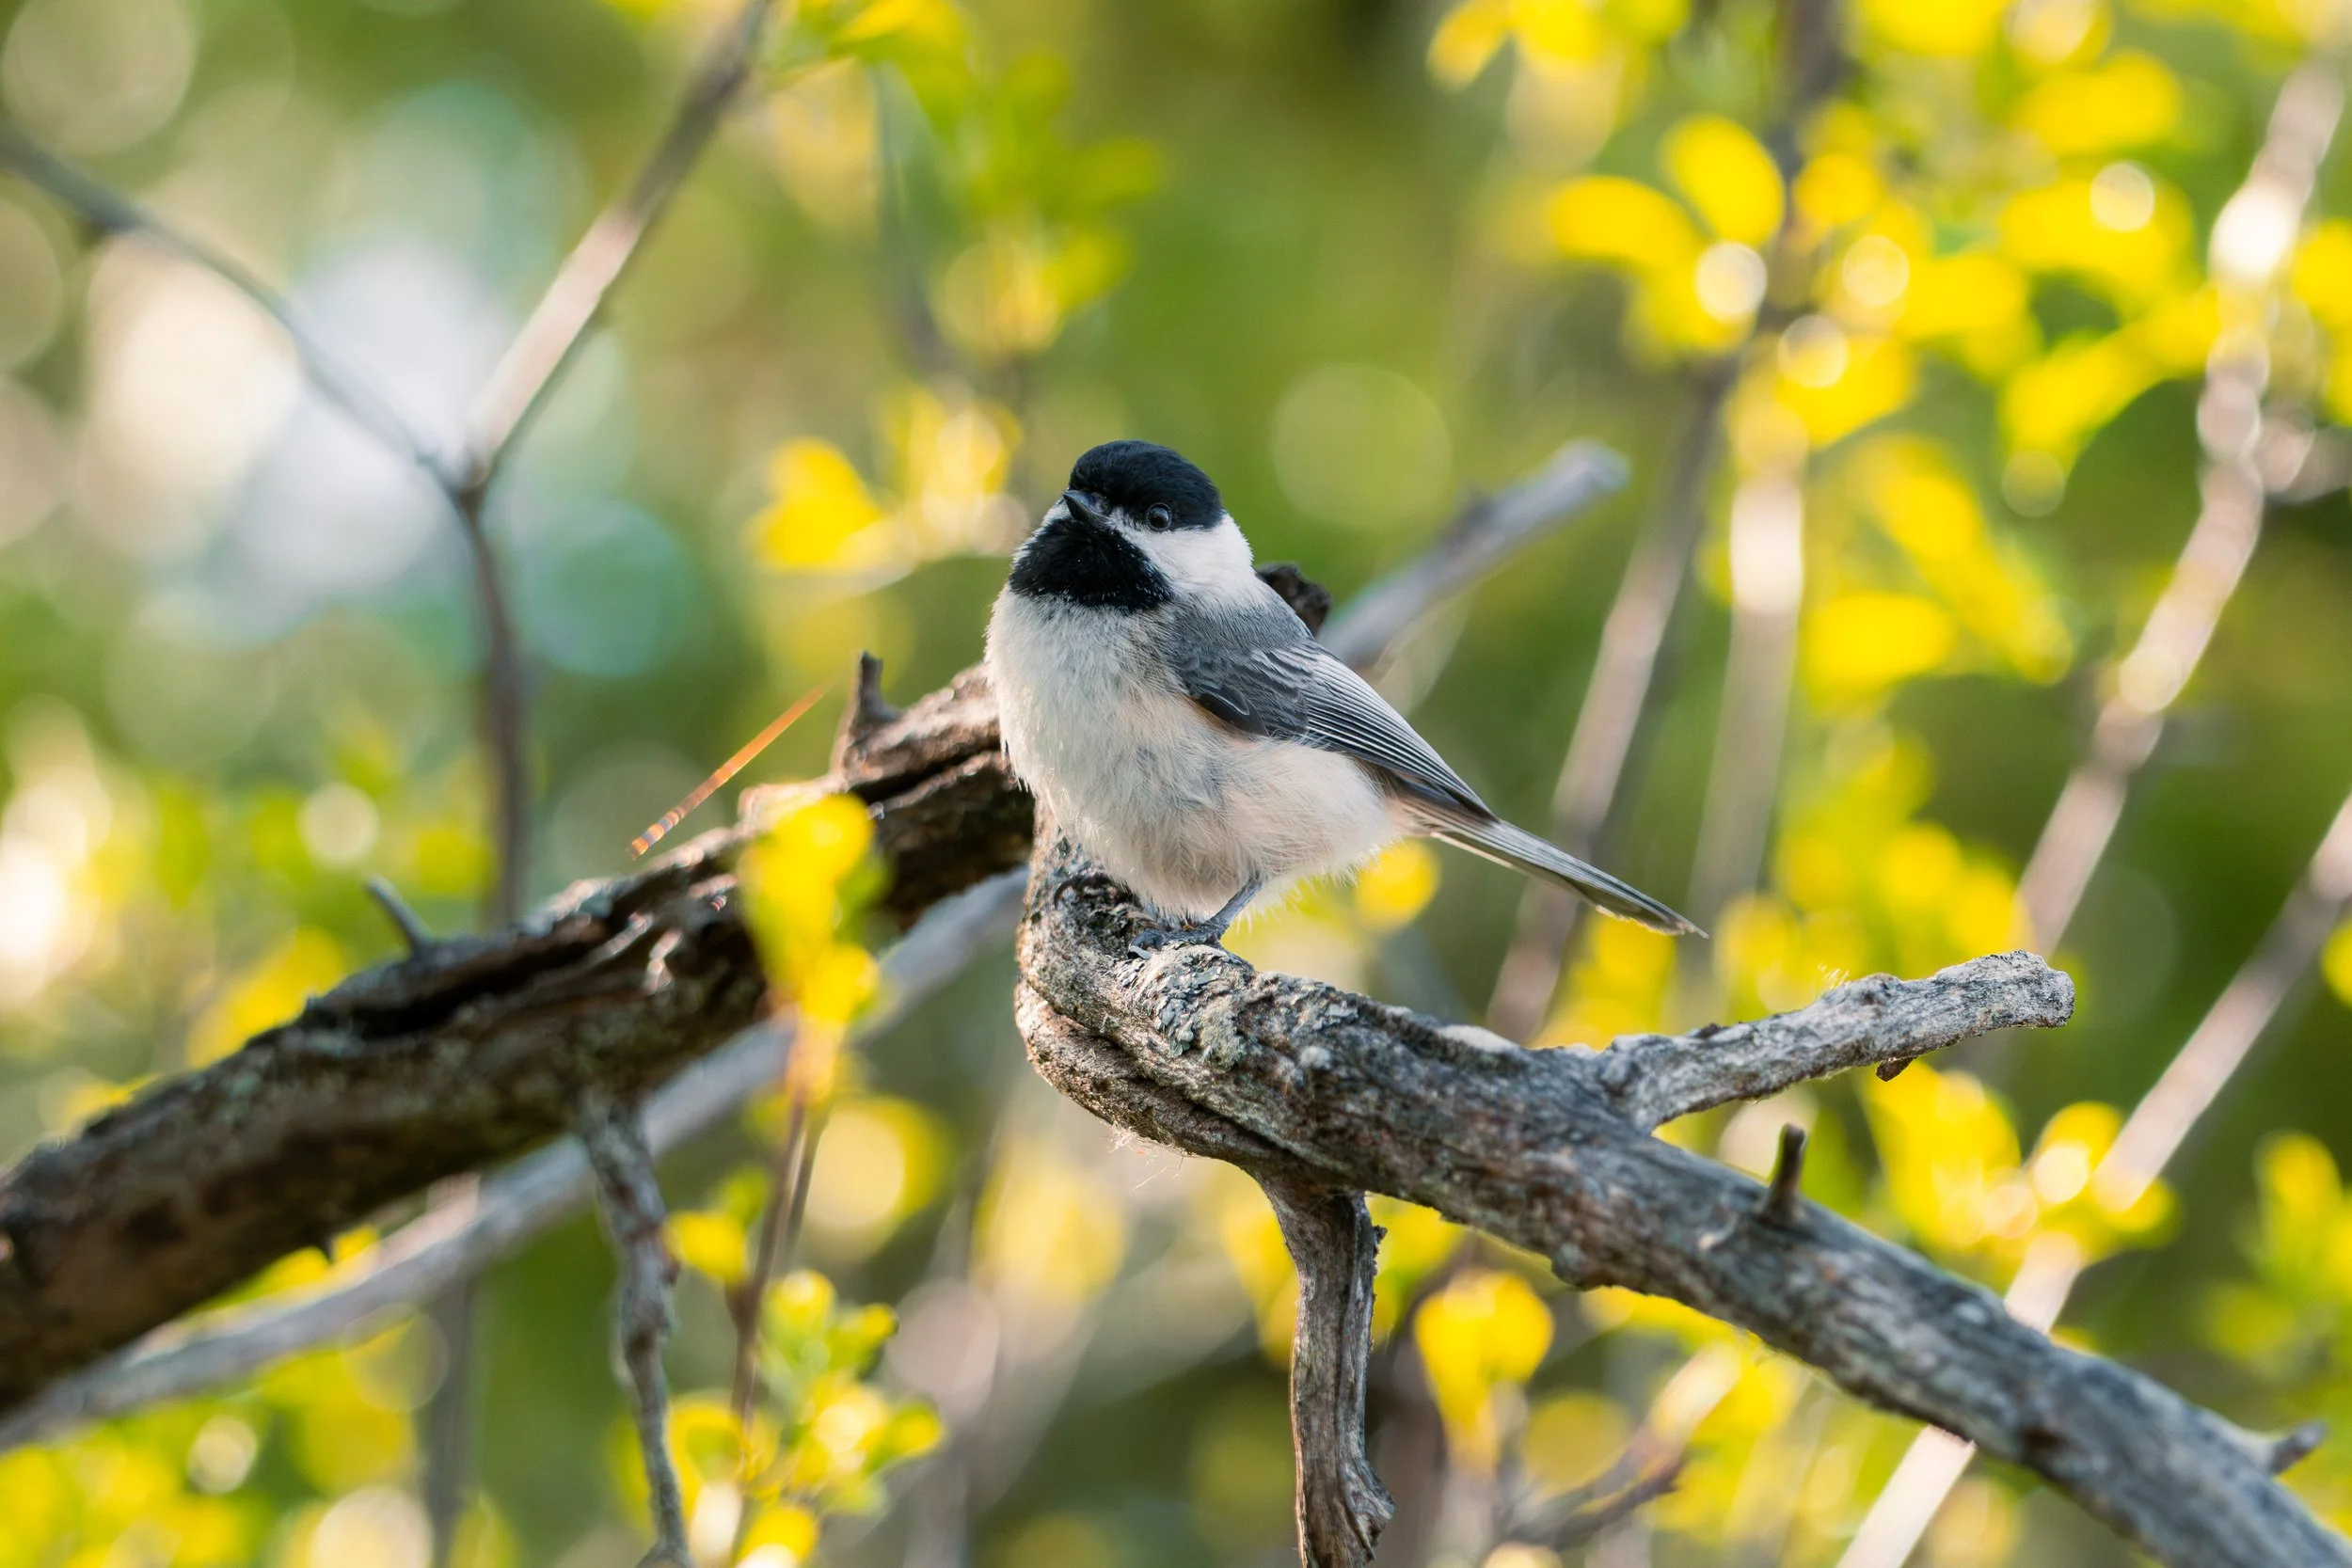
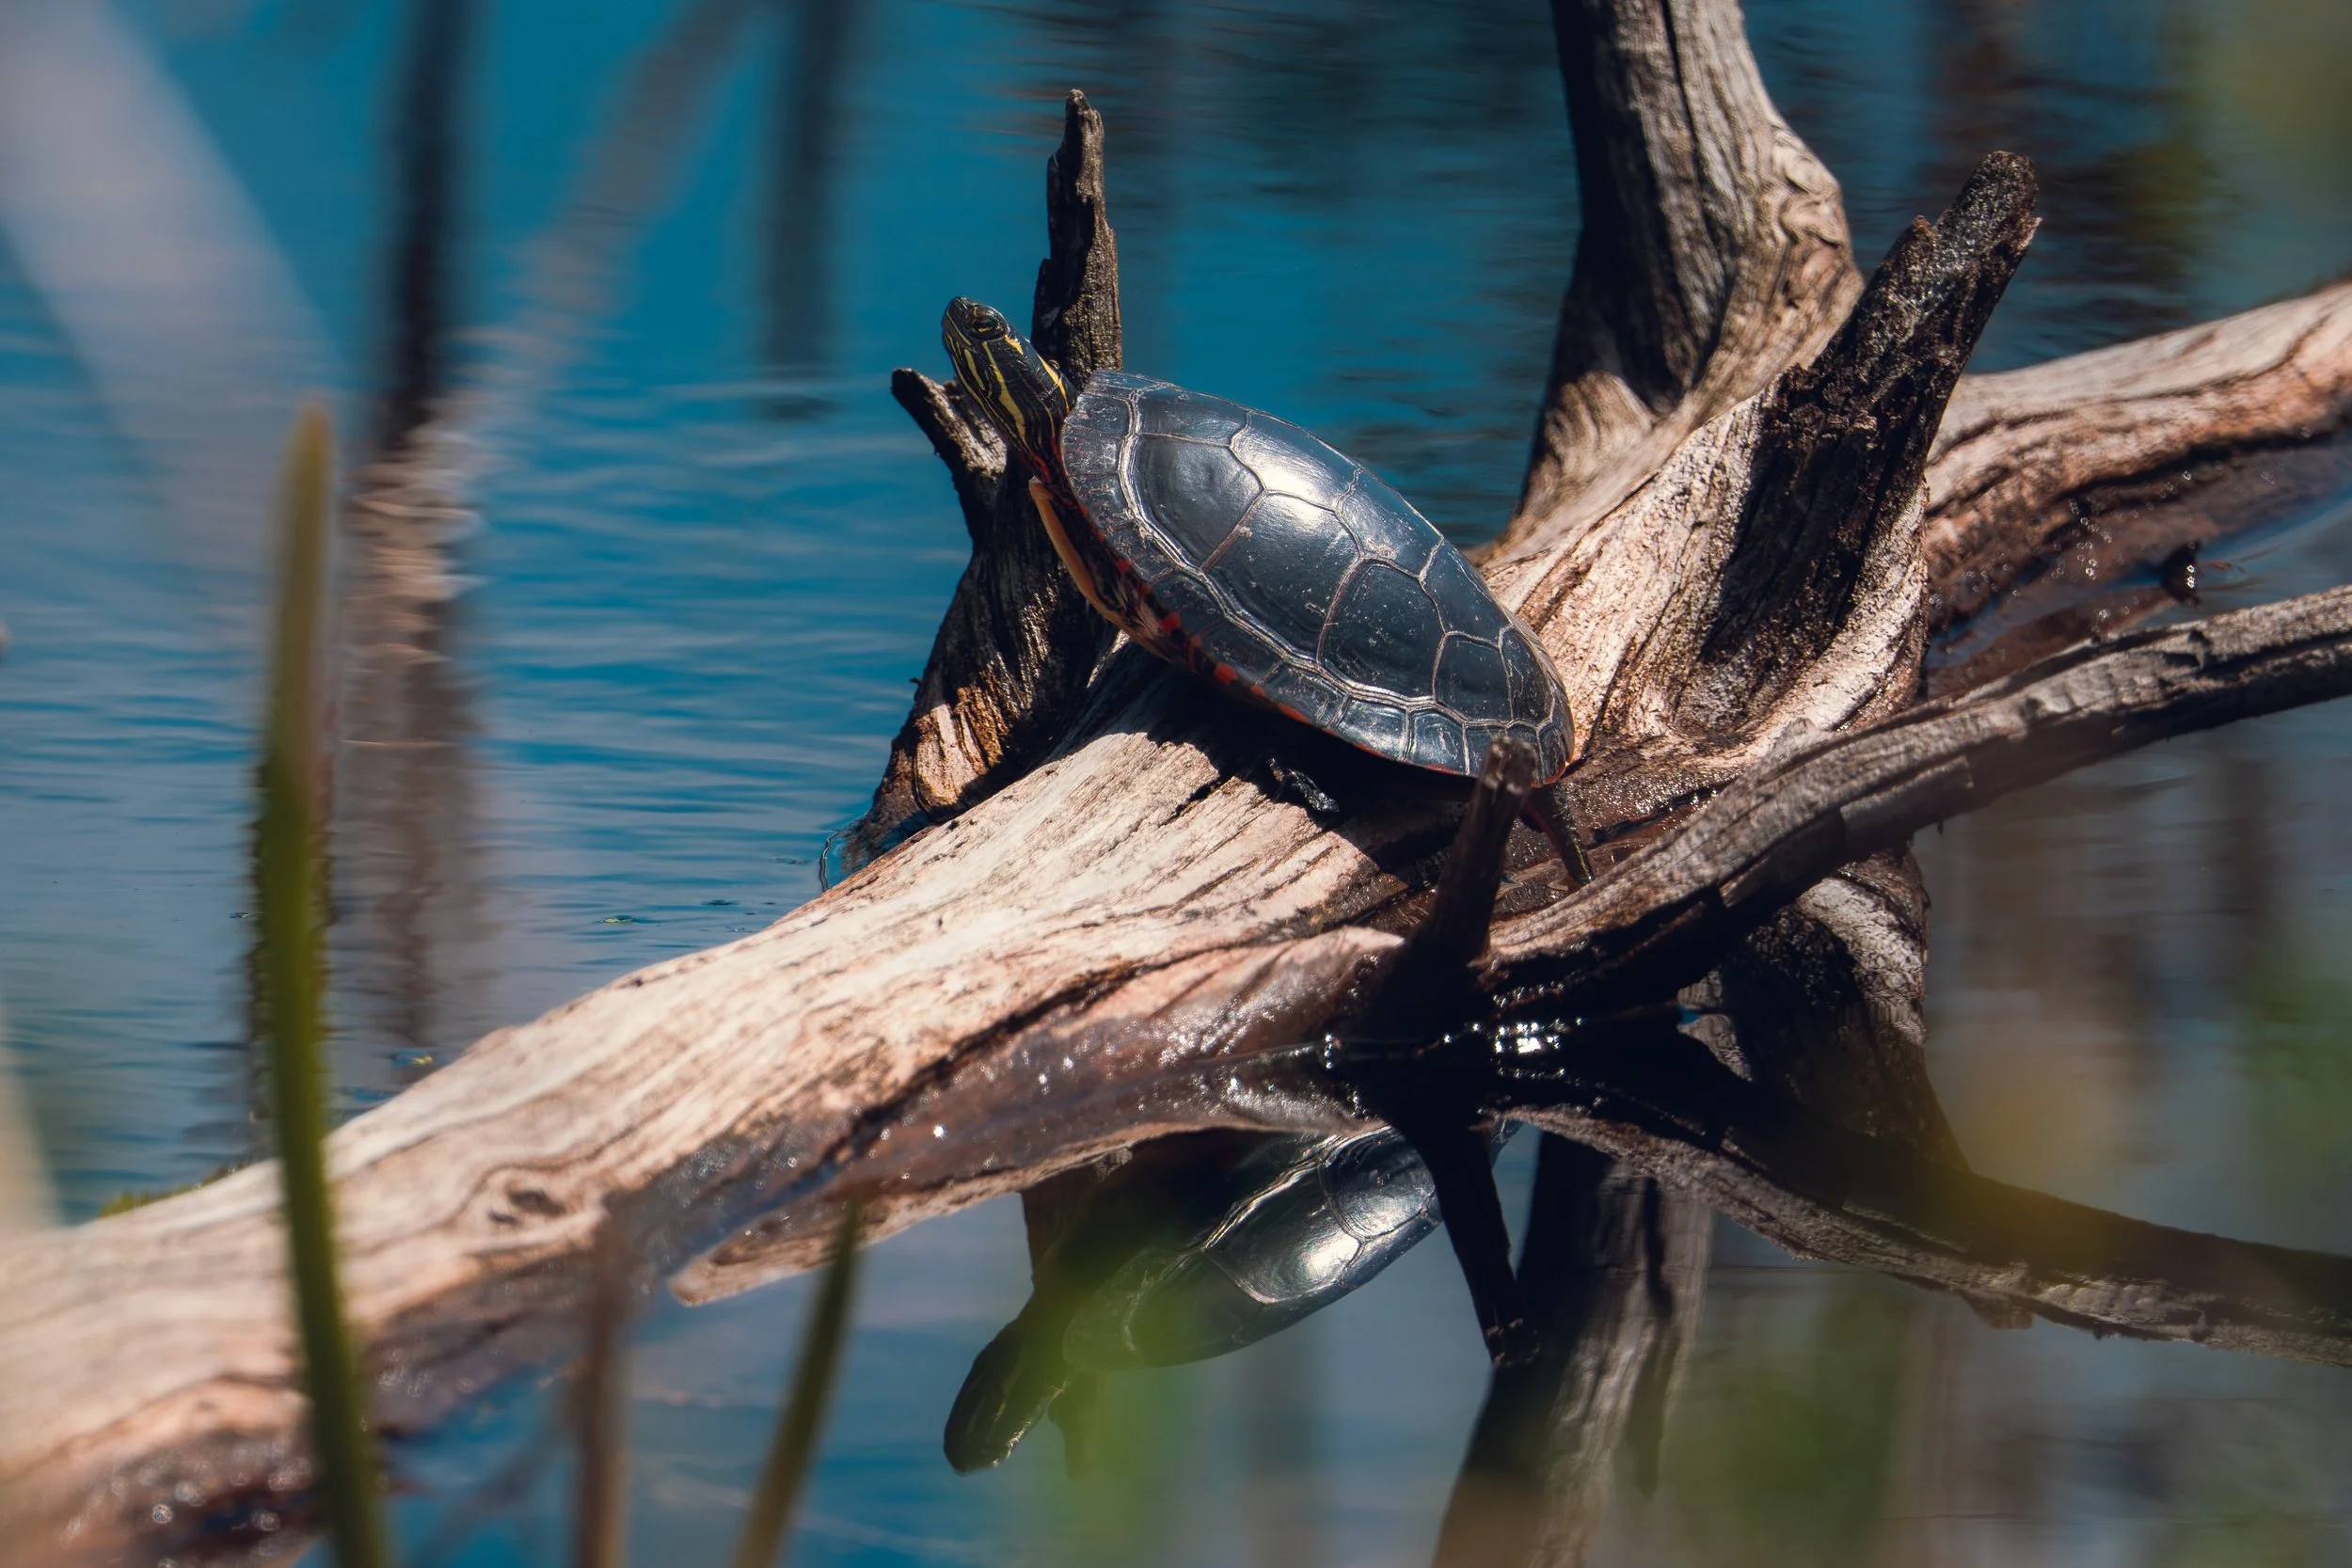
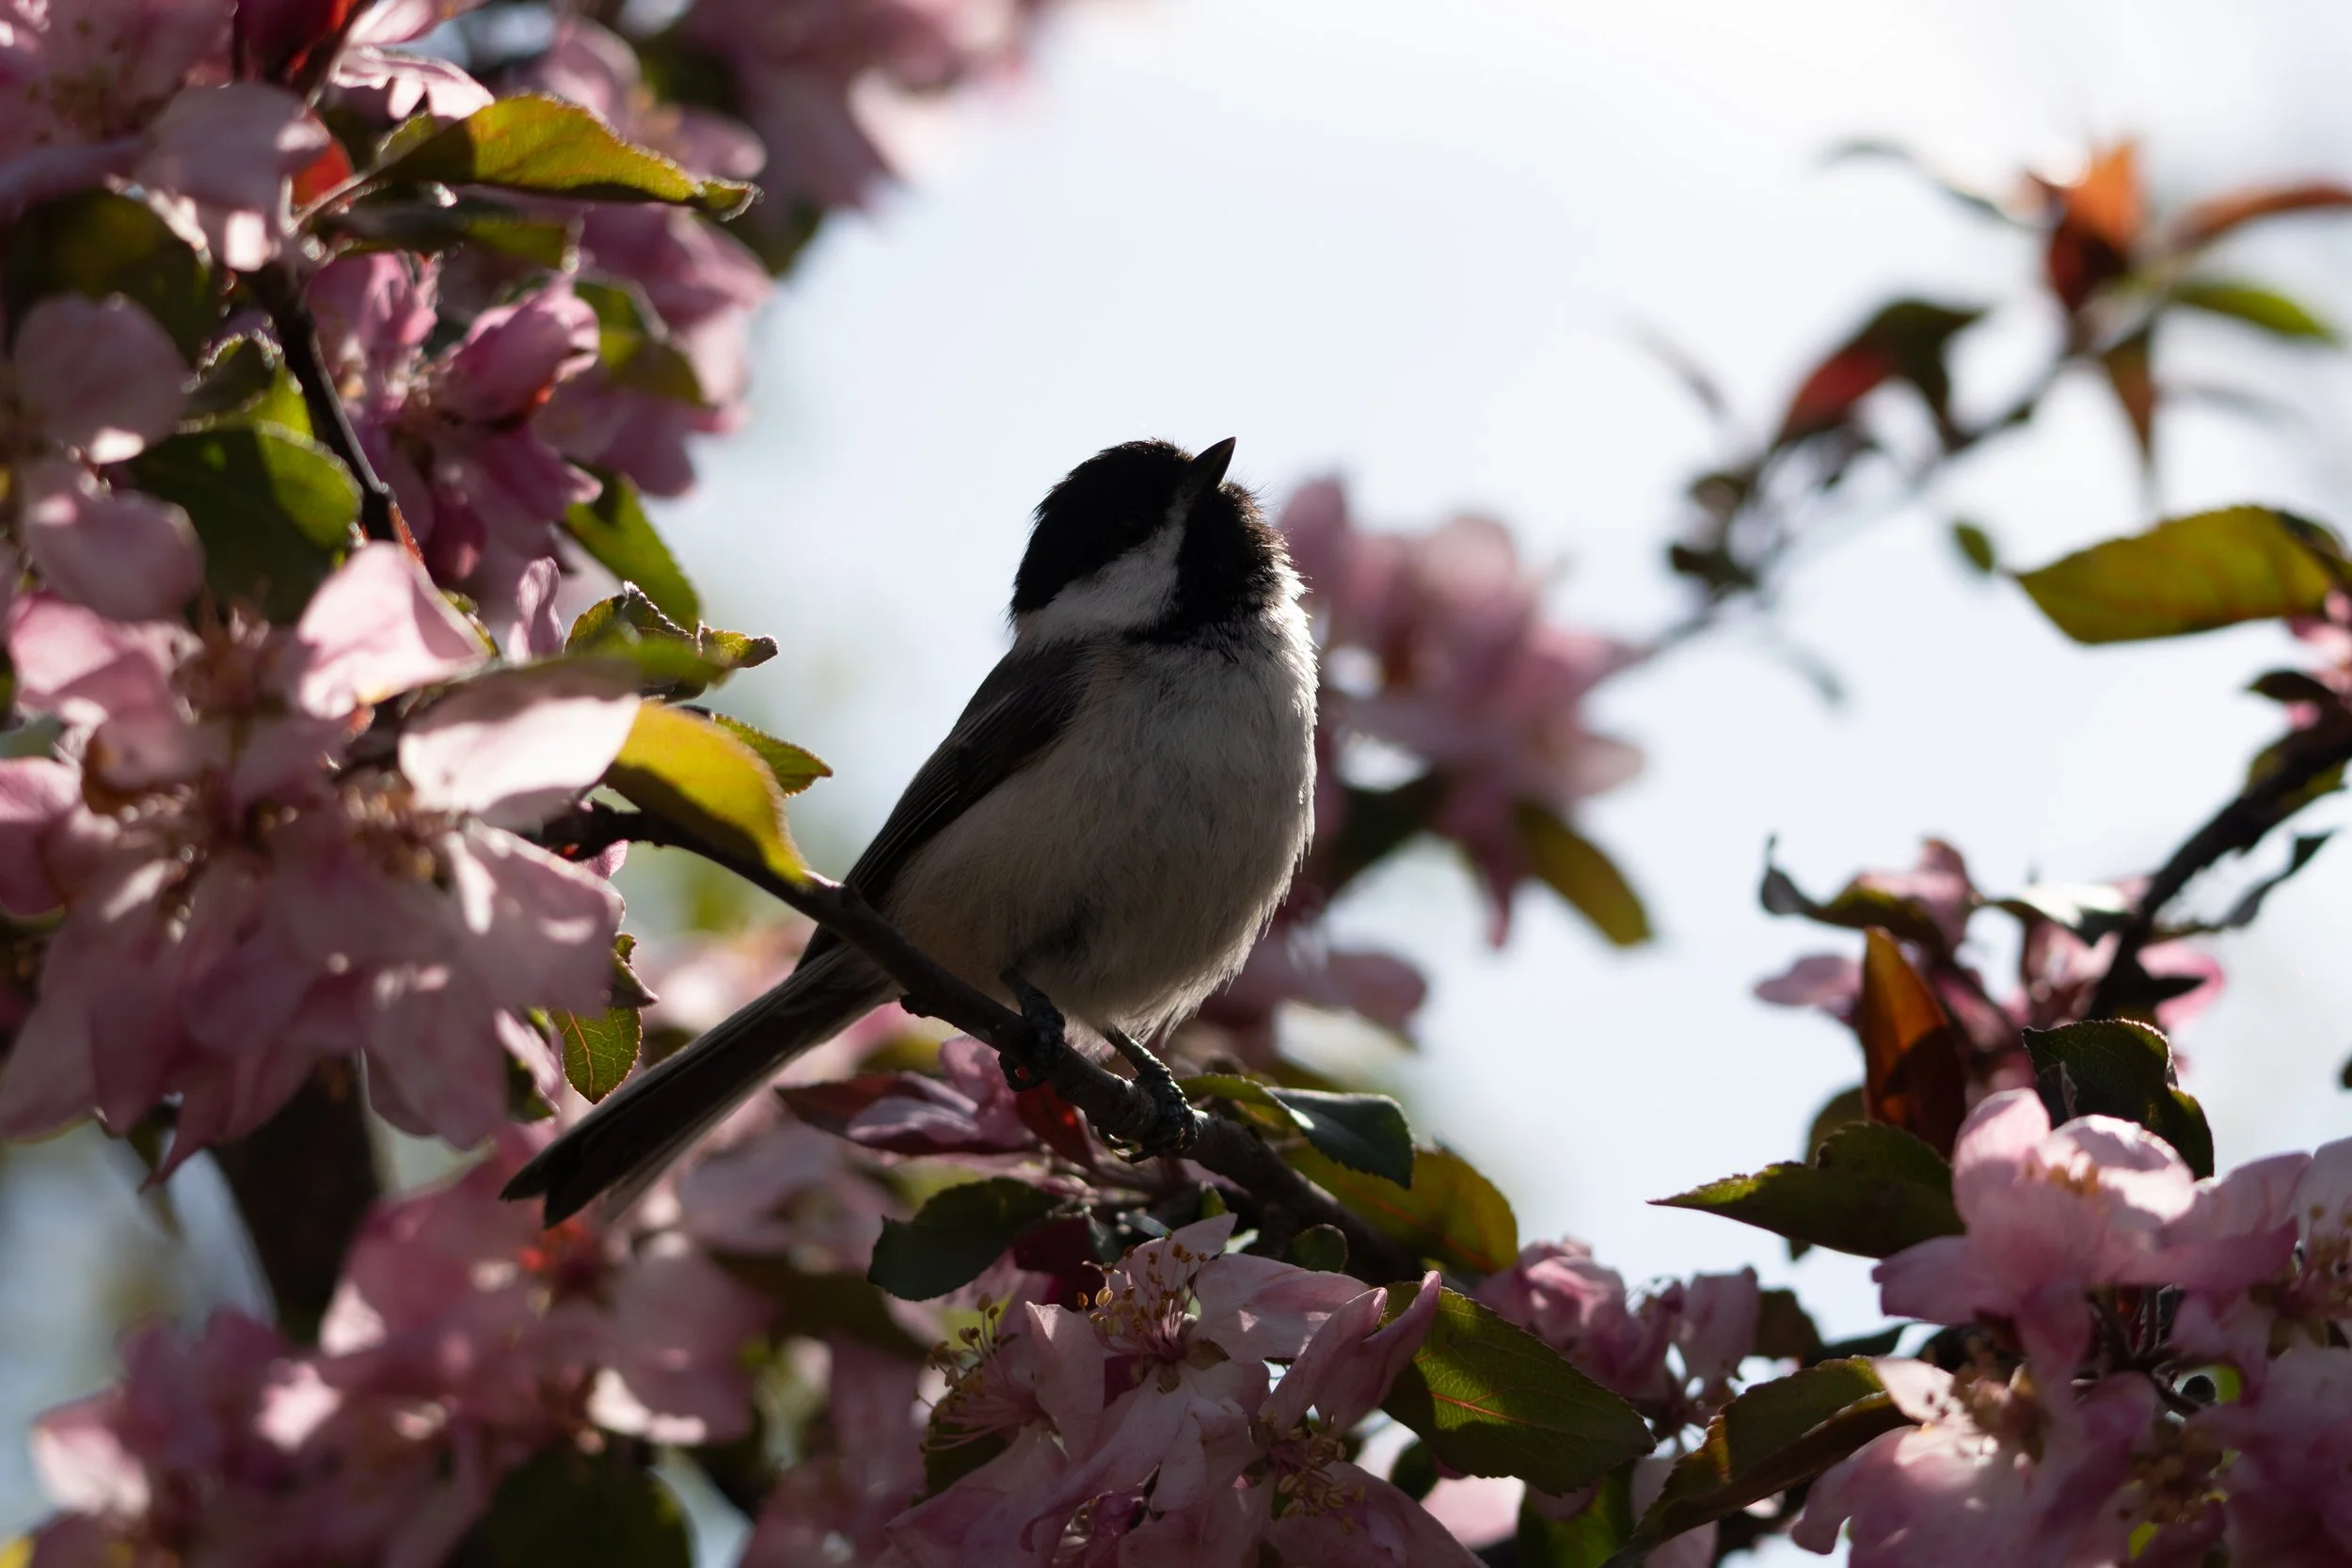
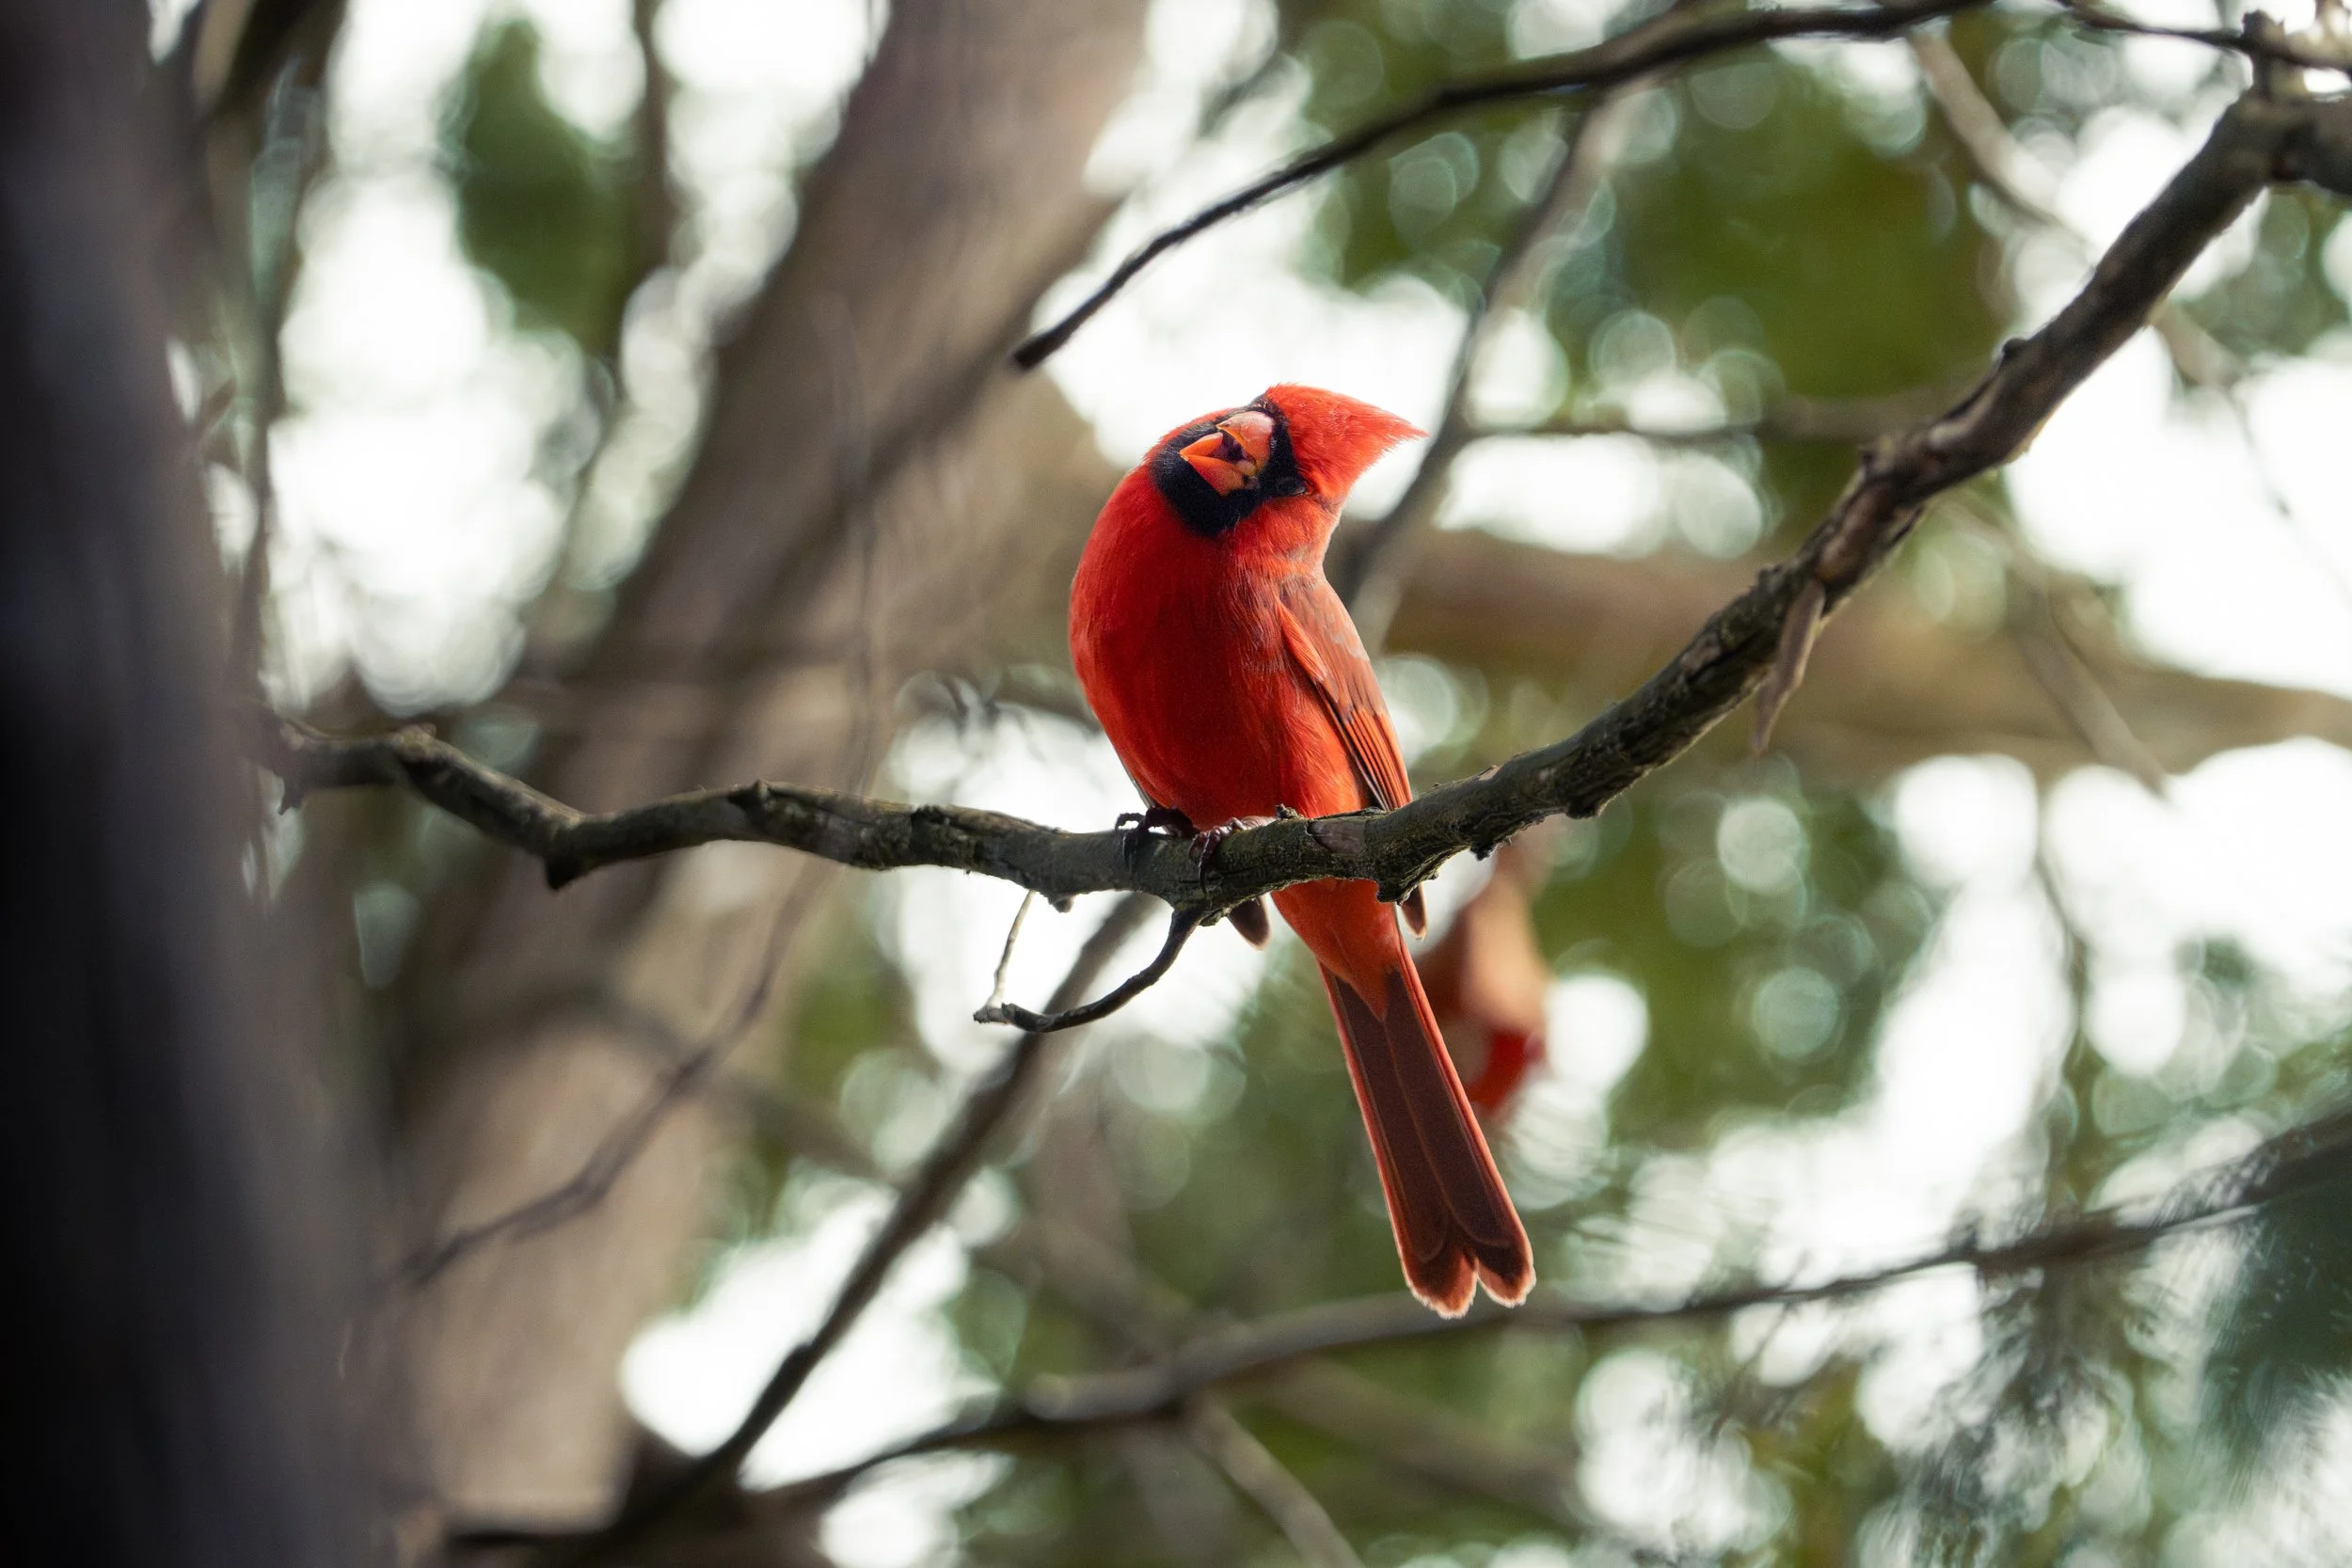
Throughout the day, many of the birds seemed to prefer perching on the side of the trail that was backlit by the sun. While that looked great in person, it left the birds quite dark in the photos, so I would need as much flexibility as possible with the files when editing them later.
The Sony ZV-E10 II can shoot compressed RAW files, and they held up very well during editing. Below is one of my favourite shots of the day, and a great example of how much I could pull from the shadows.
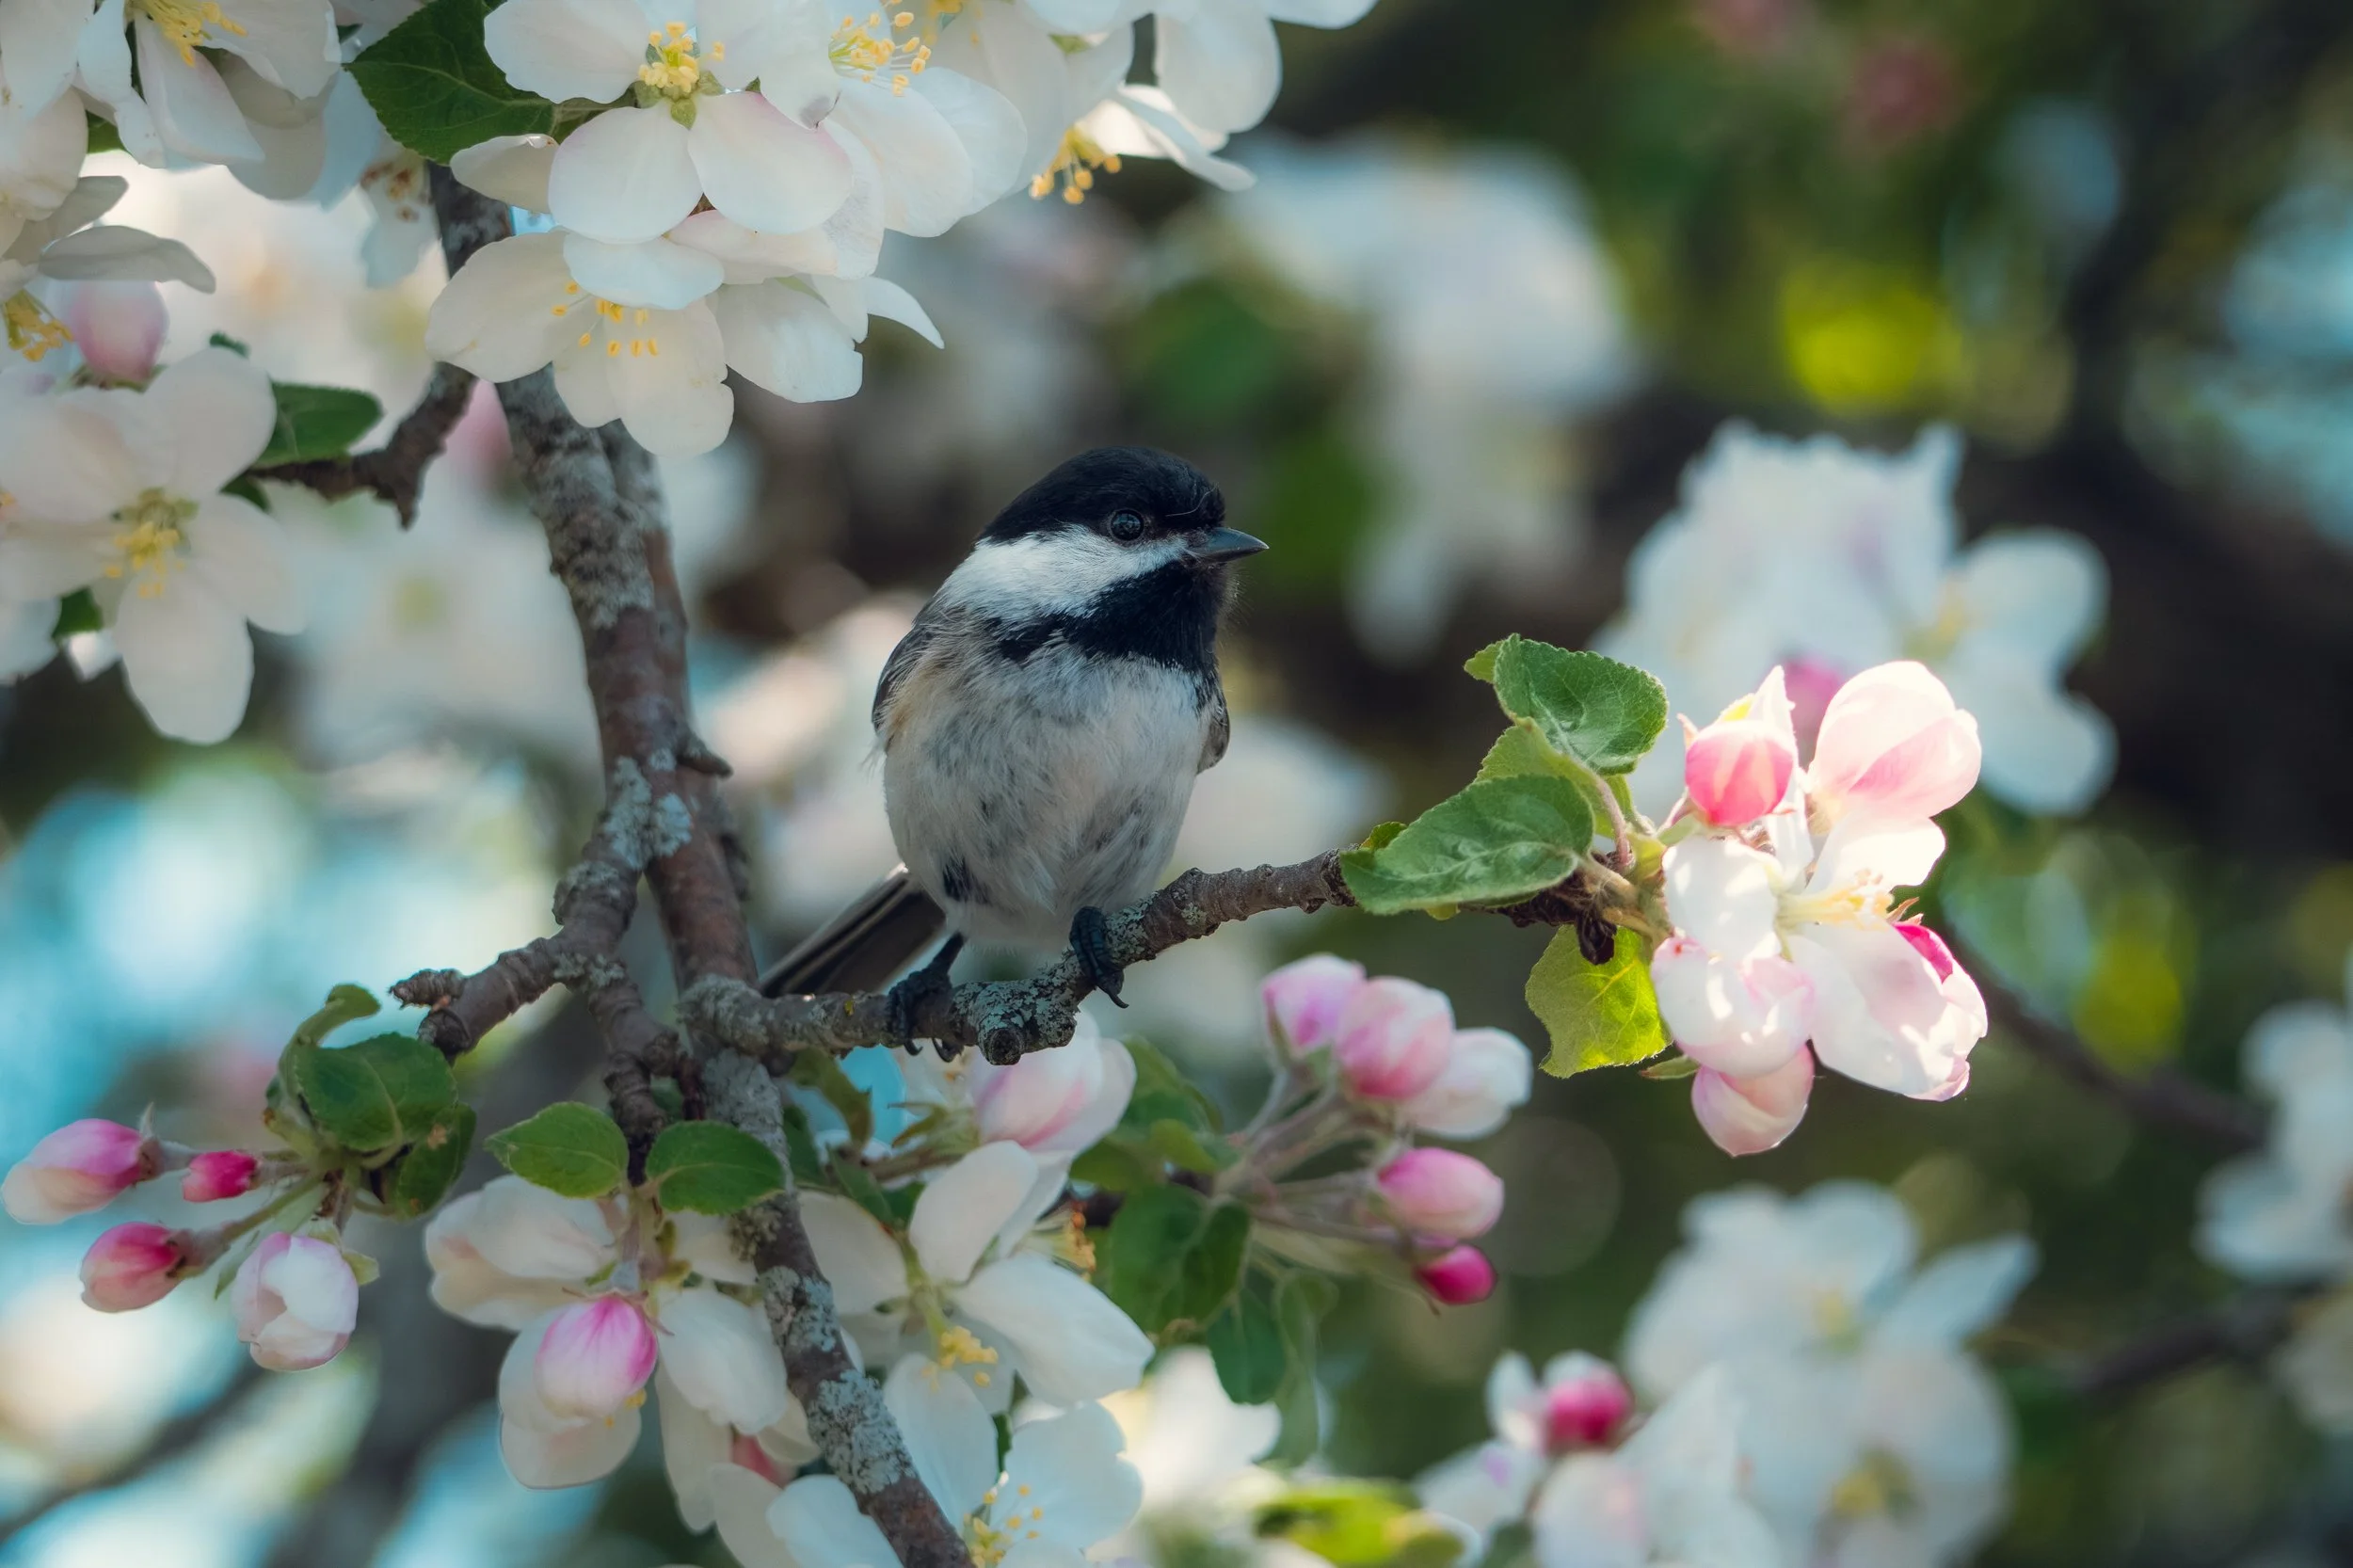
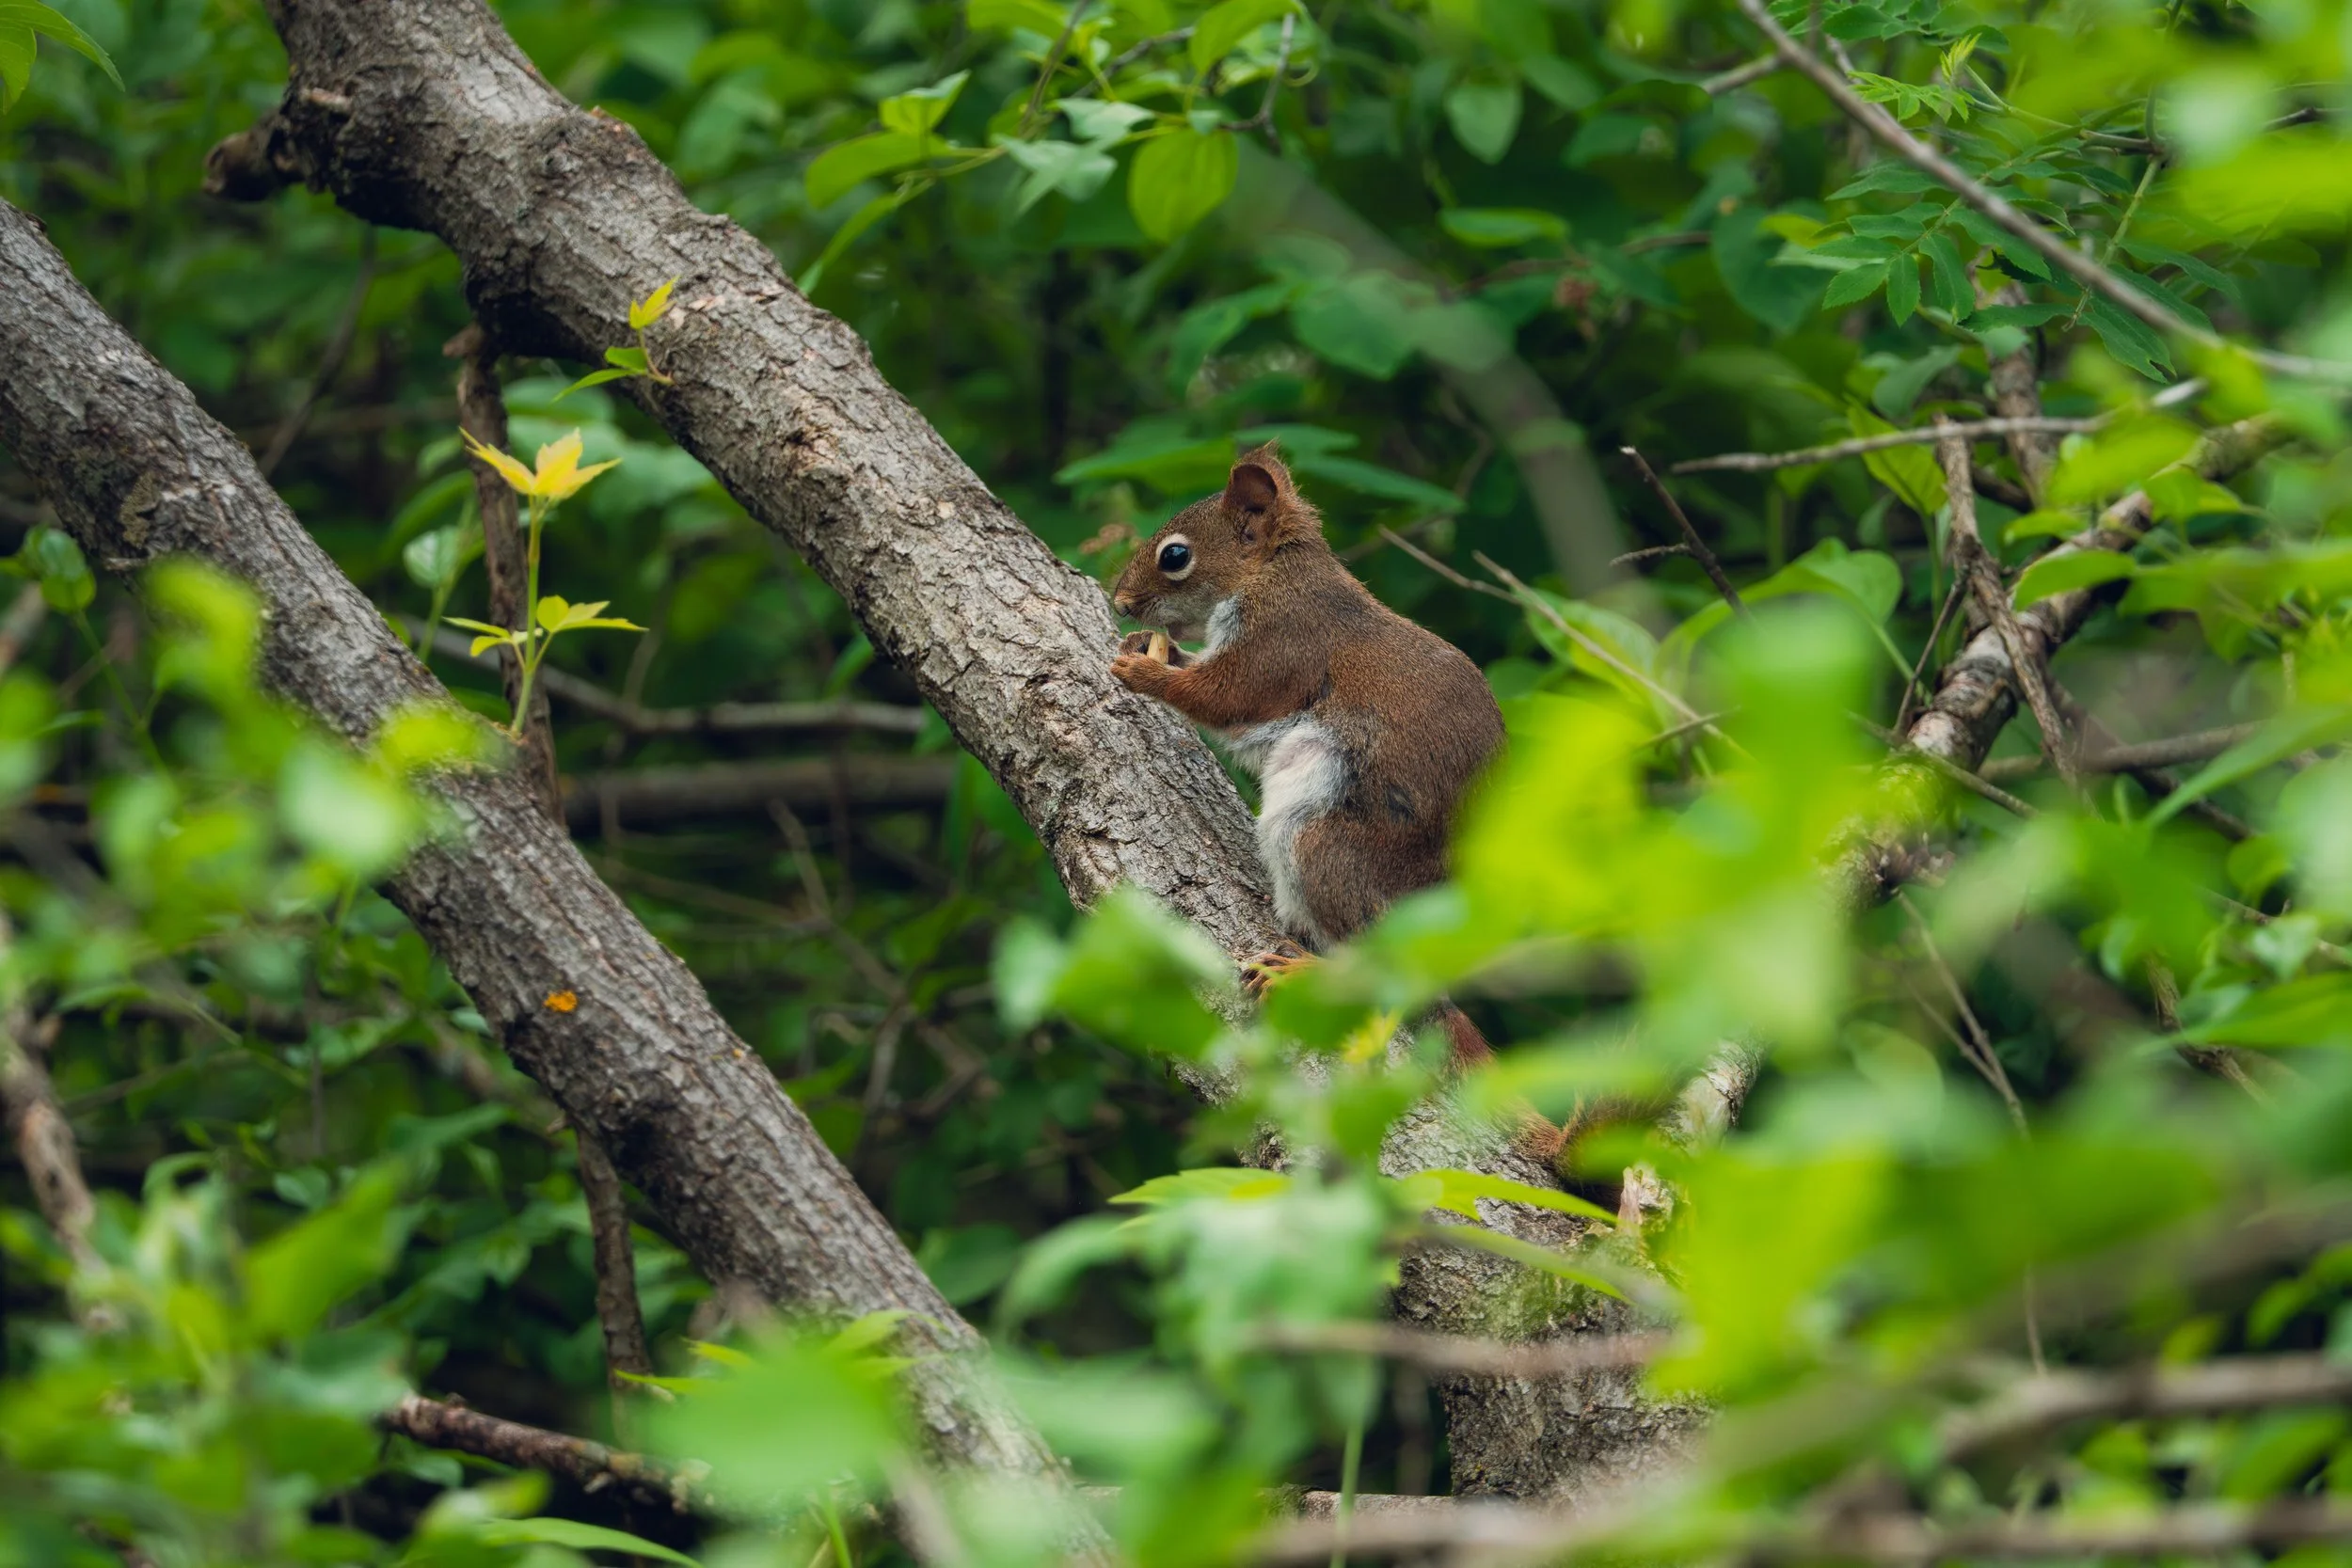
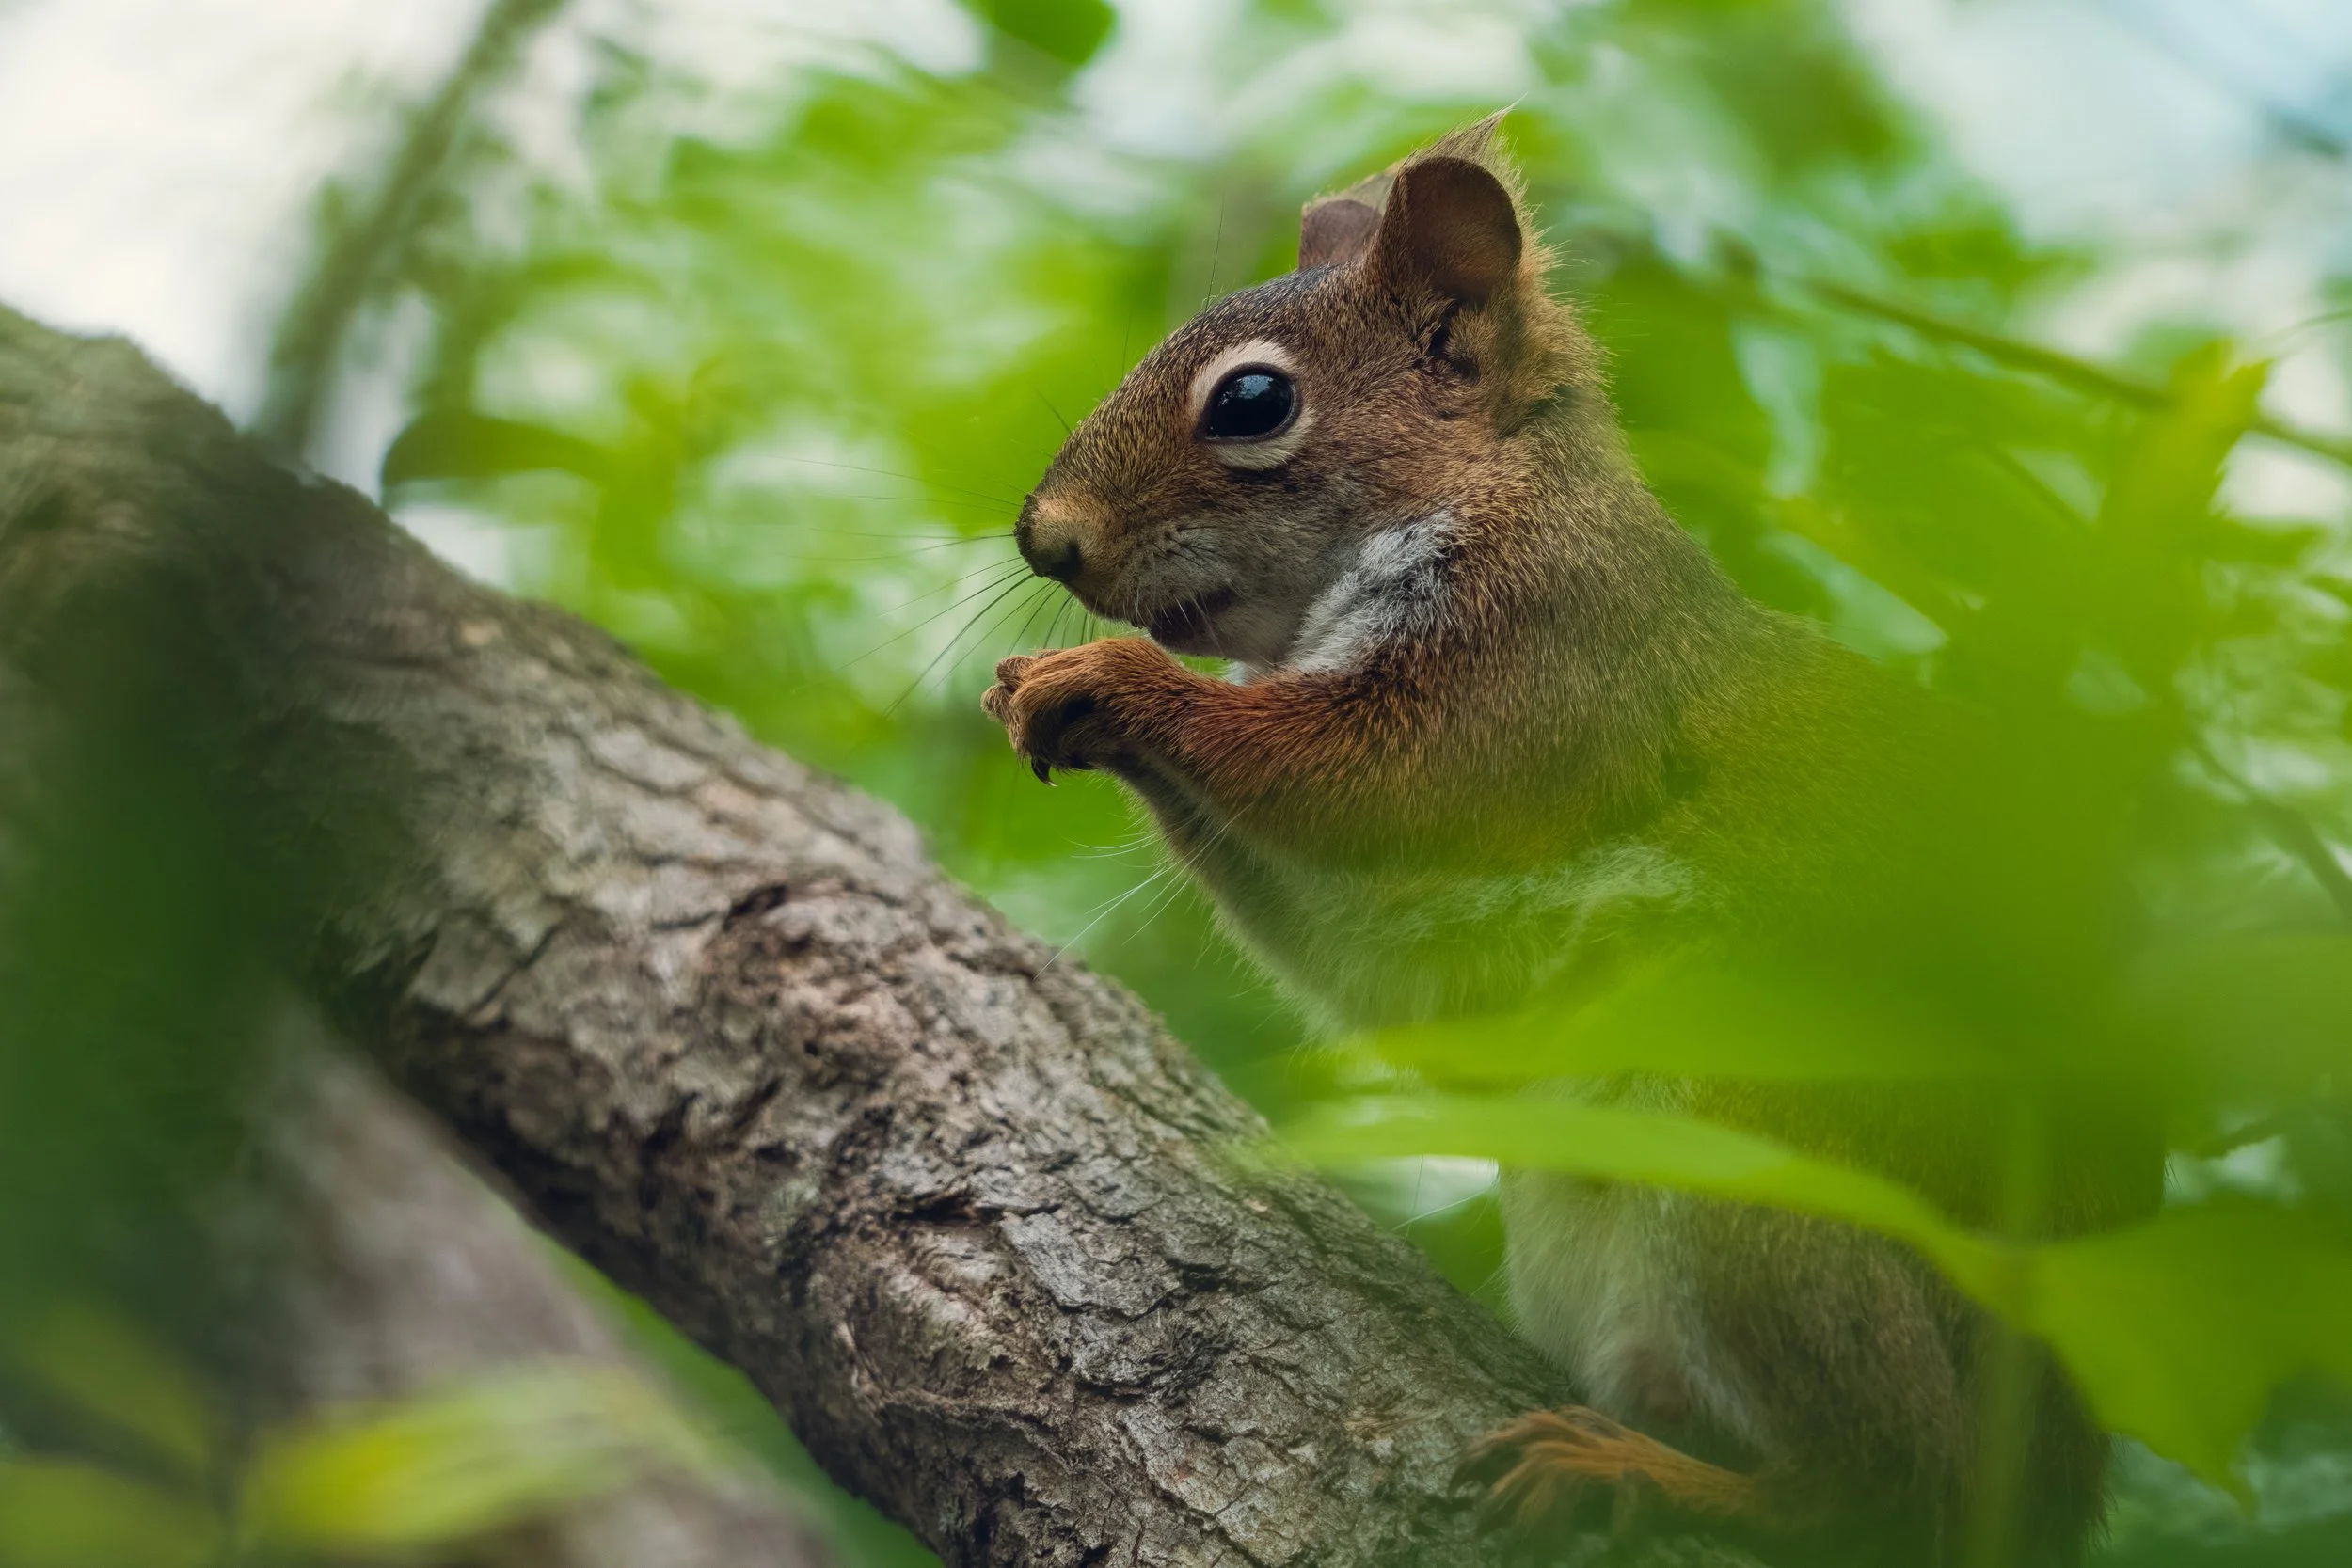
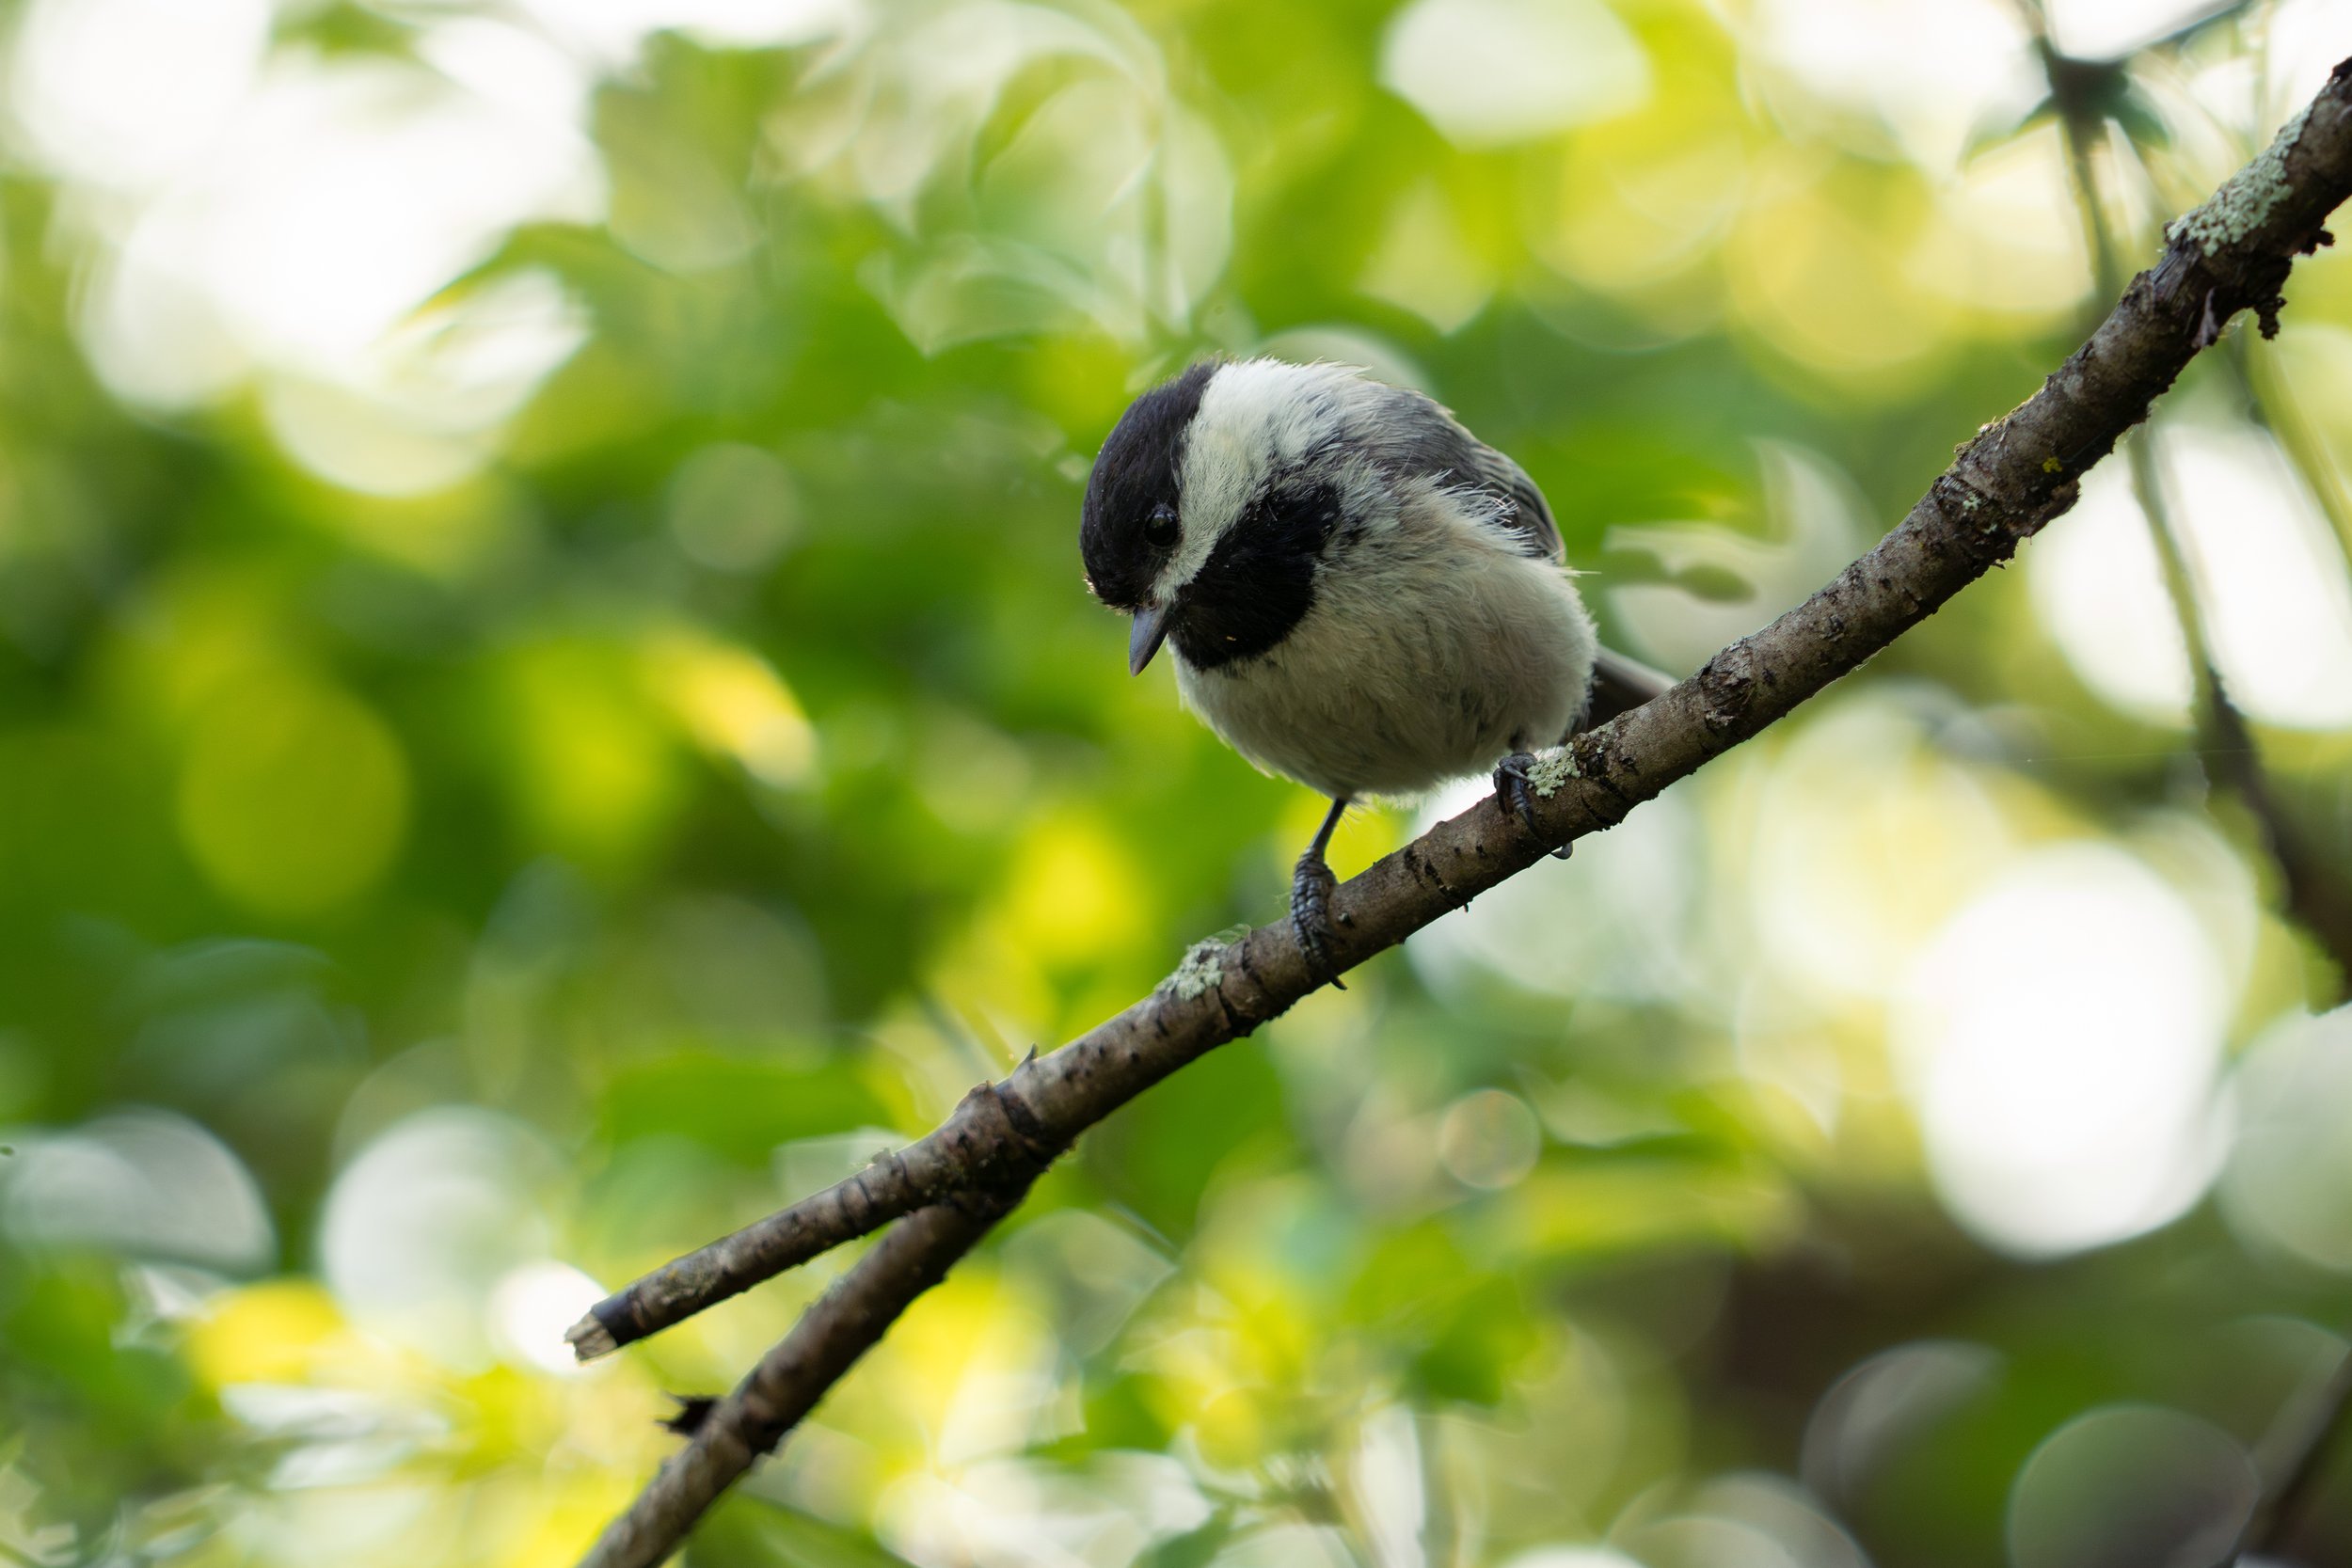
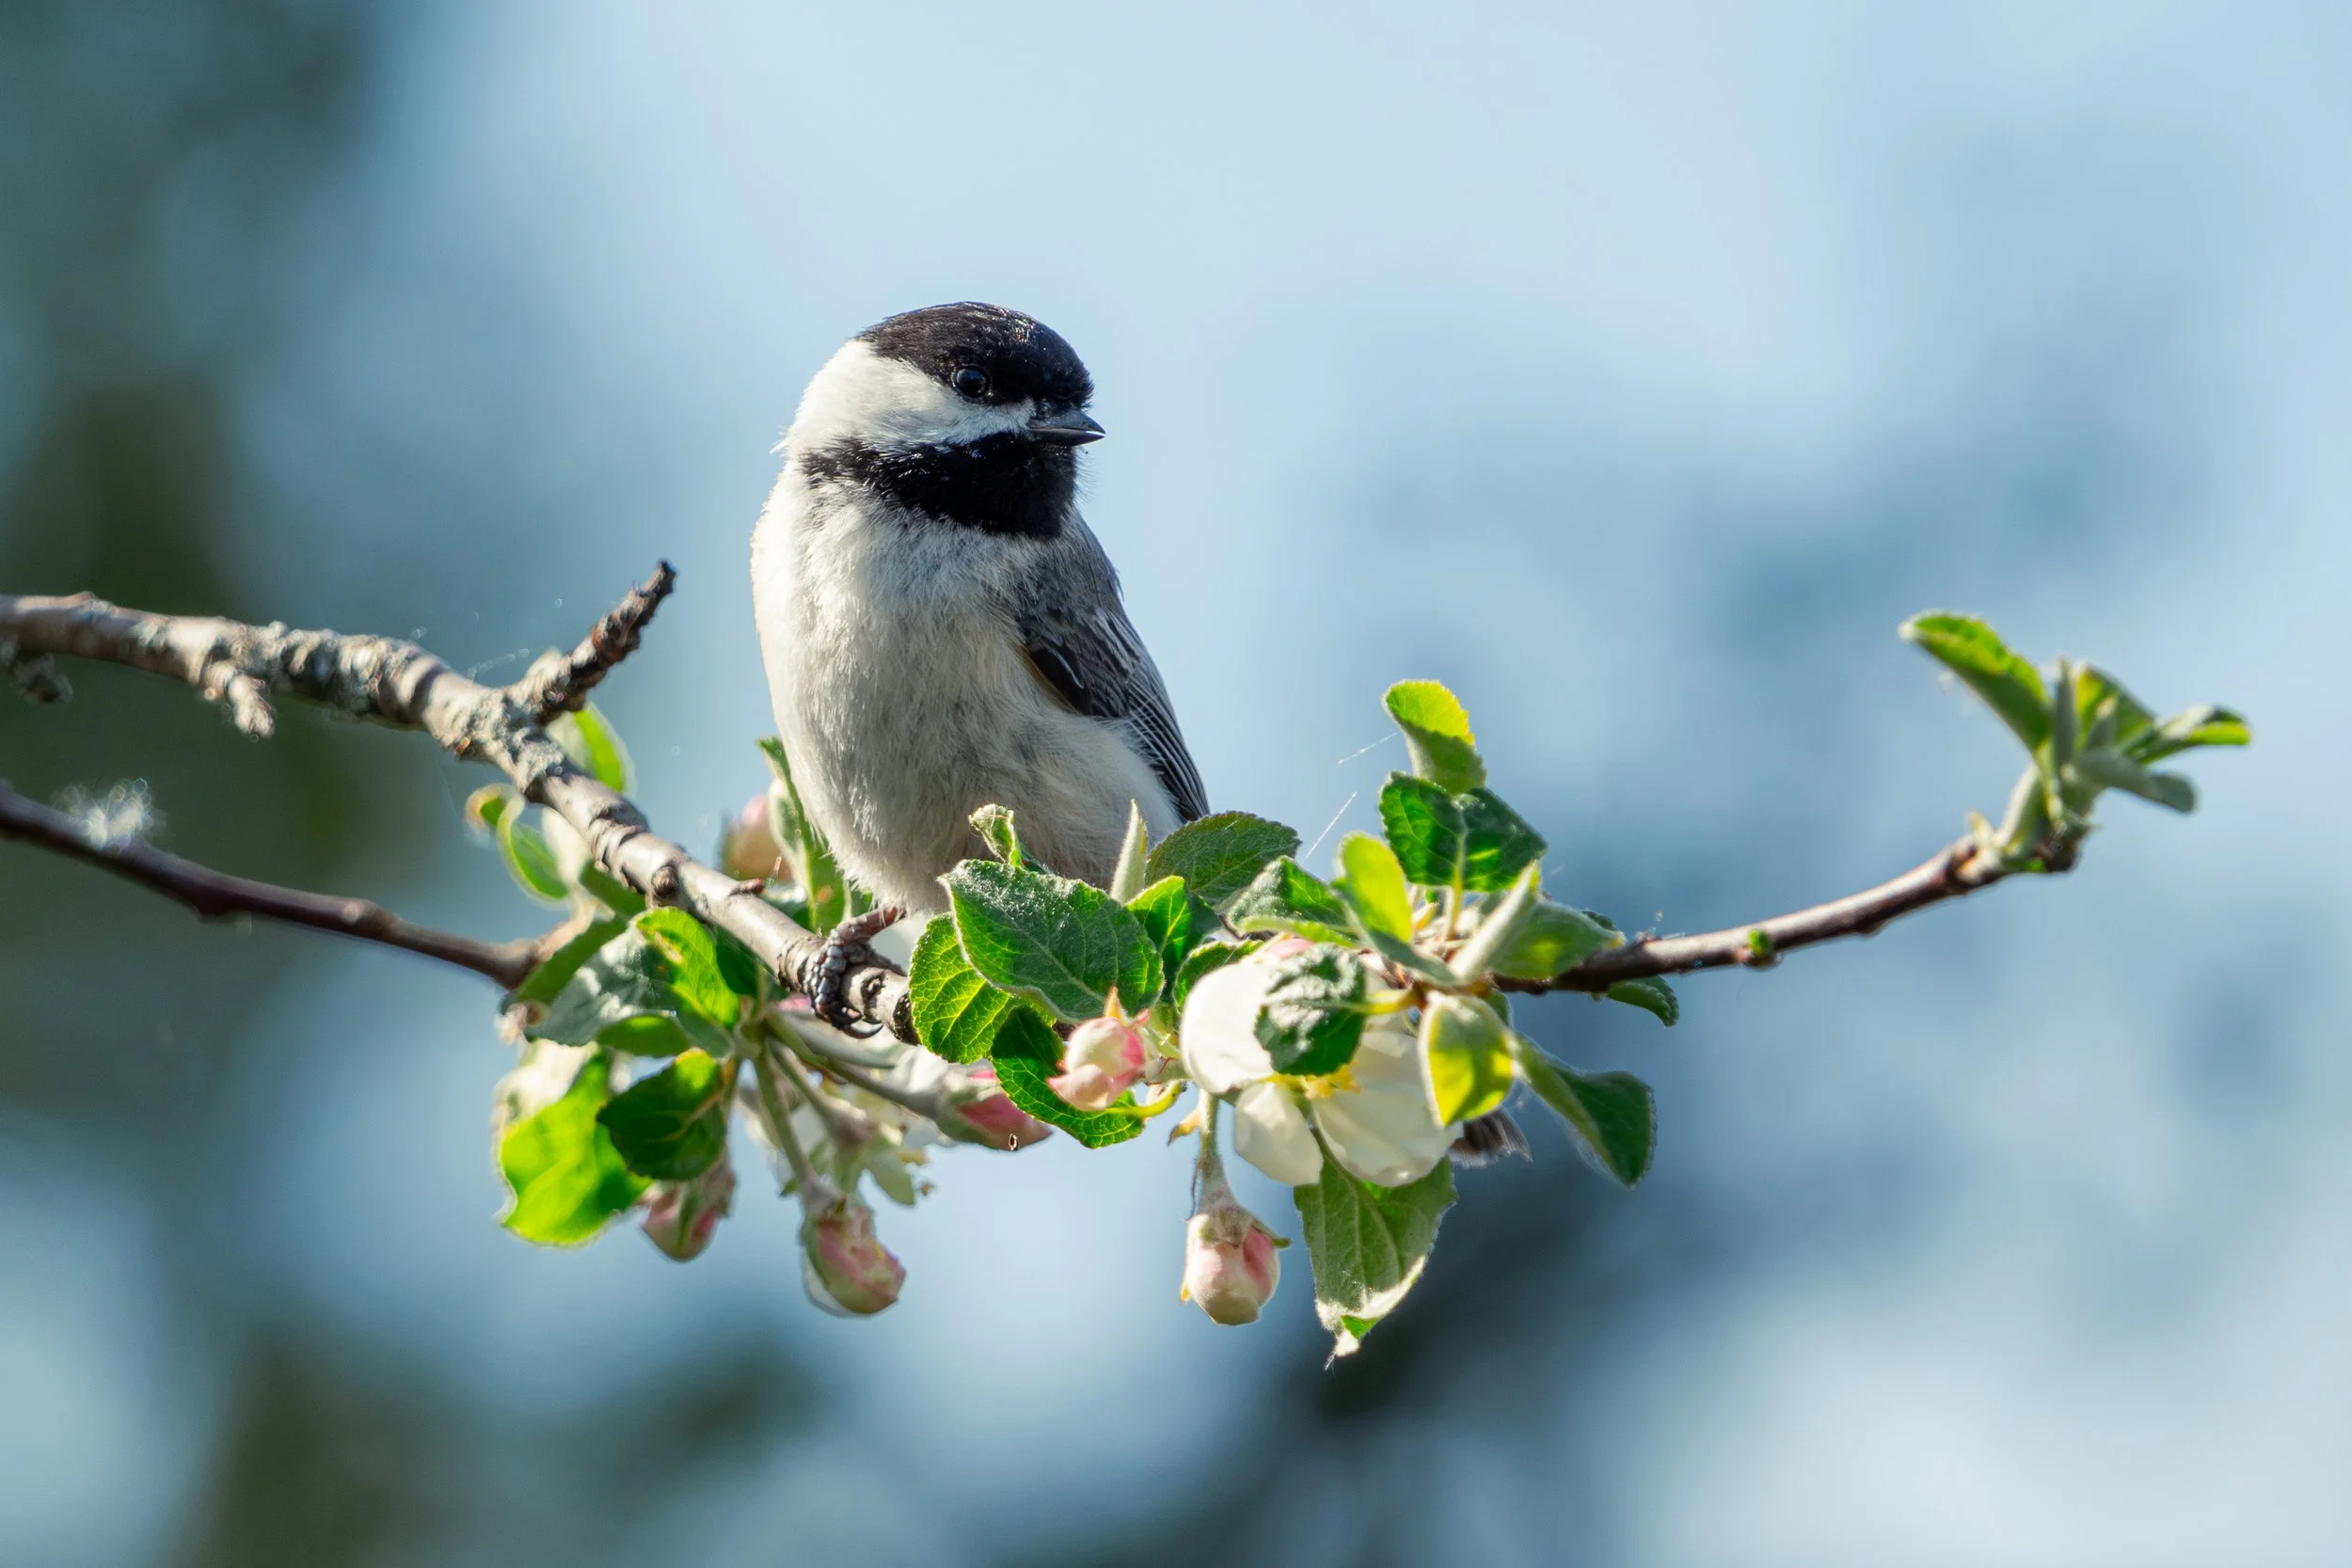
While some cameras continue to push higher resolutions, the ZV-E10 II has a 26.0 megapixel sensor, and I found it to be more than enough on an APS-C camera. The file size of these images averaged around 35 megabytes, and I felt that was enough quality to work with to reframe my images.
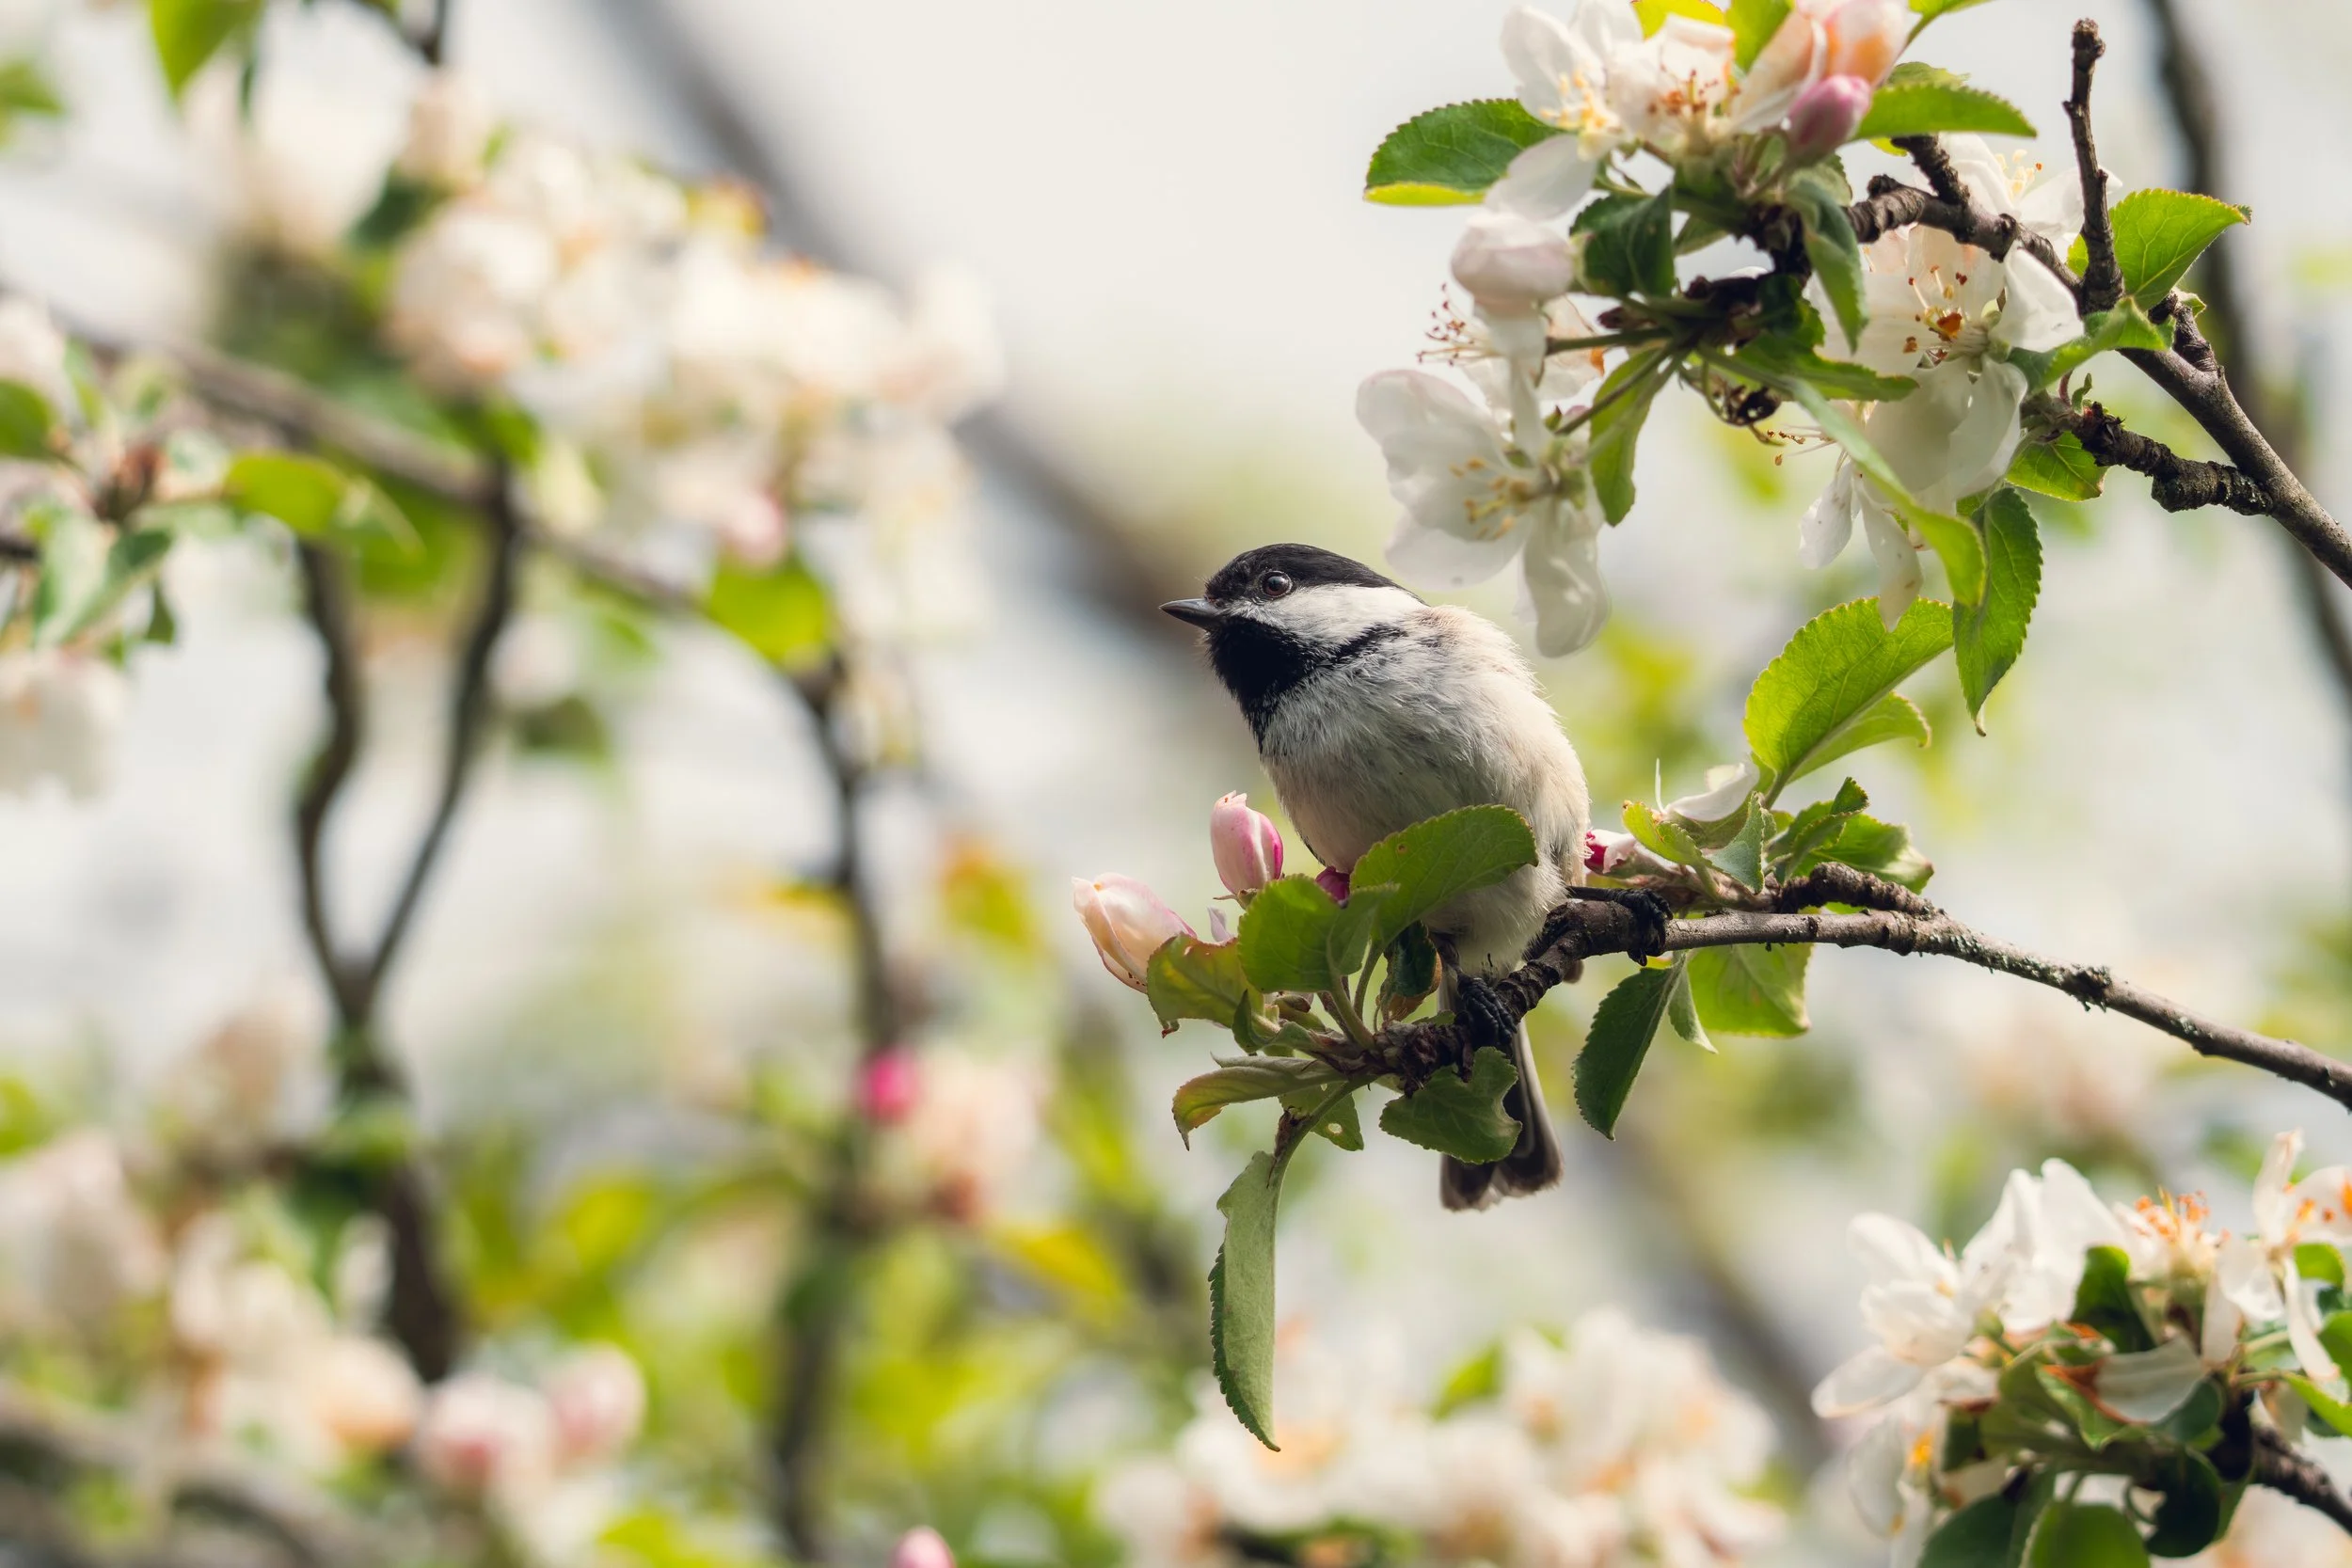
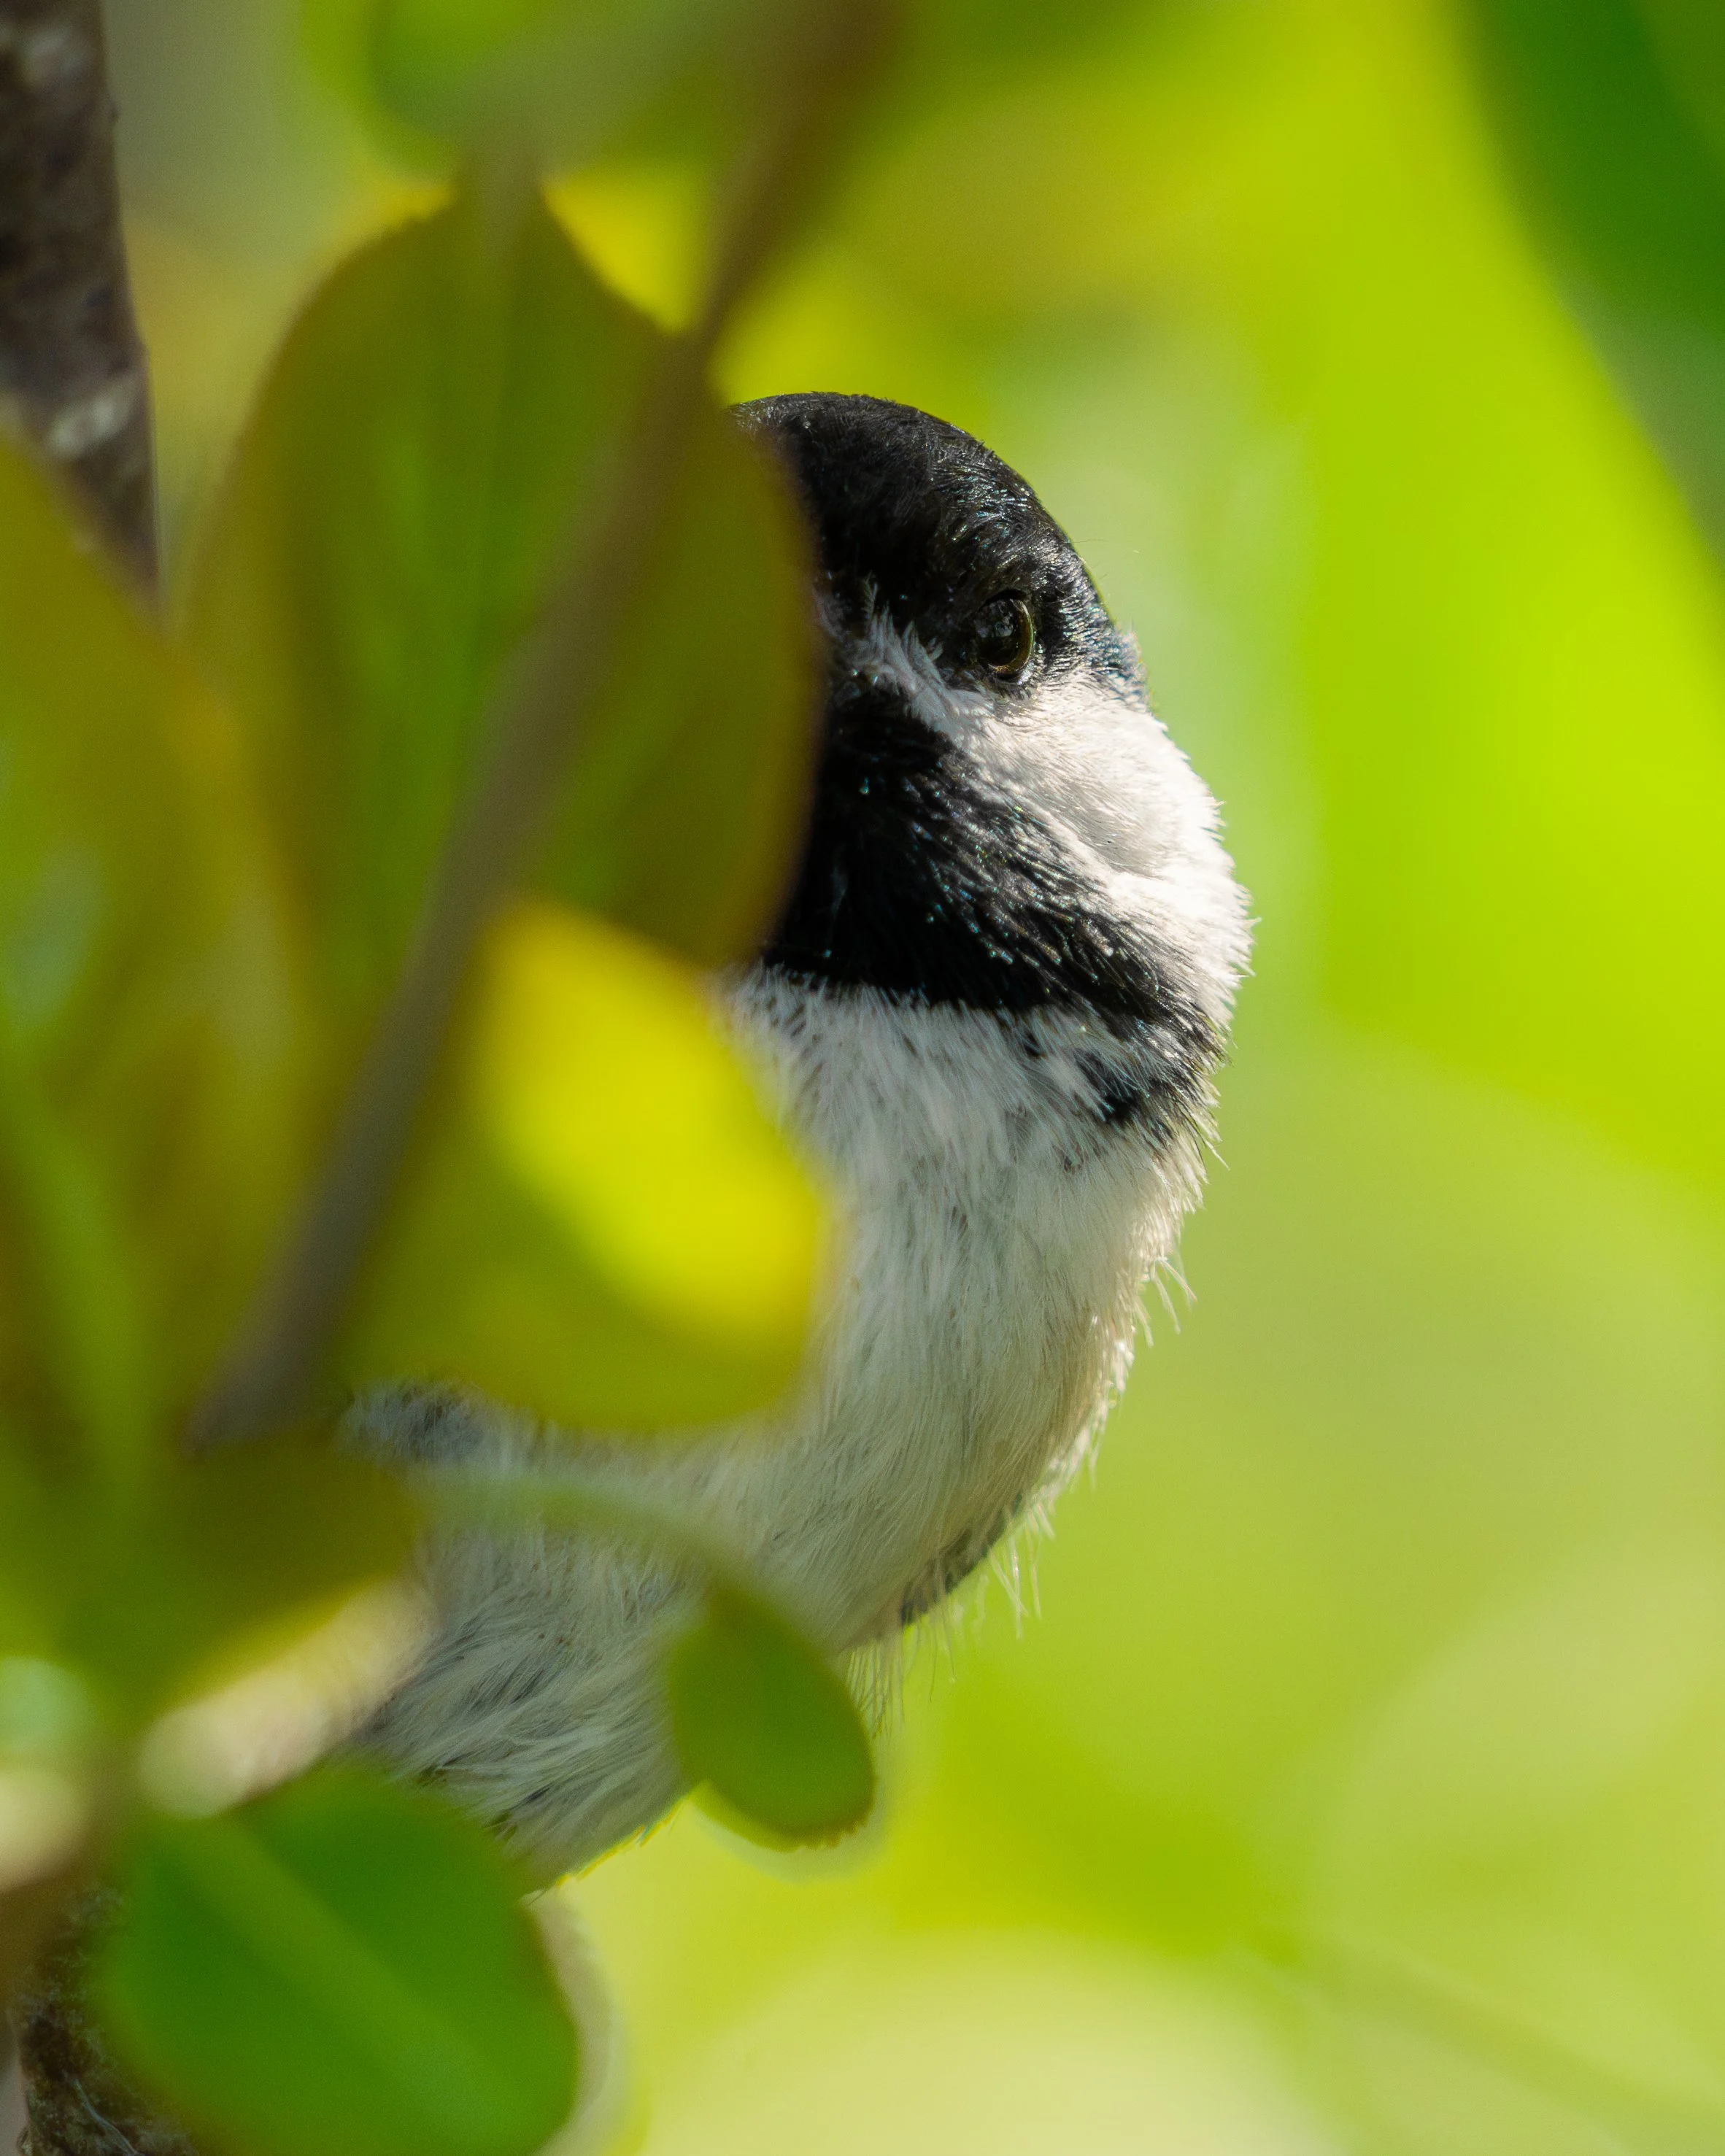
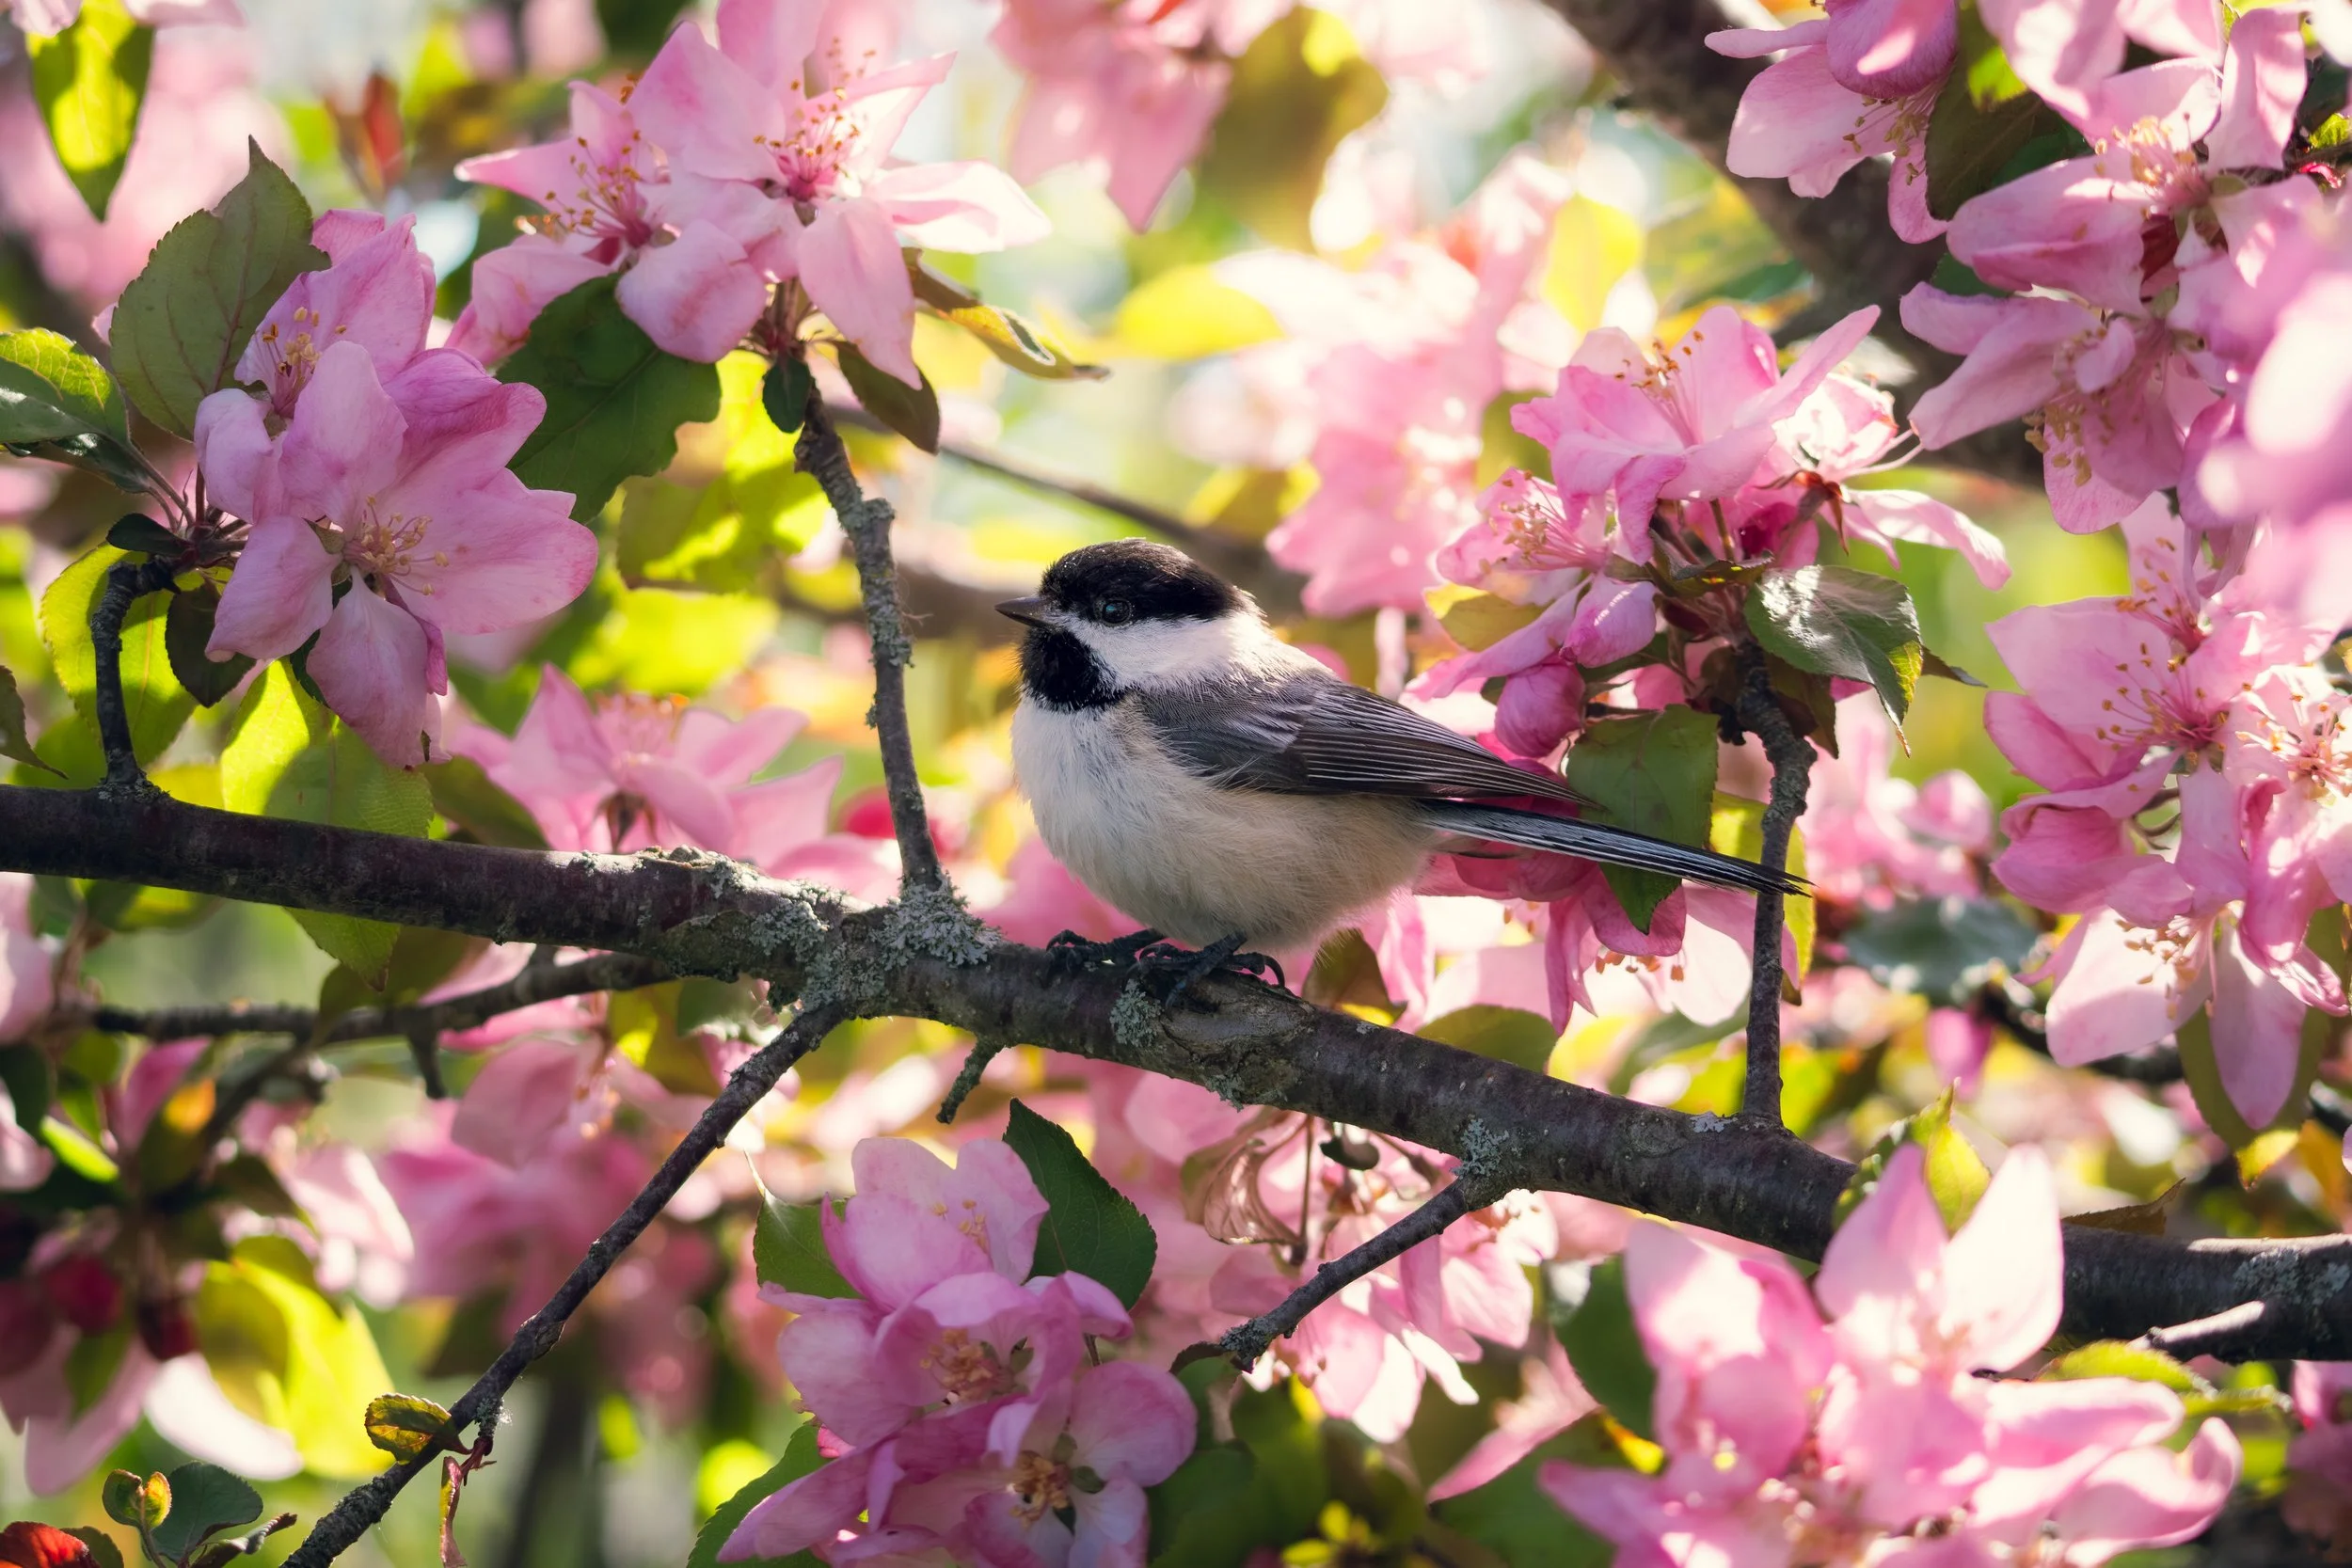
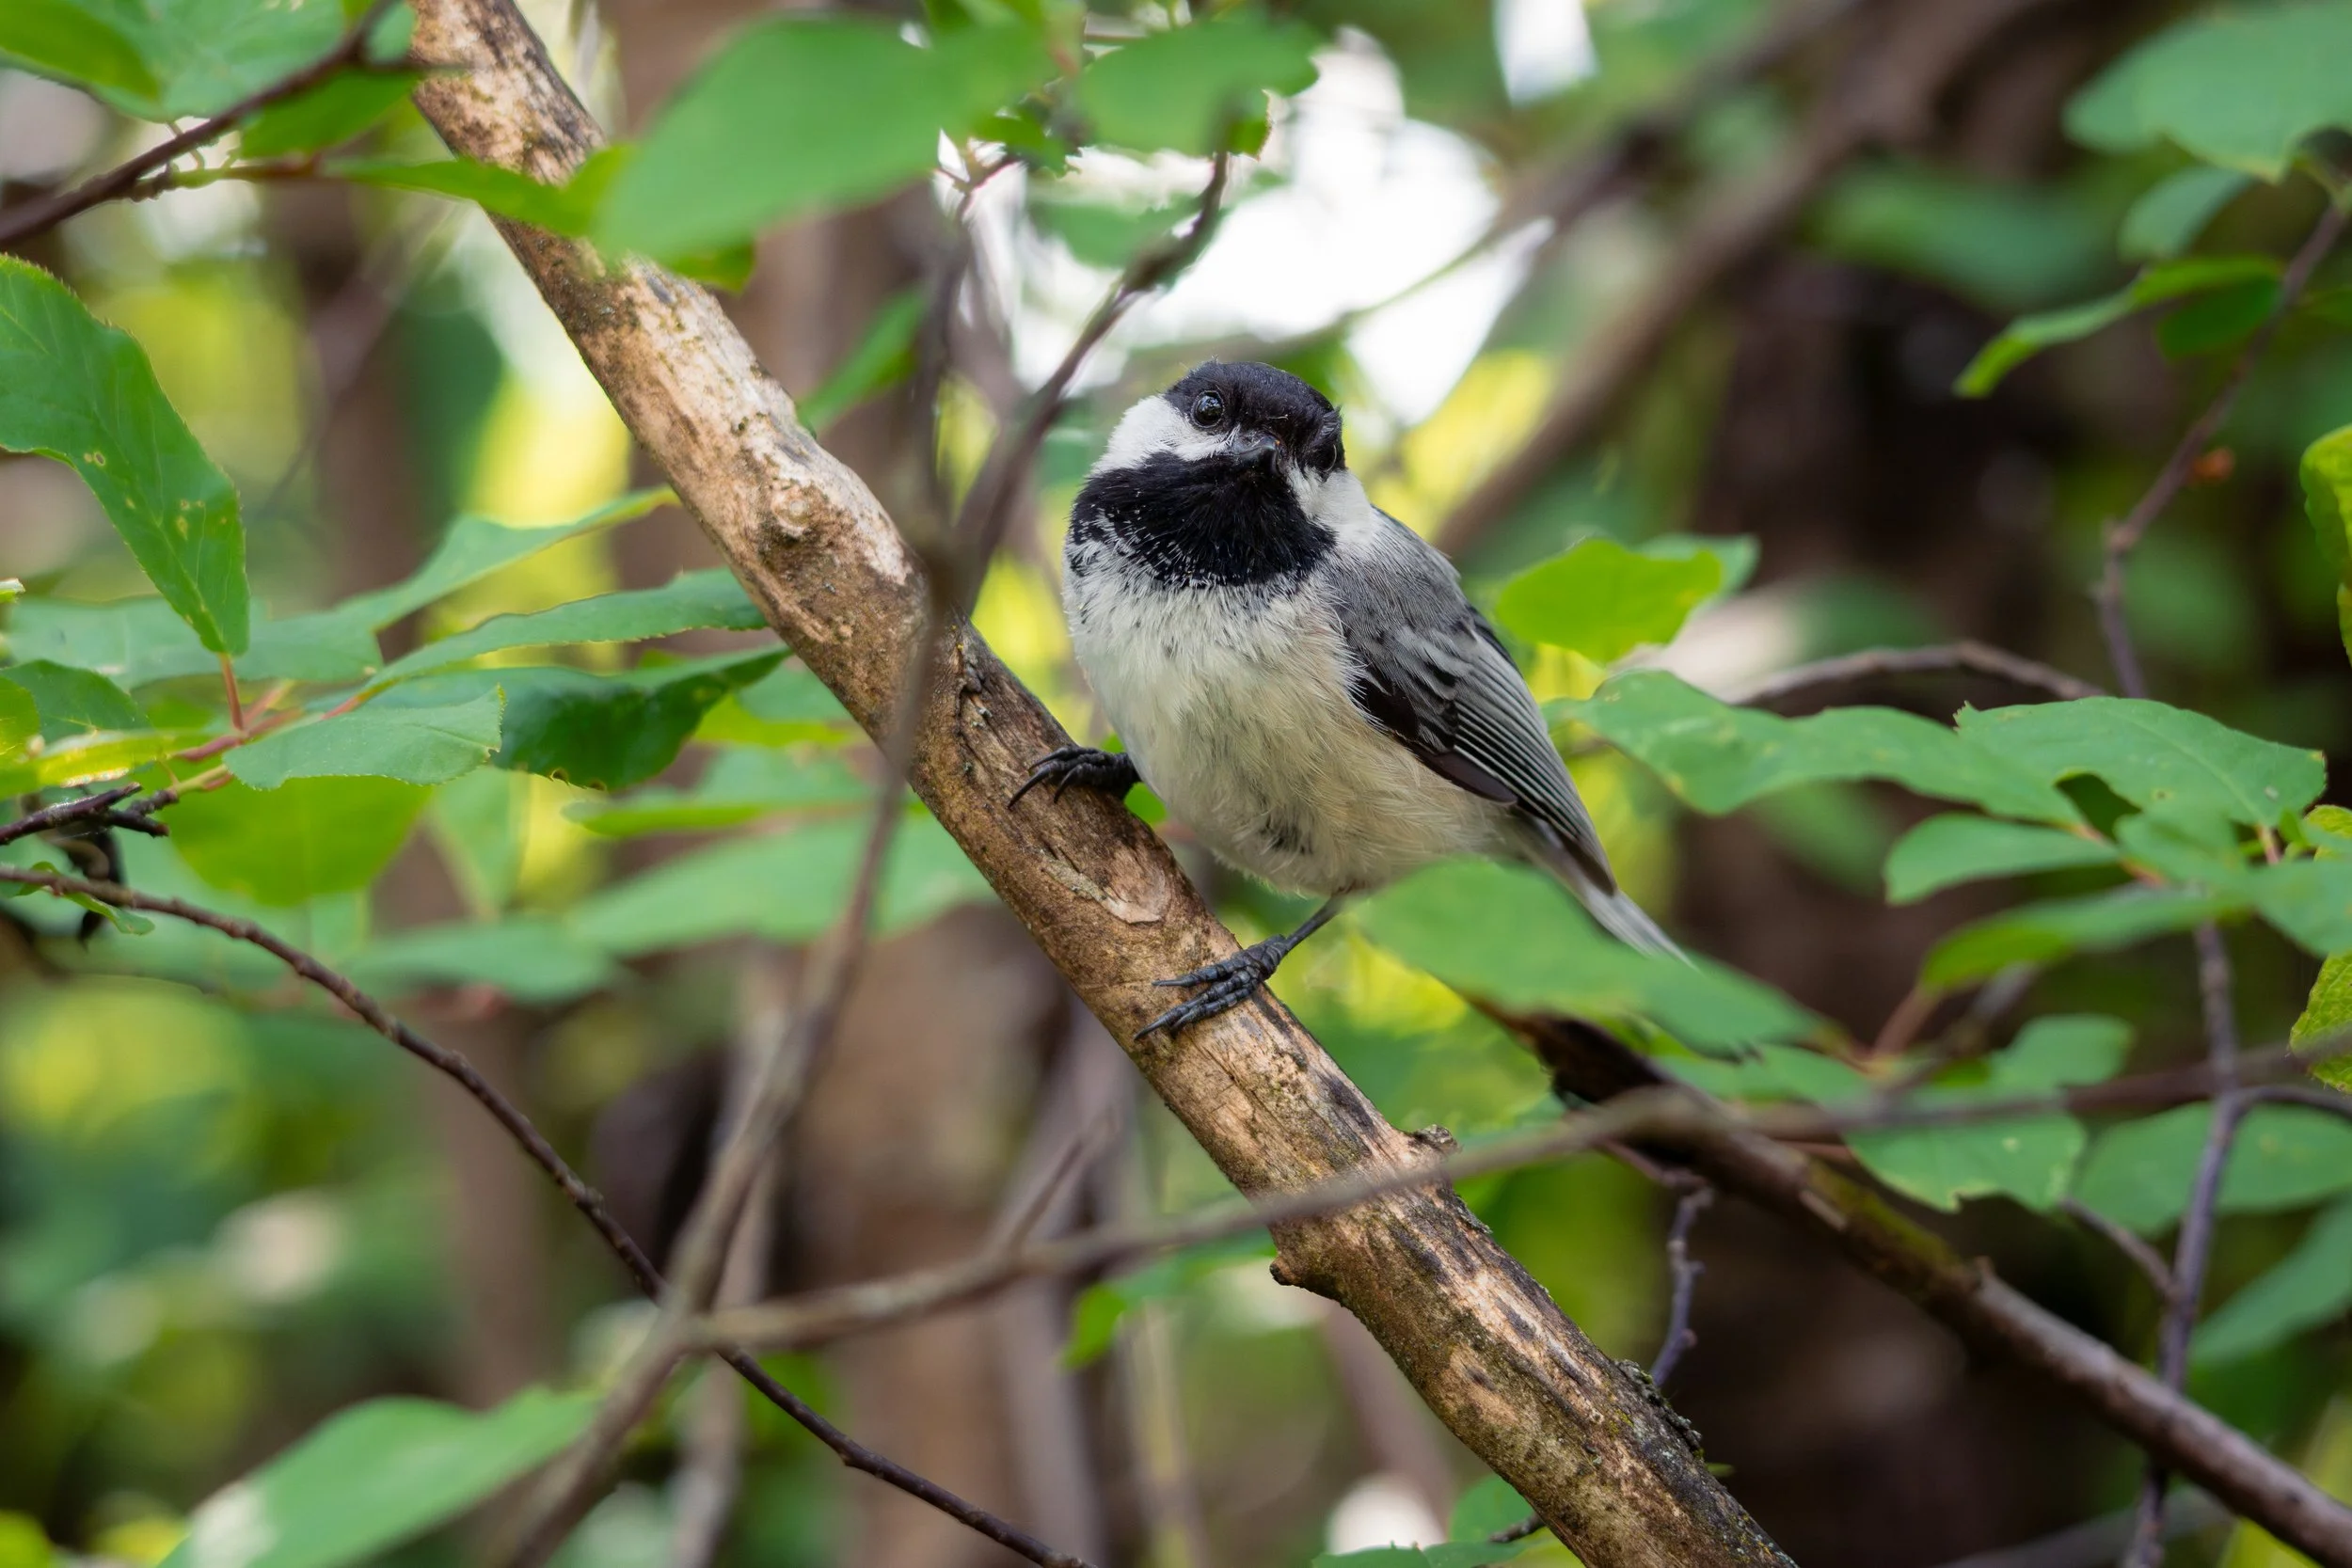
Take this Black-capped Chickadee, for example. A heavy crop of roughly 73% only seemed right to show off its adorable antics. The image still retains about 7 megapixels of resolution.
Of course, image quality only matters if you can actually get the shot in the first place, and this camera feels surprisingly speedy in a few ways.
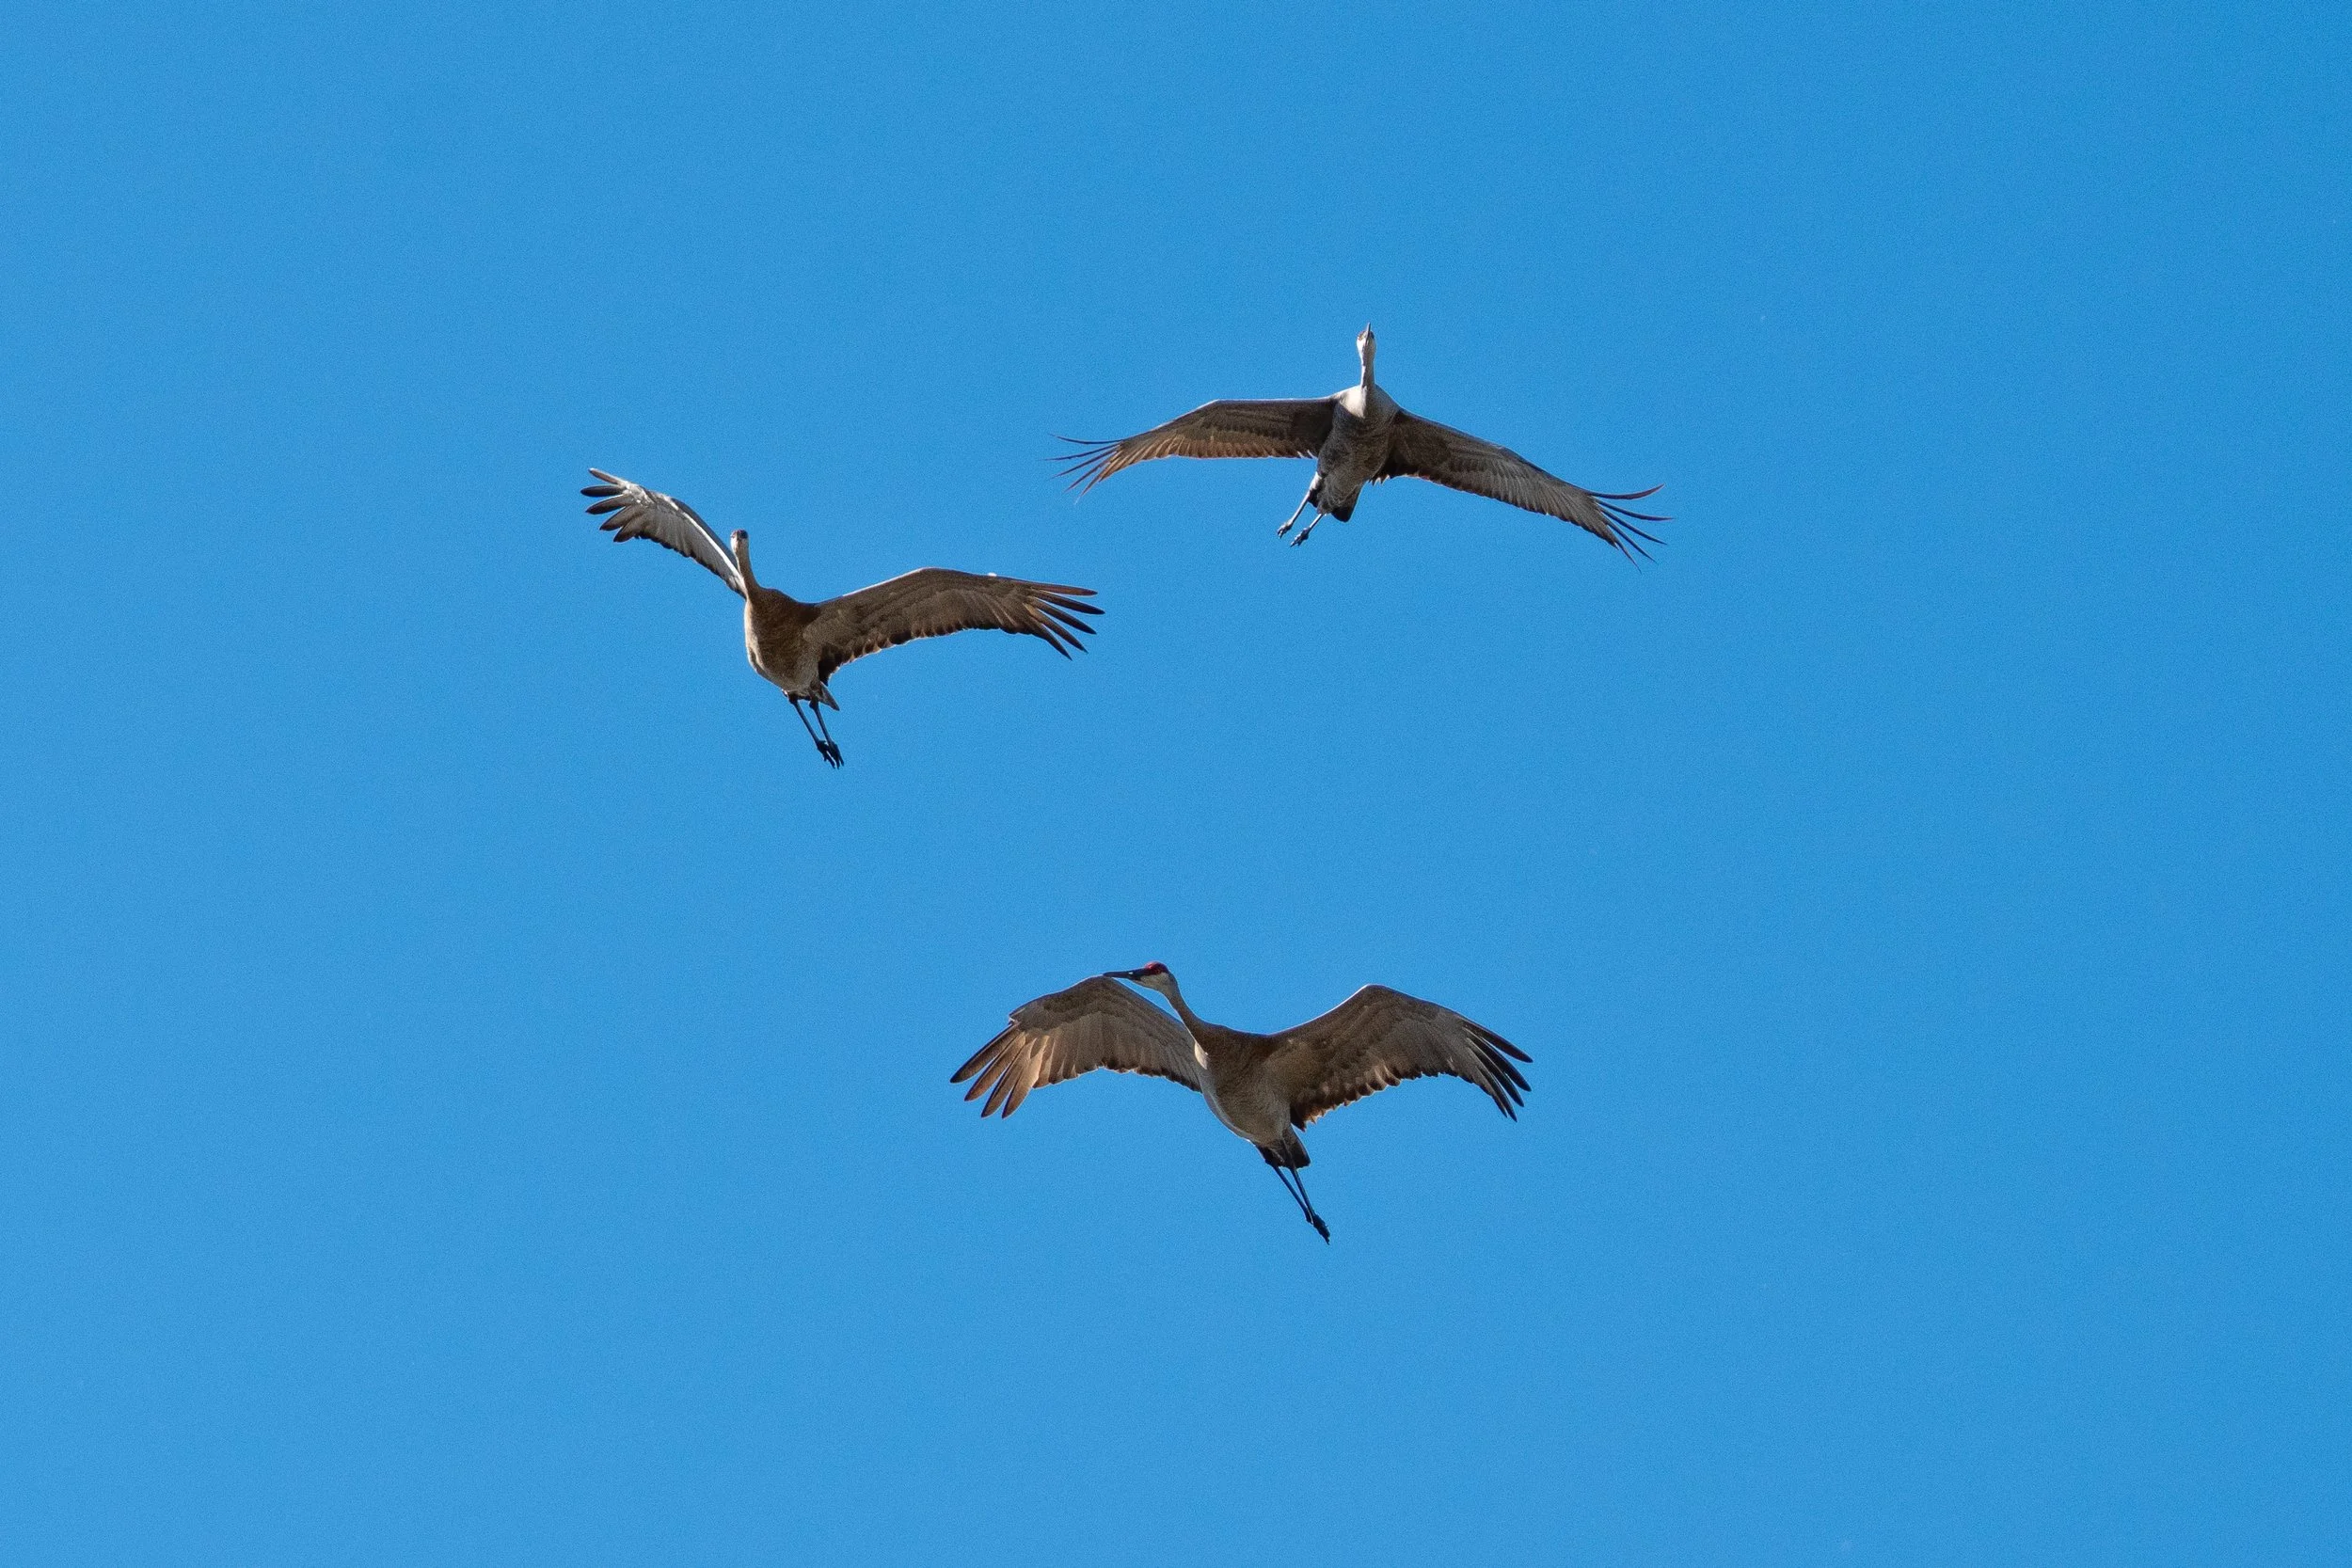
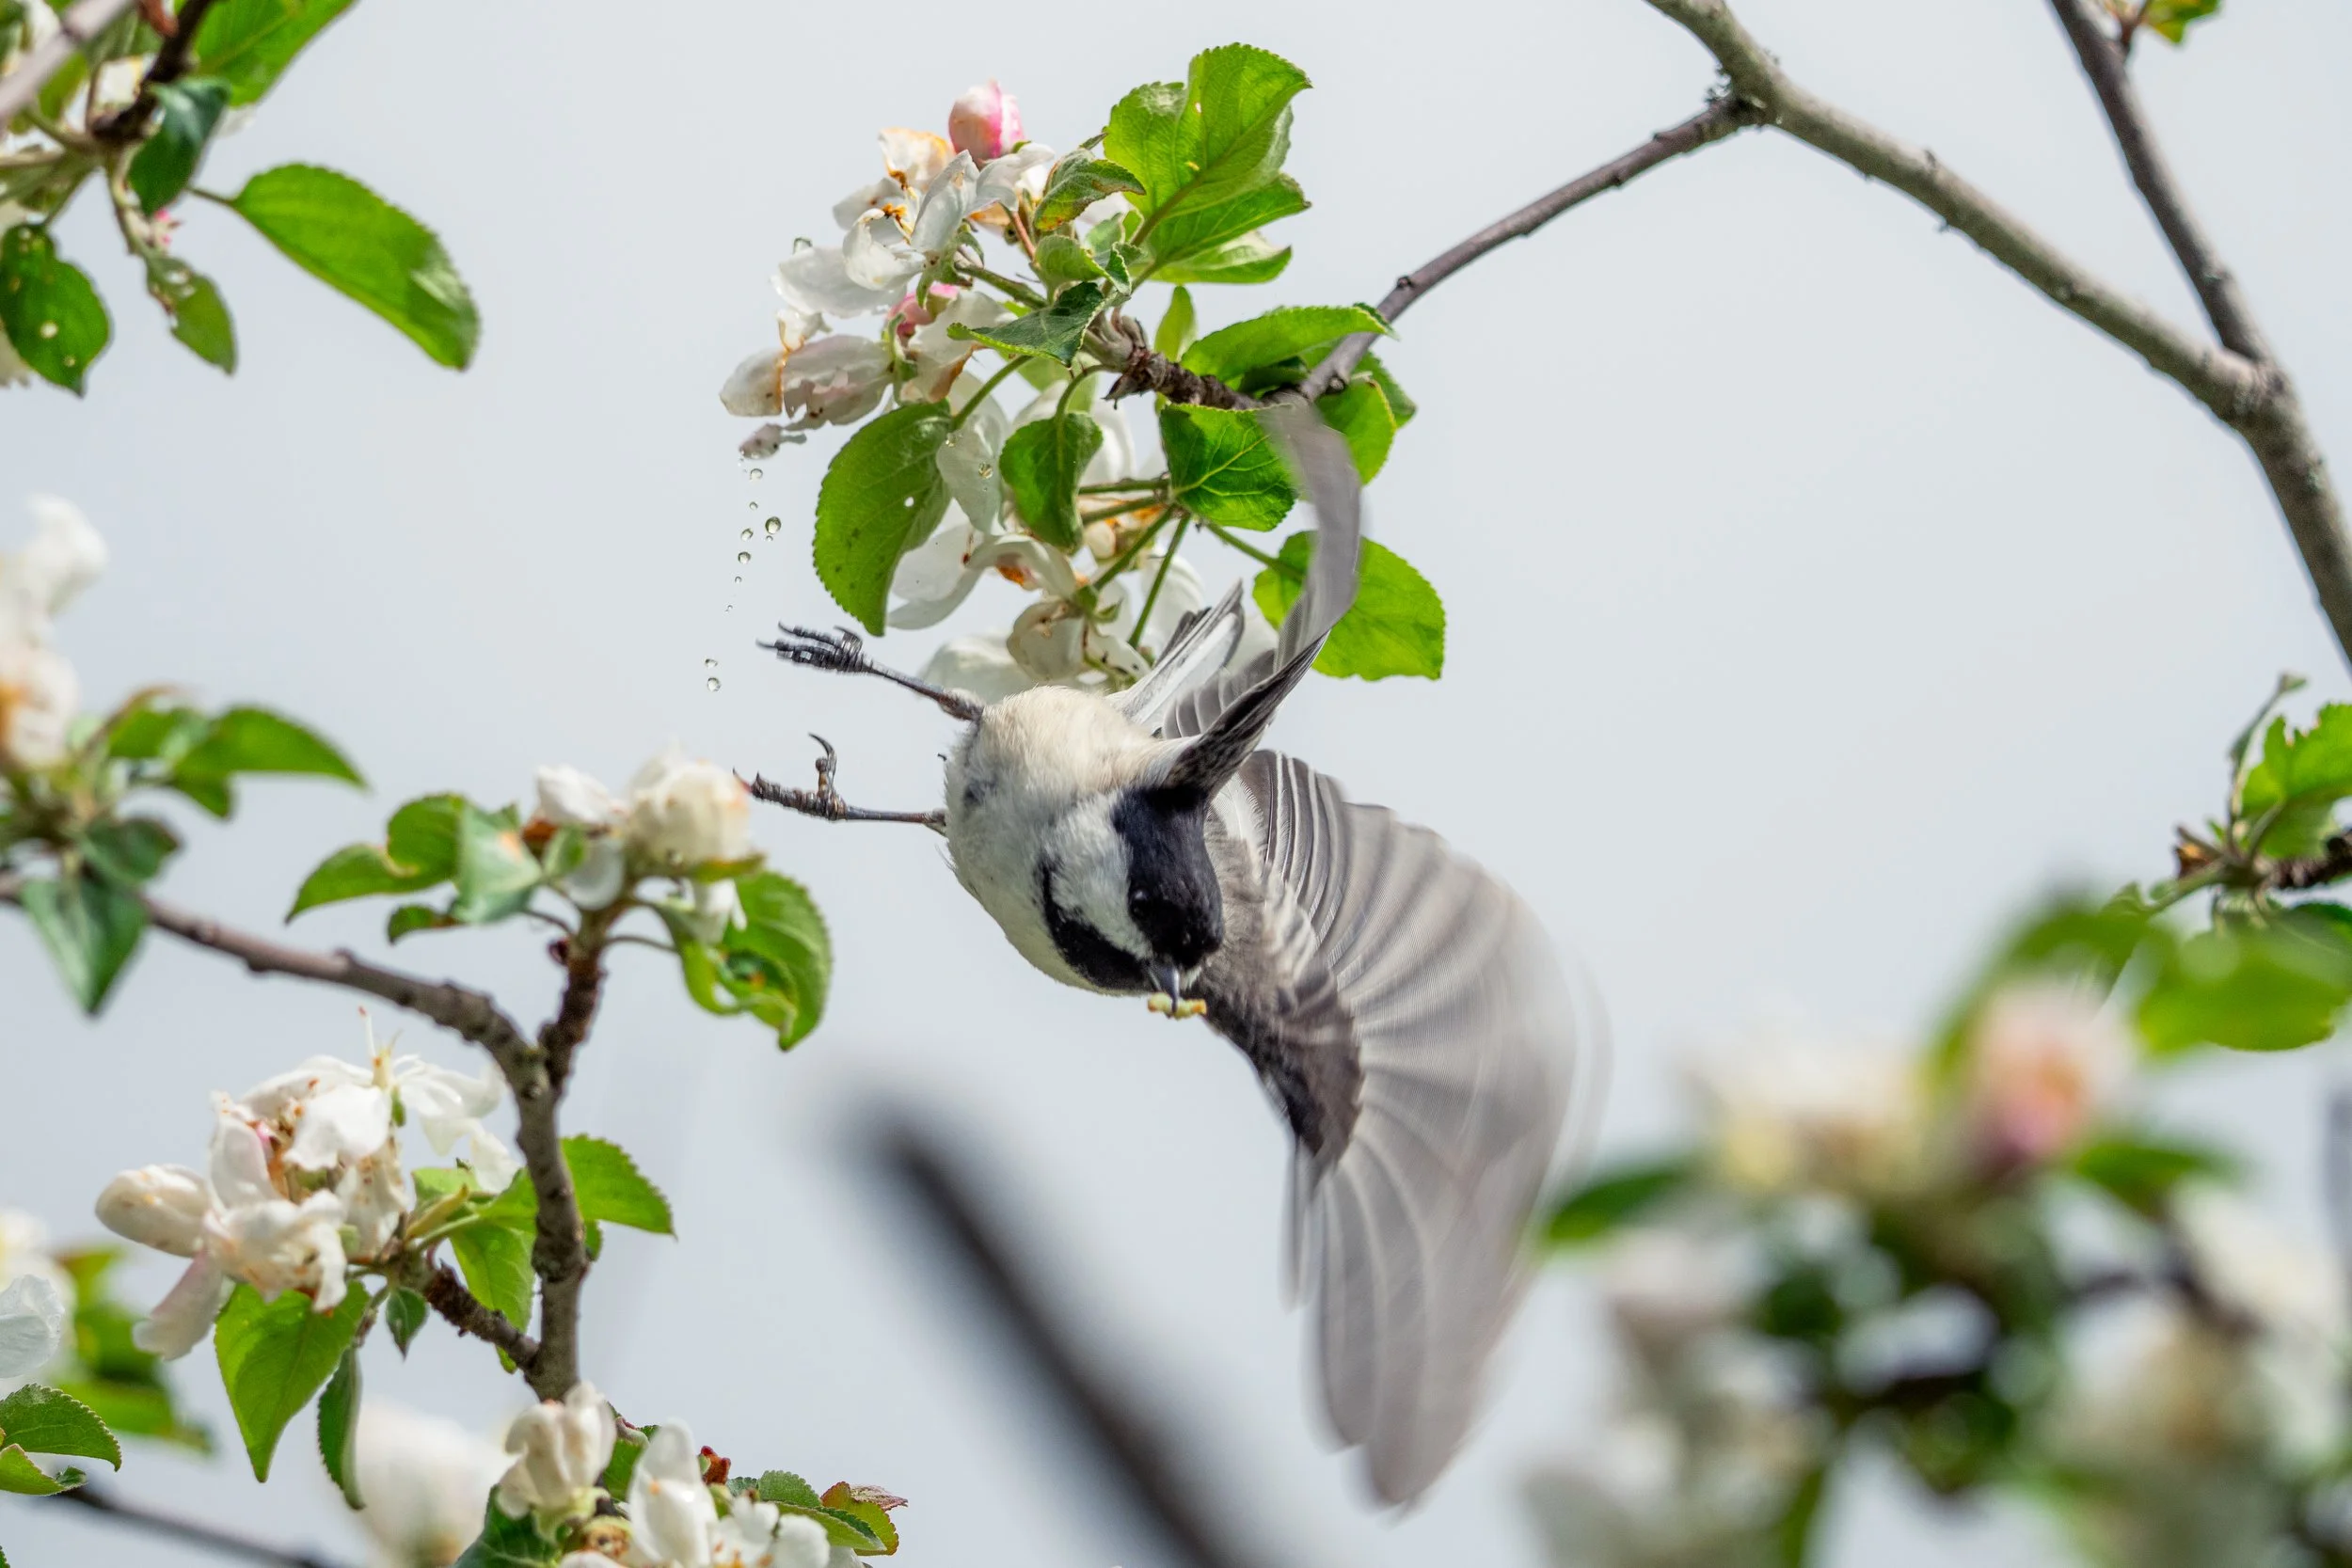
The camera can shoot up to 12 fps, which is noticeably faster than the 6 fps I typically use on my A7 IV when shooting uncompressed RAW. That extra speed was enough that a quick burst of images sometimes captured additional moments of a bird taking off, which was nice to have.
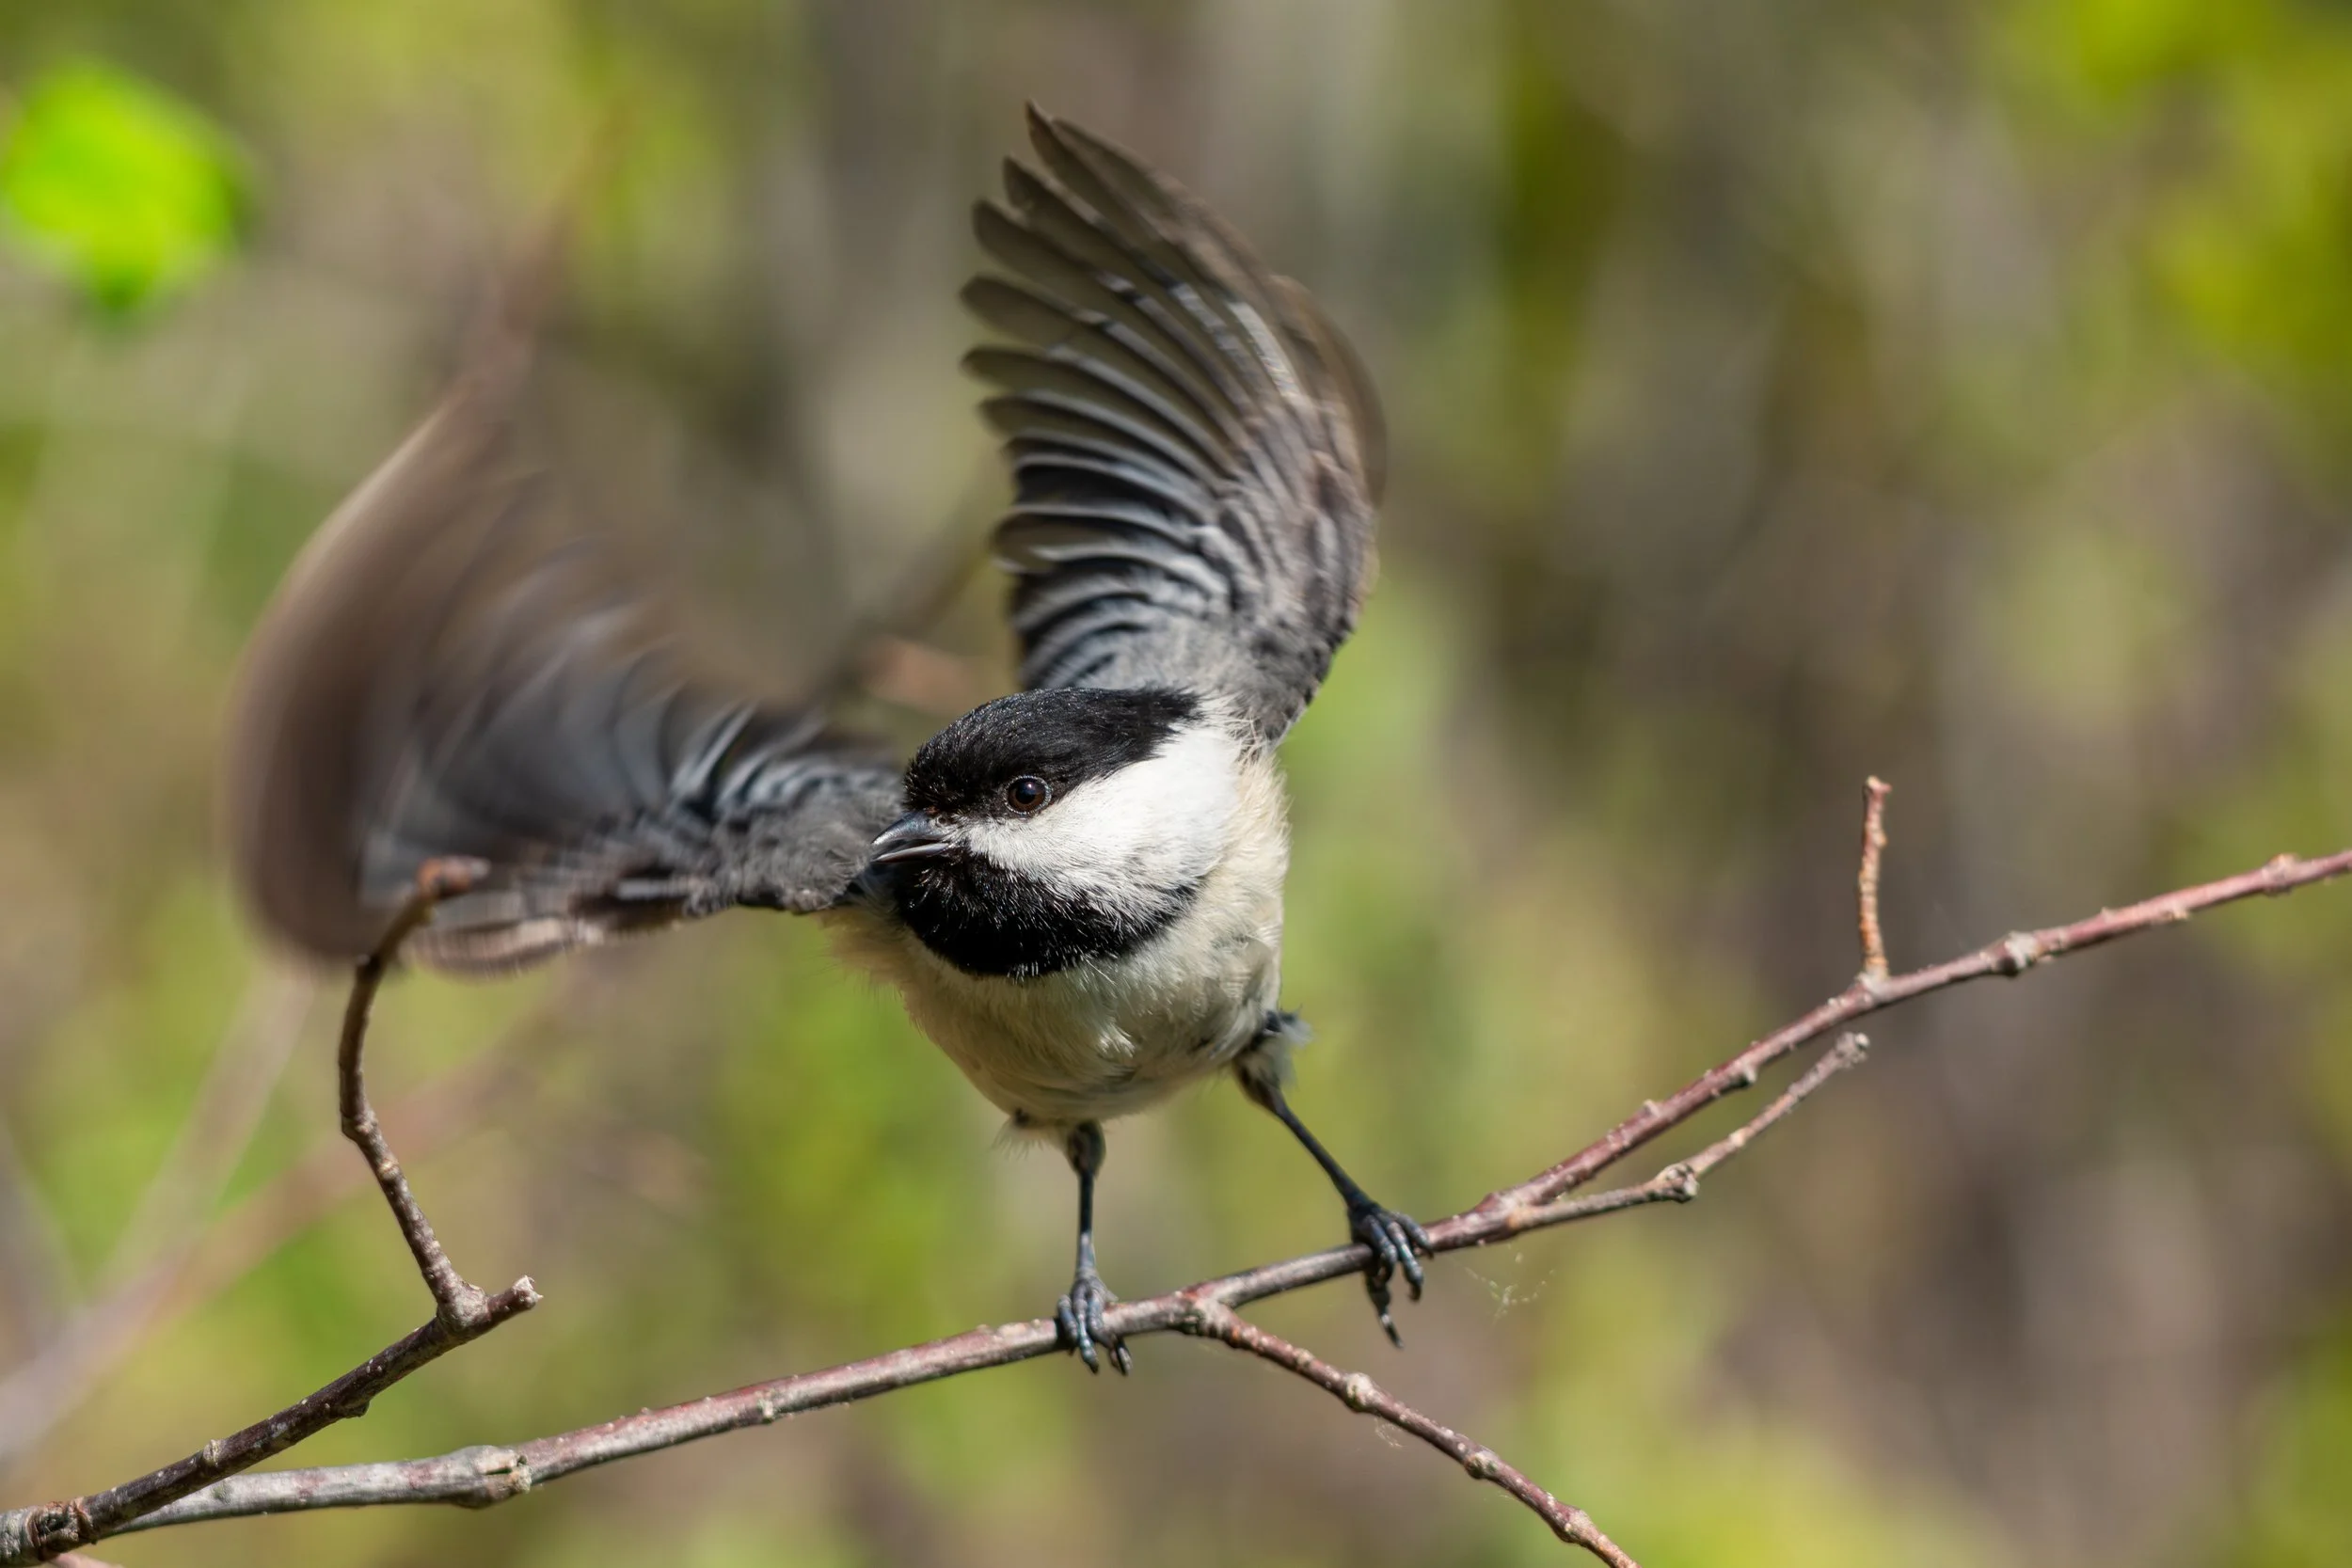
The autofocus keeps up really well, too! With Bird and Animal Eye AF enabled, the camera was able to lock onto subjects very quickly, and throughout this outing it felt every bit as capable as my A7 IV.
I personally like pairing Eye AF with the Tracking focus mode. This gives you a focus spot that you place over the subject initially, and once focus is acquired, the camera will continue tracking that subject as it moves around the frame.
Usually, I’ll swap between a small and medium centre focus spot and a zone focus area for birds in flight. However, one of the first things I noticed was the ZV-E10 II only offers a large centre focus spot and a zone focus area in its tracking modes. Smaller focus spots can be useful for avoiding branches and foliage around a bird, but nonetheless, the limited options didn’t slow me down.
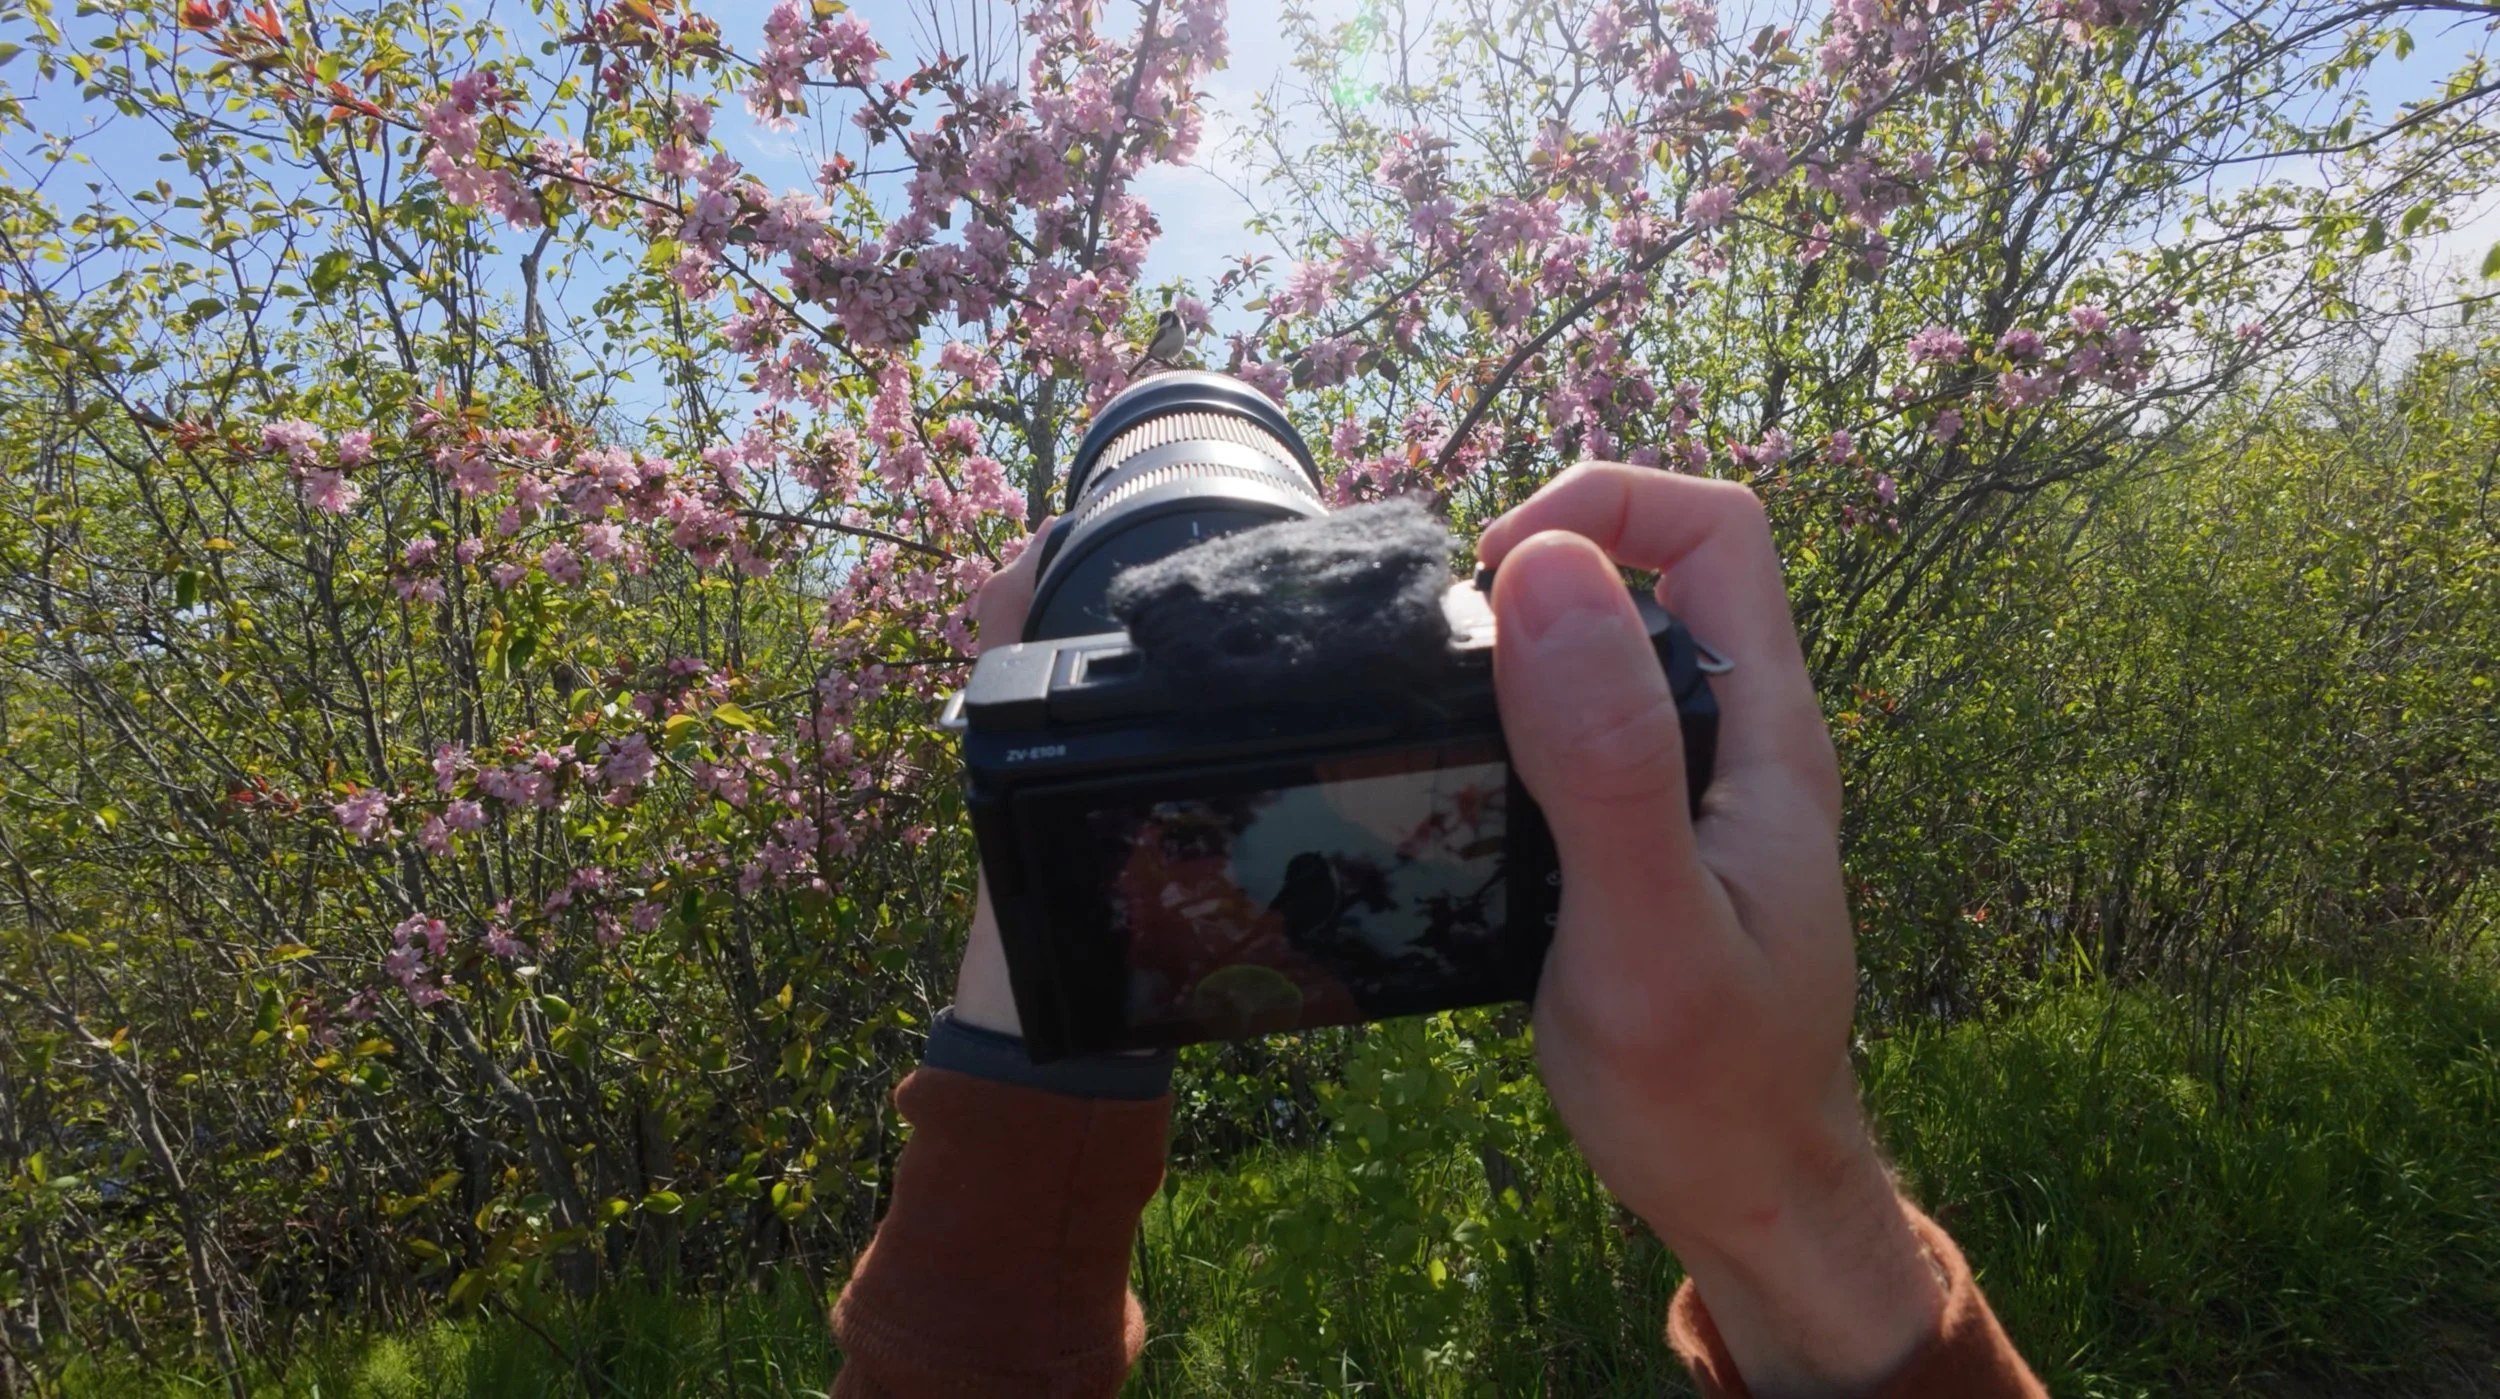
Now, you might have noticed something about this camera - it doesn't have an electronic viewfinder!
I'll admit, at first, it felt really unnatural. Normally, I'd lift the camera to my eye and line the bird up quite quickly. In this case, I had to hold the camera out in front of me and try to keep it steady while searching for the bird on the back screen.
Not ideal, but with the lightweight setup I had, I was able to adjust surprisingly quickly. Once I increased the screen brightness for the sunny conditions, I found it much easier to use.
I even managed to capture some fast action where I only had a split second to lock focus on a kingfisher flying by. It was shot at 100mm, which definitely helped me frame the bird up a little bit quicker.
As for how I had this camera set up for photos, it took a bit of experimentation to find something that worked for me.
I shoot in Manual mode with Auto ISO. The top dial controlled shutter speed, while the rear control wheel handled exposure compensation. This gave me quick access to the settings I adjust most often when photographing wildlife.
That left aperture as the odd one out. Since there's no third dial available, I had to adjust it using the touchscreen and directional buttons. It's slower, but because I usually leave my aperture alone for long stretches of a wildlife outing, it felt like the most reasonable compromise.
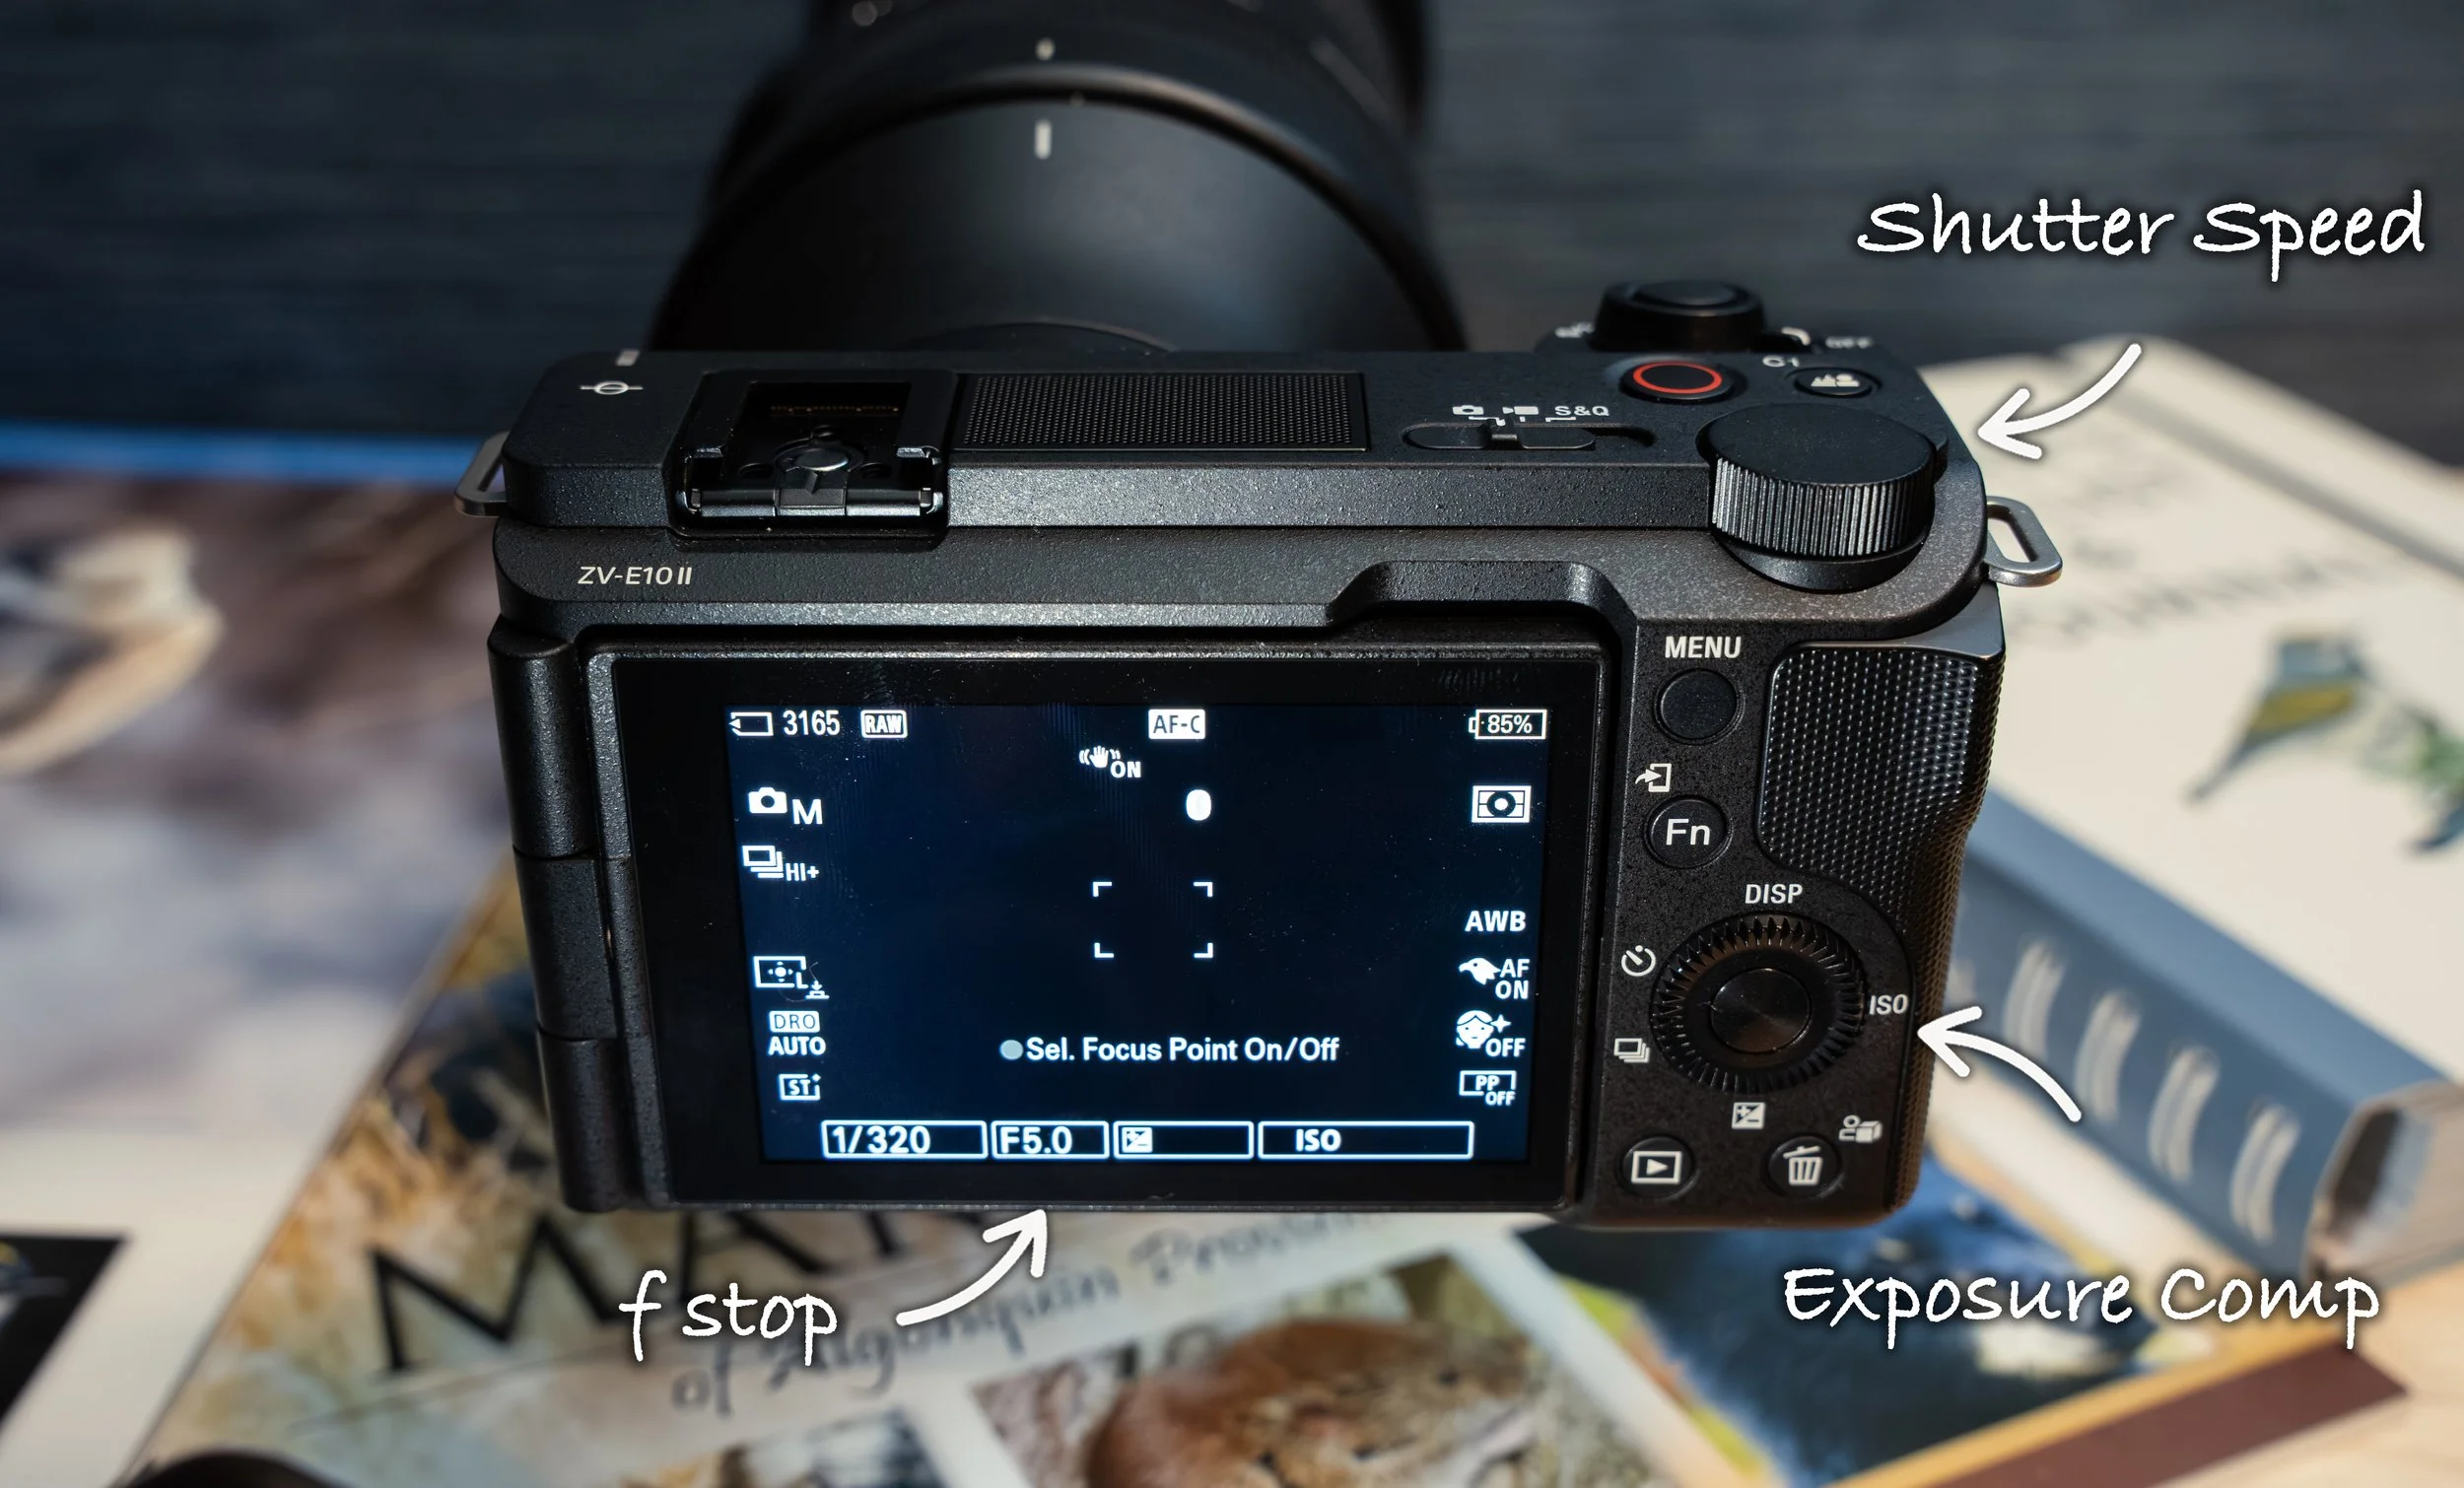
The exposure compensation wheel can be turned or pressed for directional buttons.
One concern I had before taking the camera out was the lack of a physical shutter. With my A7 IV, I generally avoid shooting wildlife in silent mode because rolling shutter can sometimes cause a weird jello-like distortion if either I or the subject moves too quickly. Thankfully, that never became a noticeable issue on the ZV-E10 II during this outing, even when the birds moved erratically.
The overall build quality of this camera feels nice. It's very lightweight at just 292 g (10.3 oz) and made from recycled plastic that honestly feels quite tactile and comfortable to hold. It isn't weather-sealed, and I did notice a bit of creaking from the body with a large lens attached (the sigma weighs 1140 g / 40.2 oz), something I hadn't noticed before.
Overall, I was pleasantly surprised by my experience with this camera, especially considering wildlife photography isn't really what it was designed for. The Sony ZV-E10 II was built to be a beginner-friendly vlogging camera with some serious video potential, which is exactly why I bought it.
Up until now, I was shooting most of my video on an iPhone. The ZV-E10 II is small and lightweight enough to replace it without feeling like another piece of gear weighing me down on my wildlife outings. I can clip it to my belt or backpack and quickly grab it whenever I want to film some B-roll or take the occasional landscape photo, making it a natural fit as my new secondary camera.
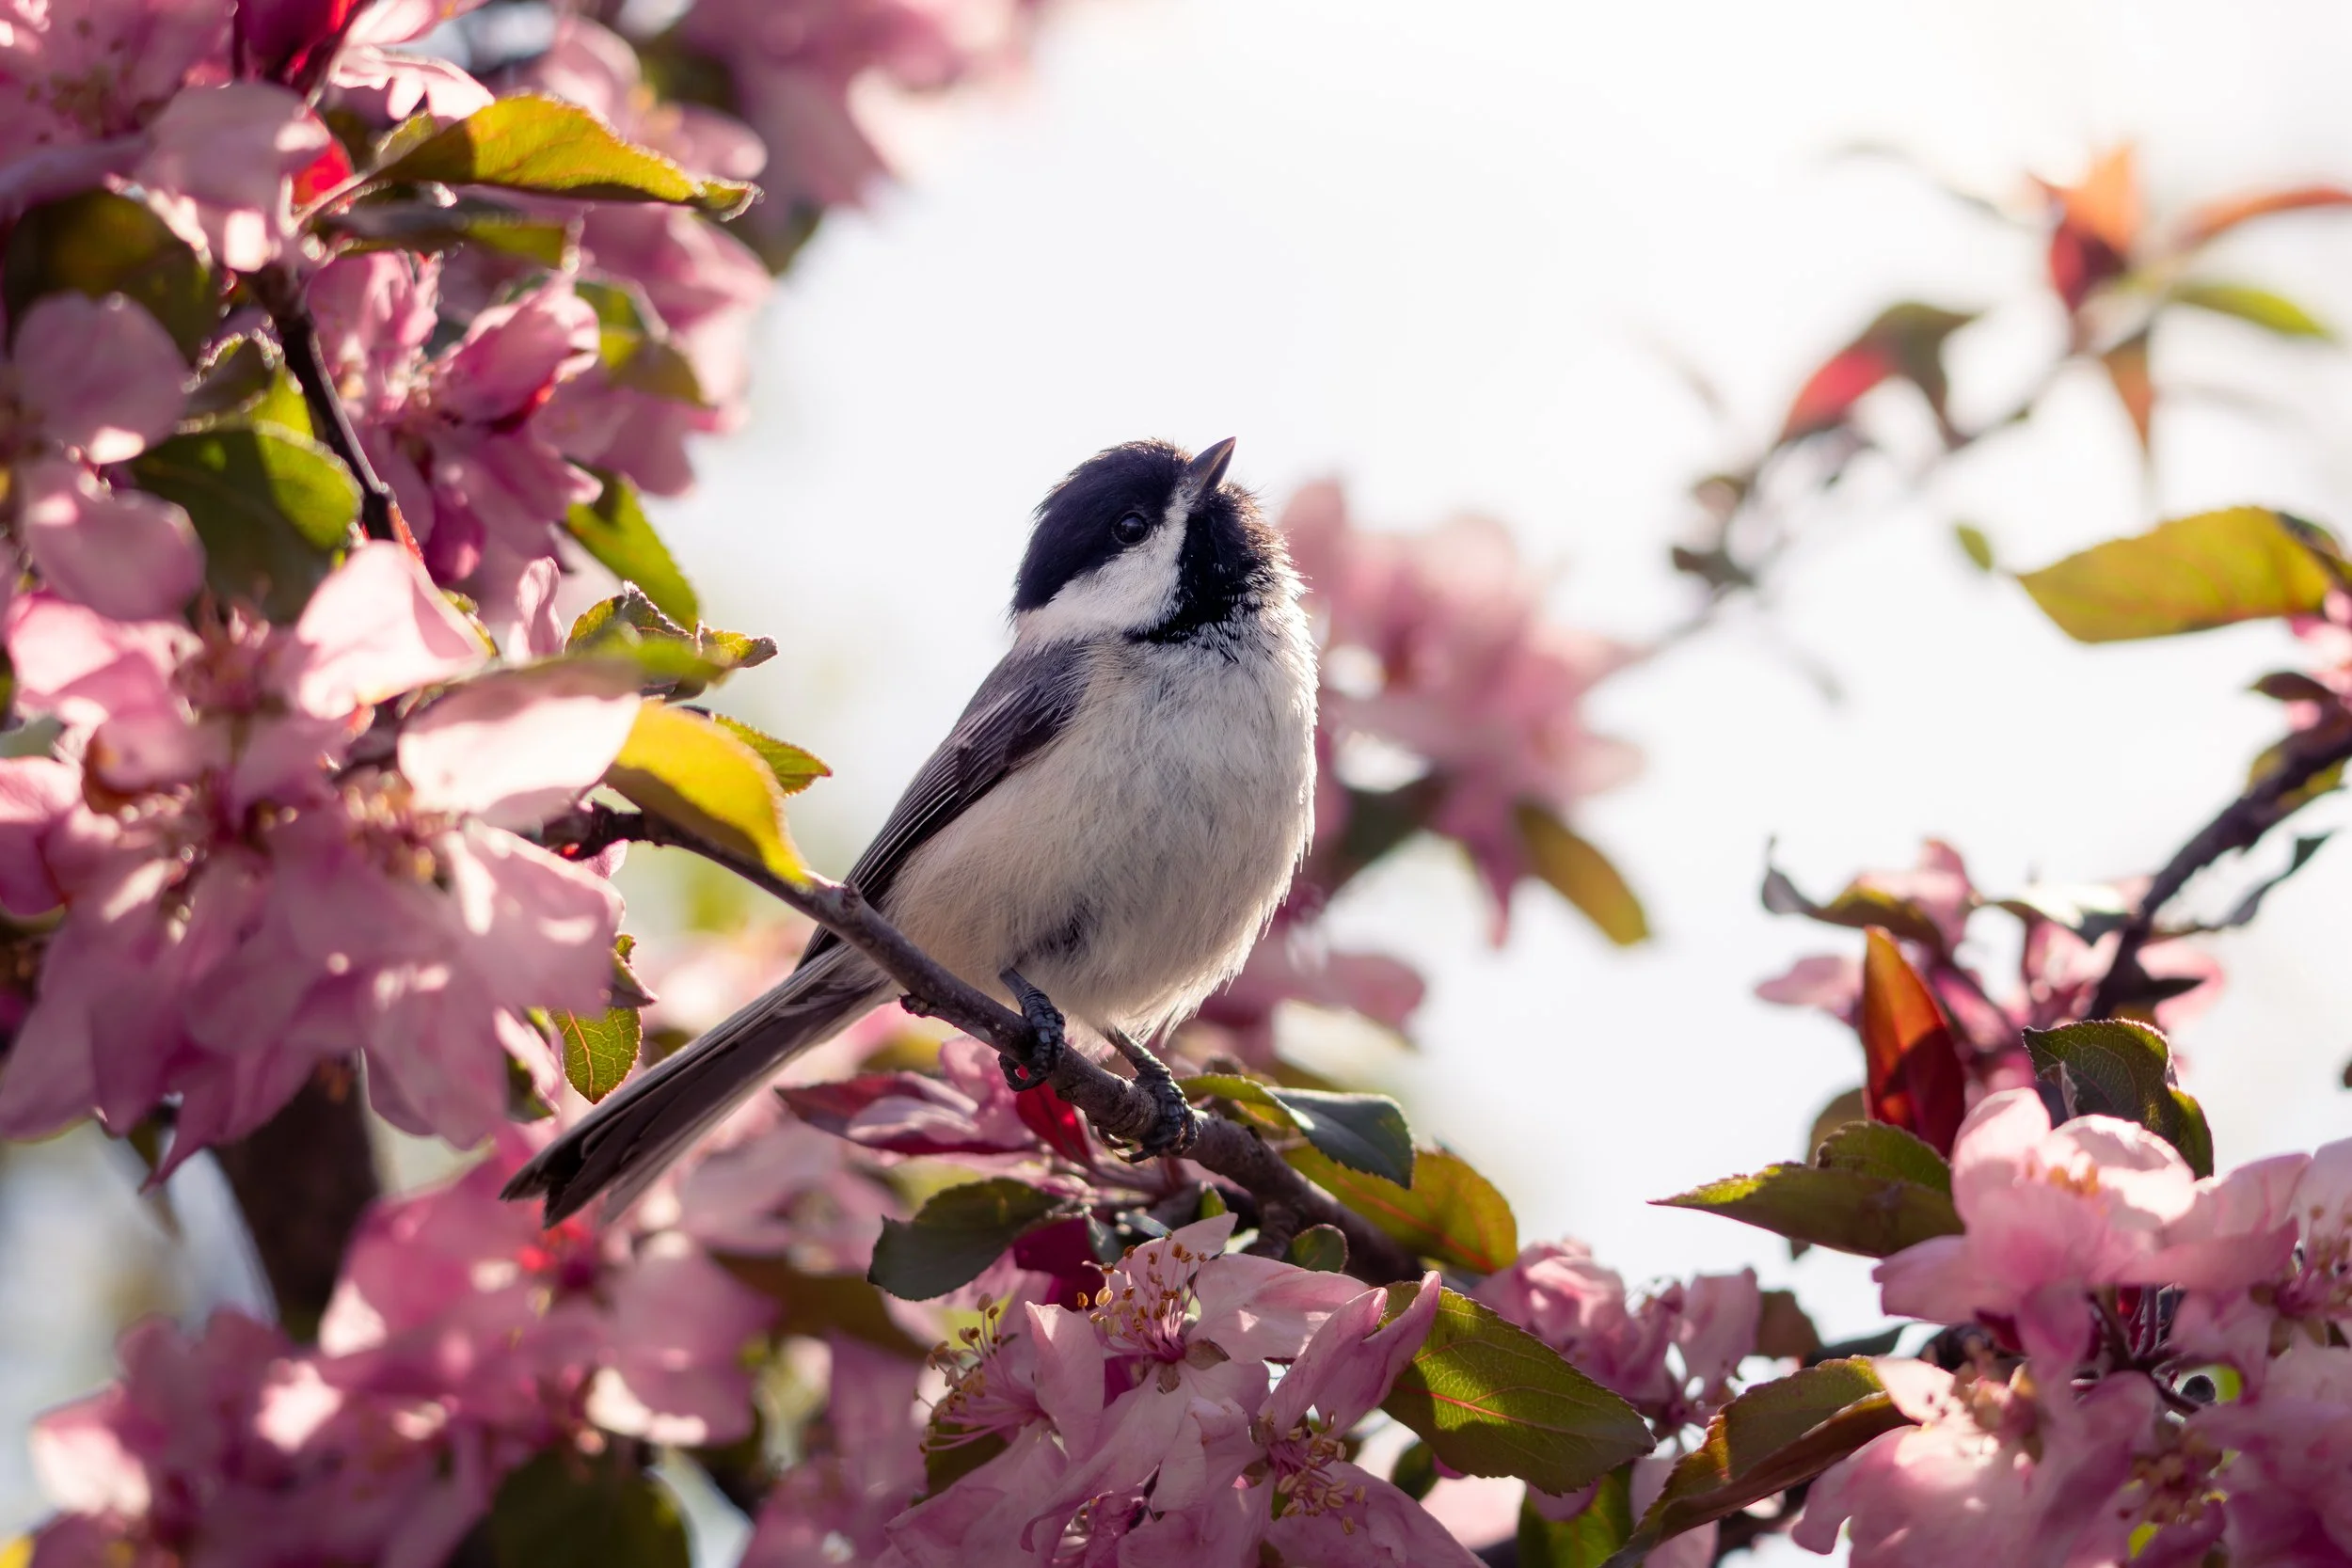
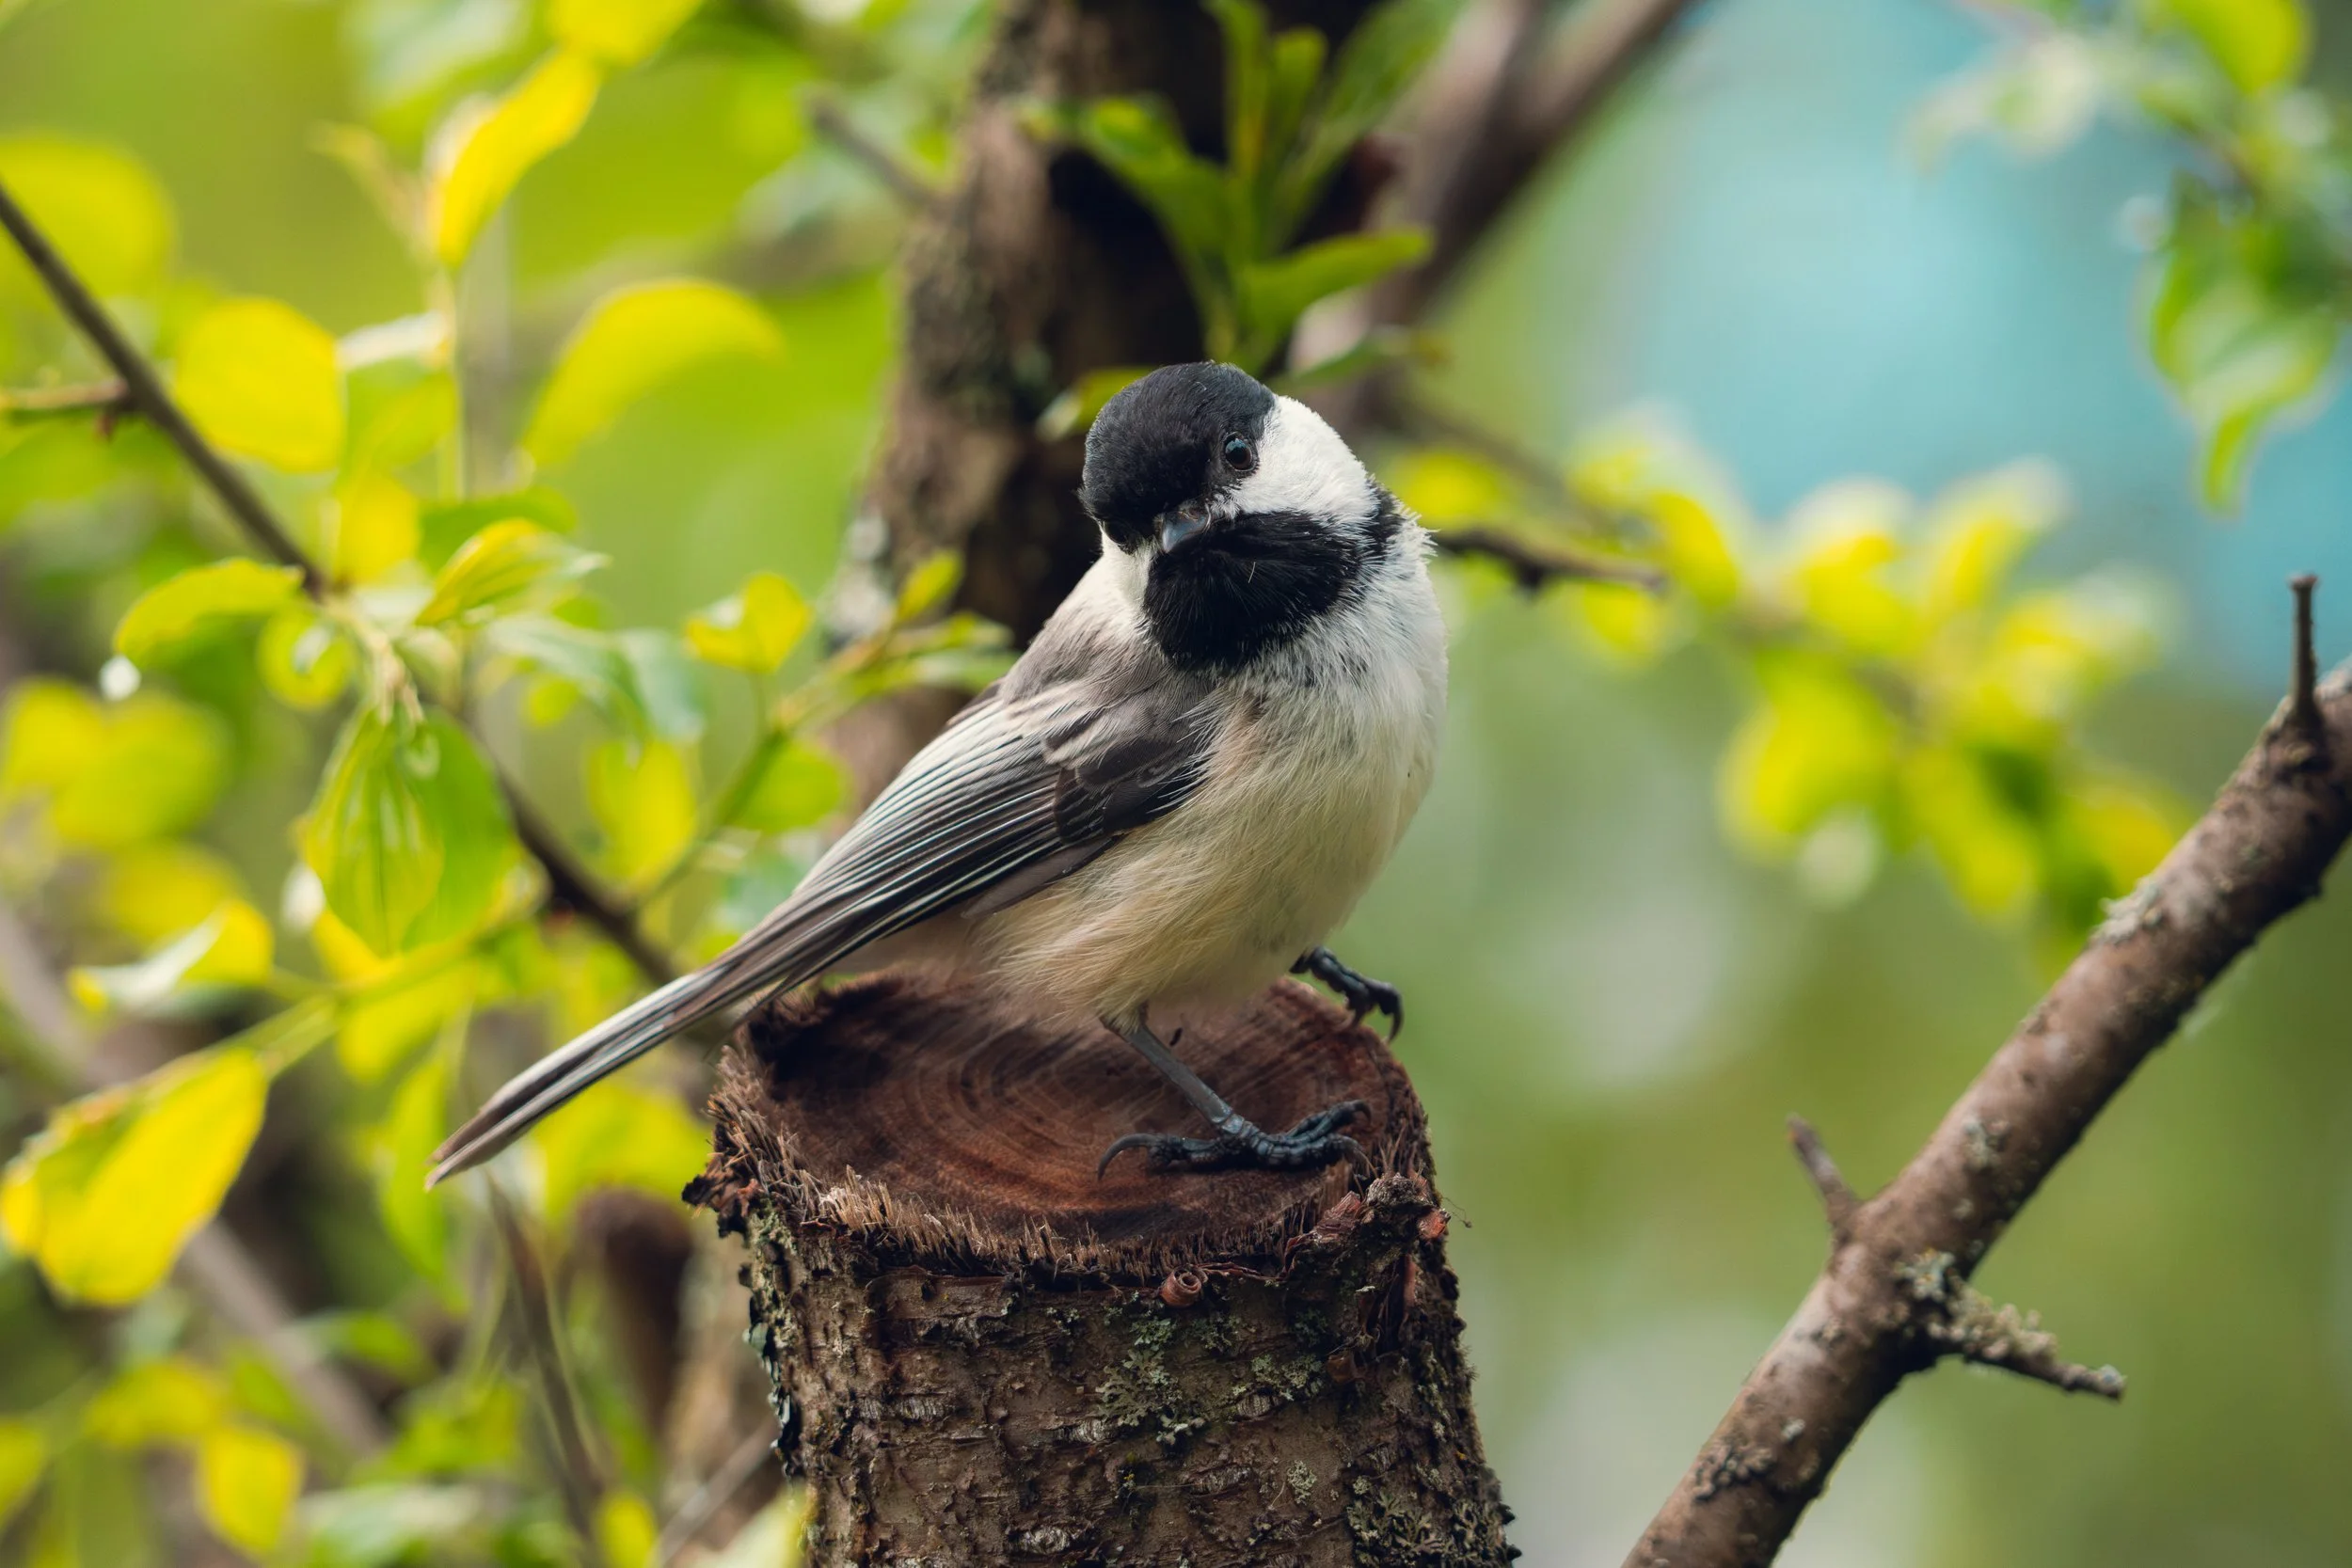
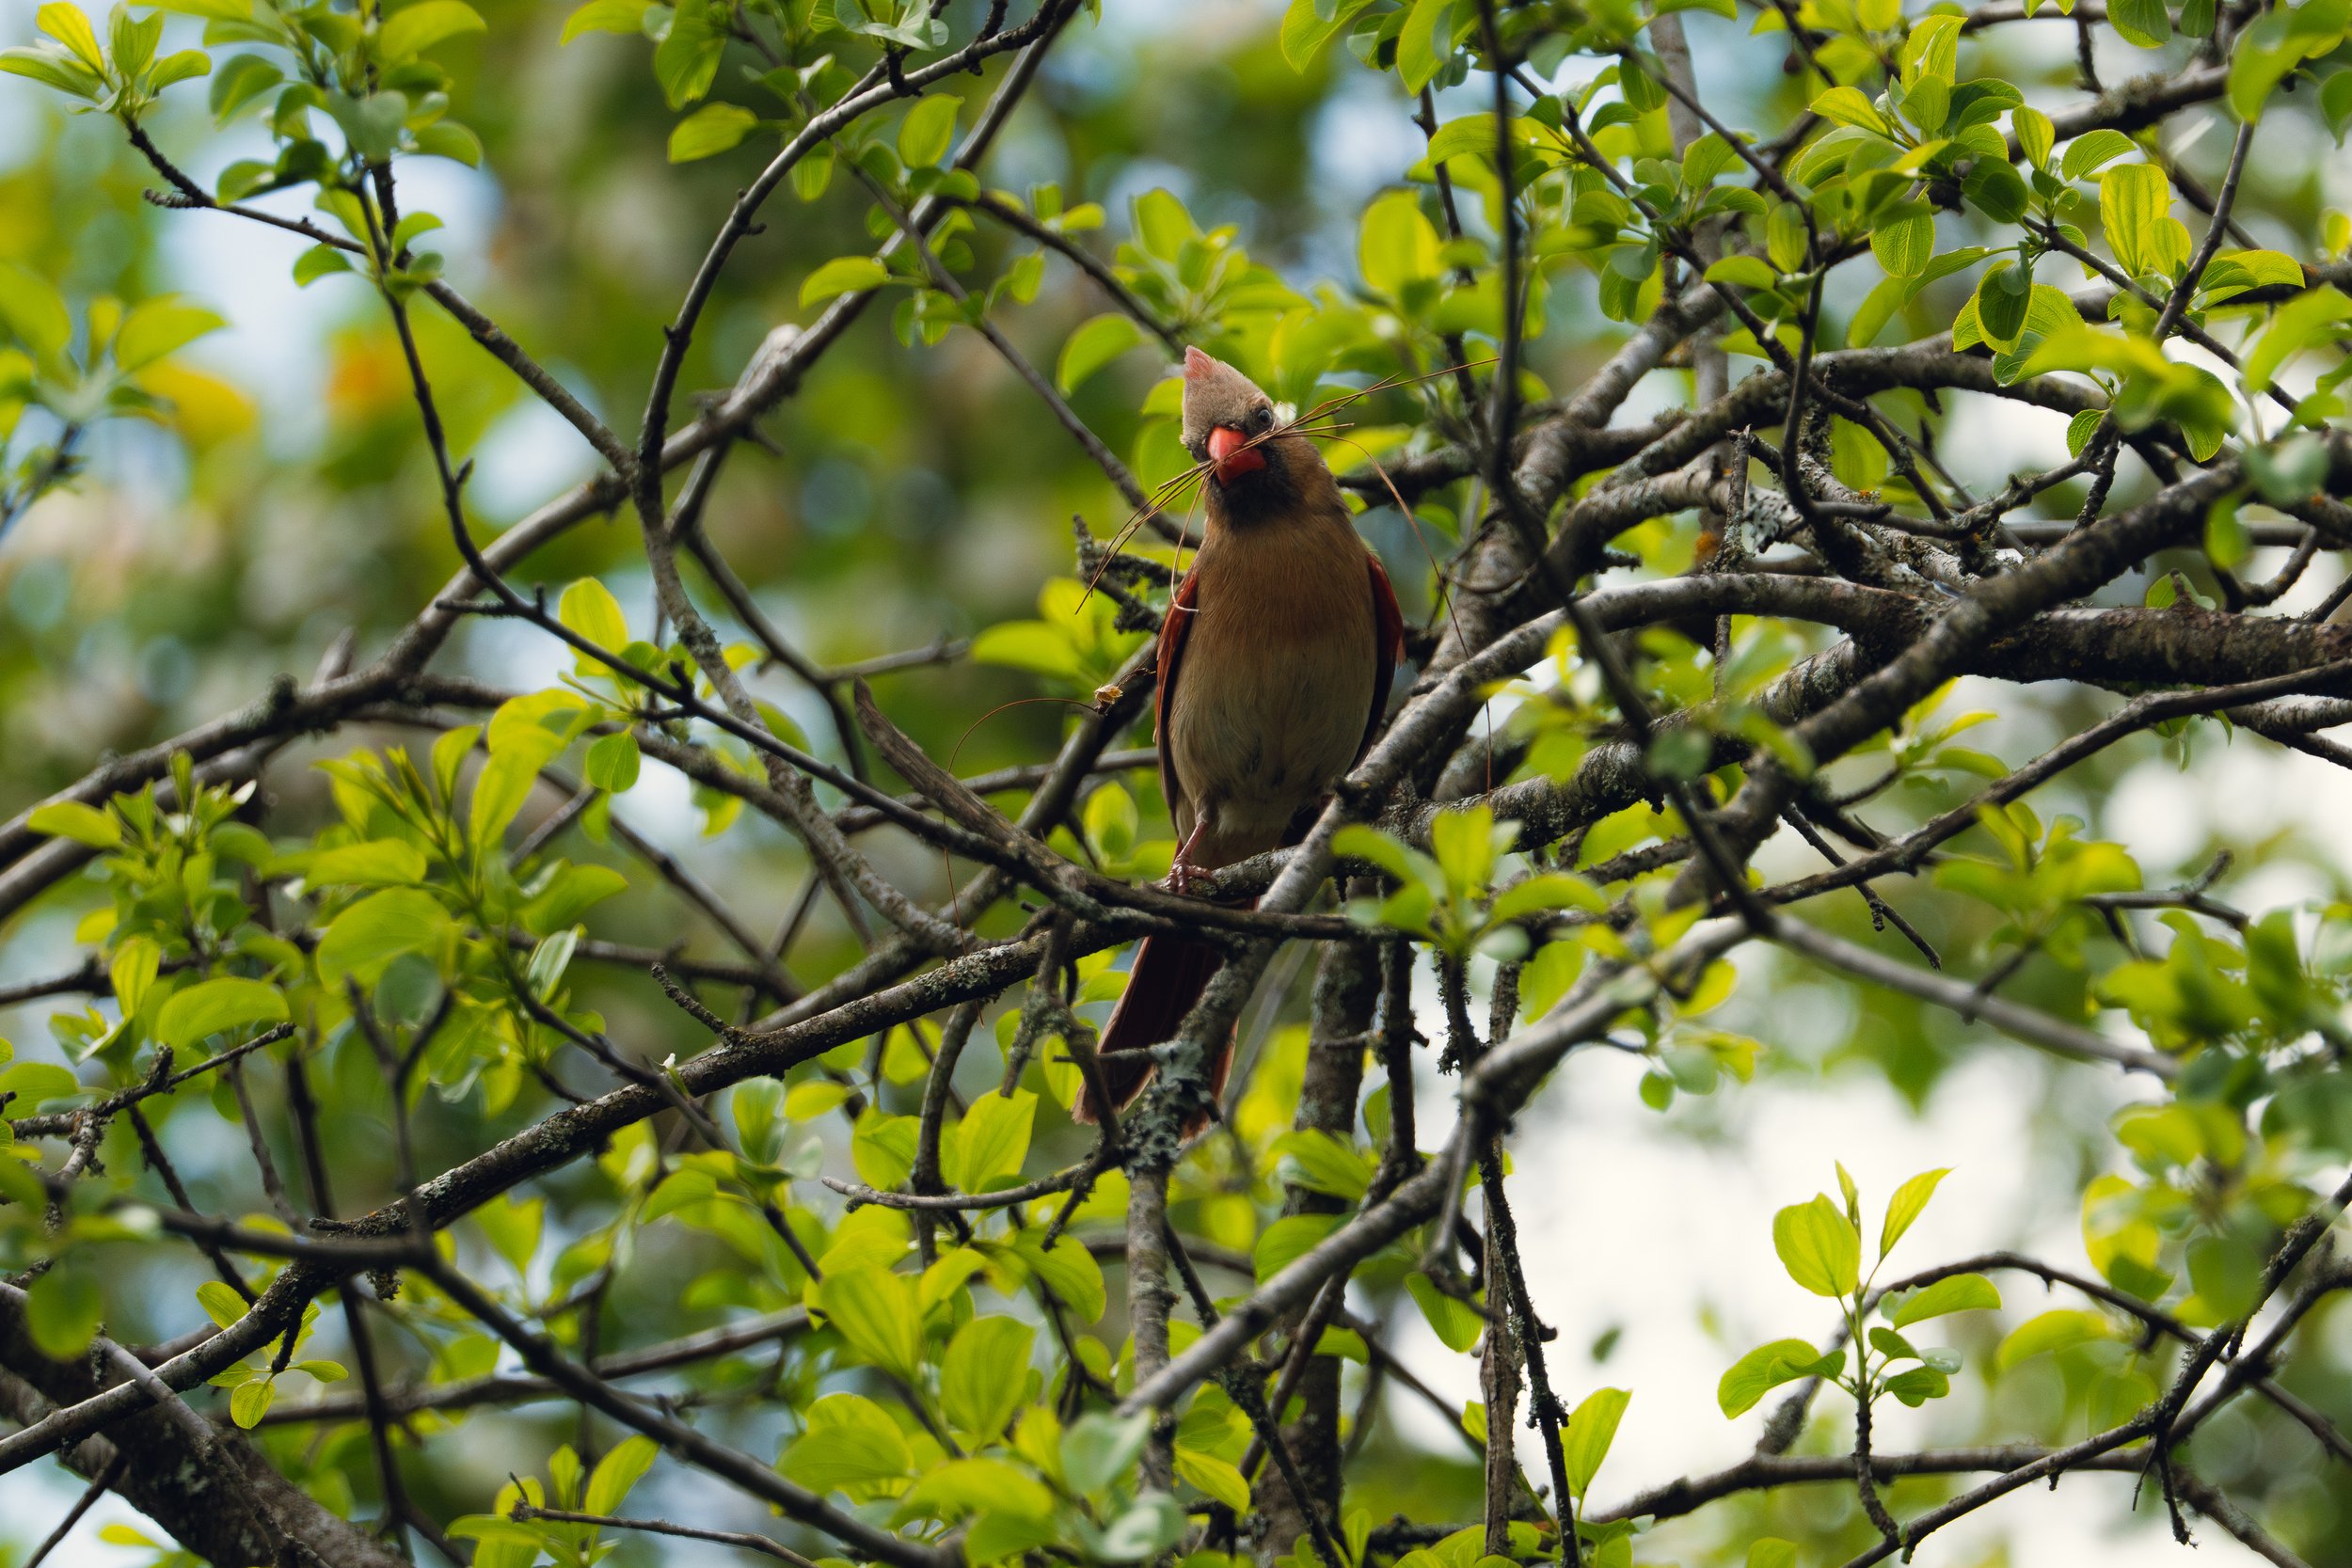
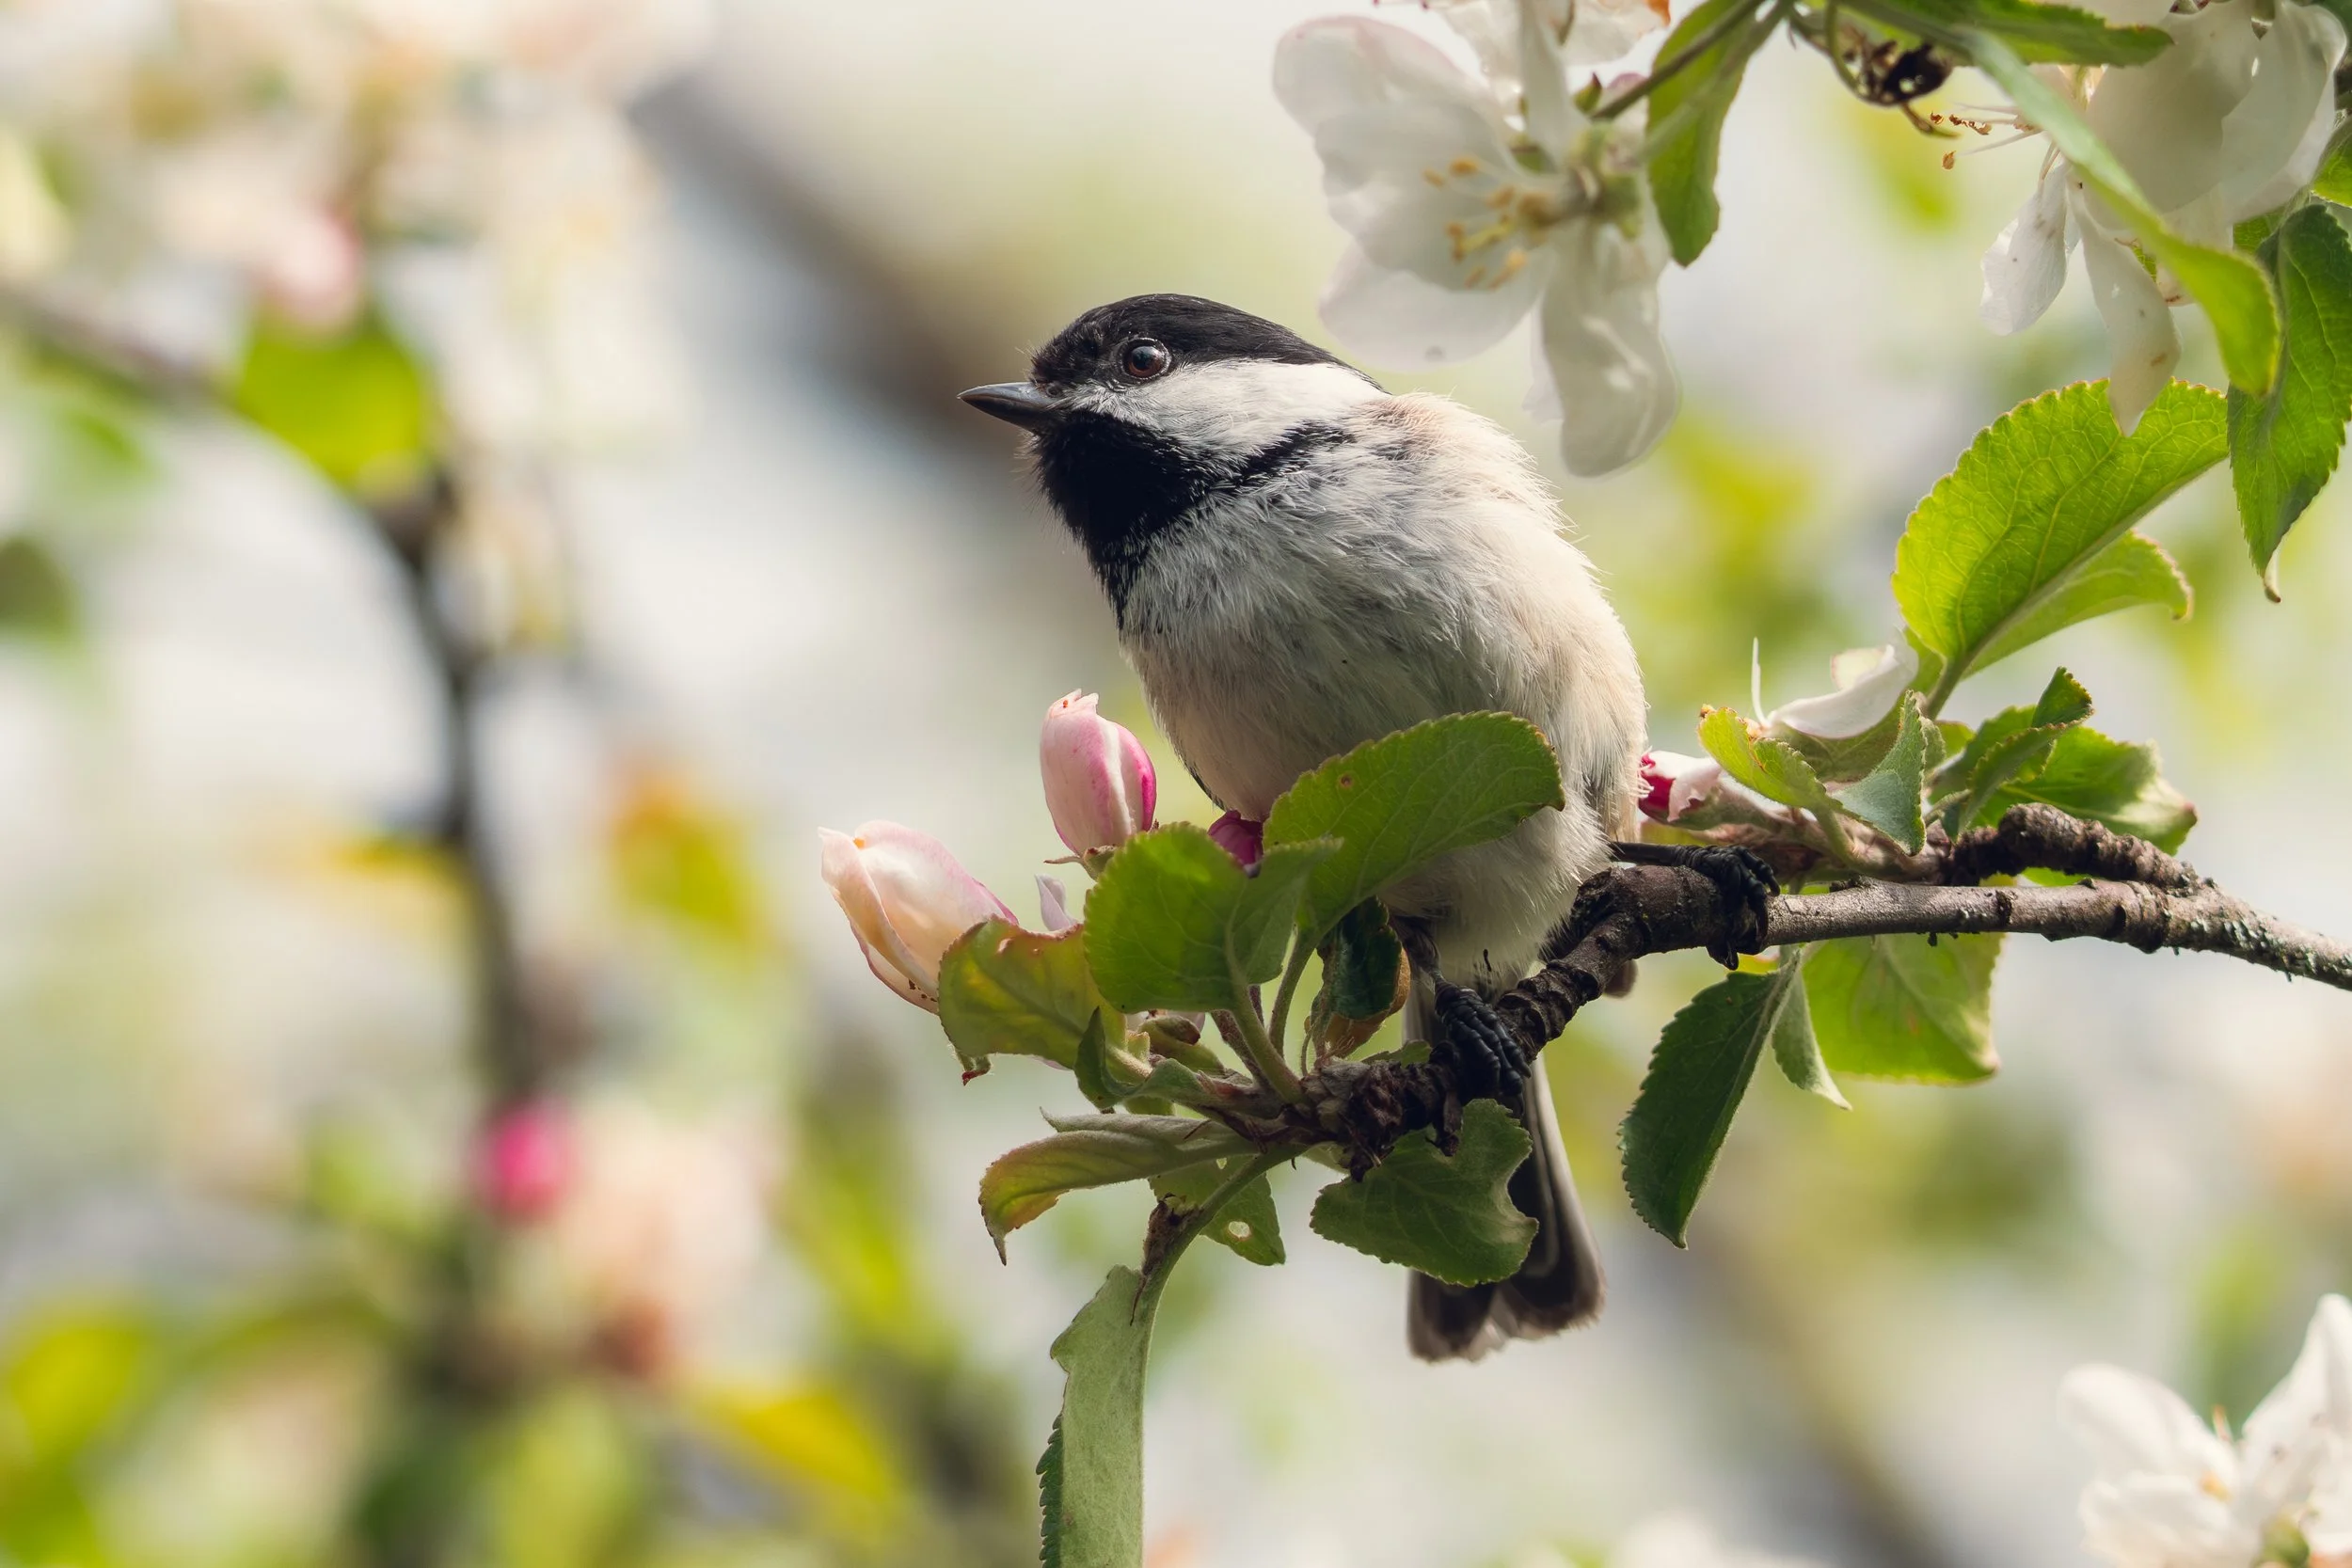
You can check out some of the photos from the adventure below, or head over to my YouTube channel to watch the full video!